The Ultimate Guide to Drying and Storing Your Sourdough Starter: Long-Term Preservation and Short-Term Care

For many passionate bakers, a sourdough starter is more than just an ingredient; it’s a living entity, a culinary companion that transforms simple flour and water into incredible bread. Naturally, one of the most common concerns and frequently asked questions about maintaining a sourdough starter revolves around its essential storage and general upkeep. Understanding proper storage techniques is crucial for its longevity, health, and for your peace of mind as a baker.
There are several compelling reasons why you might need to adjust your sourdough starter’s regular feeding schedule and opt for an alternative storage method. Perhaps you don’t bake sourdough bread regularly and find the daily feeding routine cumbersome. Maybe you’re planning to travel, go on vacation, or simply wish to take a well-deserved break from the routine. Additionally, you might want to preserve your cherished starter indefinitely or share it as a thoughtful gift with friends and family. These common scenarios all call for smart storage solutions that go beyond the everyday countertop routine.
While maintaining your sourdough starter at room temperature with consistent daily or twice-daily feedings is ideal if you’re baking frequently, life often requires flexibility. Today, we’ll delve into the most effective and popular methods for managing your starter when you need a pause. We’ll specifically cover my preferred long-term preservation technique, which involves drying your sourdough starter, and the practical short-term solution of refrigeration. These reliable methods offer excellent ways to keep your starter vibrant and ready for action whenever you are, ensuring your sourdough journey remains enjoyable and sustainable.
Important Note: Before attempting to dry or refrigerate your sourdough starter, it is absolutely essential that it is vigorous, lively, and strong enough for baking. A healthy, active starter will show clear signs of life, such as reliably doubling or tripling in size after feeding, possessing numerous bubbles throughout its structure, and emitting a pleasant, tangy, slightly yeasty aroma. If your mature starter has been resting in the refrigerator for a while and you plan to store it further, I strongly recommend bringing it back to room temperature and providing it with several regular feedings. This will ensure it’s at its peak strength and activity level before proceeding with any long-term storage methods outlined below, guaranteeing a successful preservation and revival process.
If you’ve already cultivated a robust sourdough starter but are encountering specific issues during its maintenance or baking process, don’t worry! Be sure to consult my comprehensive Sourdough Starter Troubleshooting Guide for common problems and solutions related to your starter’s health. Additionally, for challenges encountered during the bread-making itself, my Sourdough Bread Troubleshooting Guide offers invaluable guidance to help you achieve perfect loaves every time.
Compelling Reasons to Dry Your Sourdough Starter:
Once you’ve successfully cultivated an active and vigorous sourdough starter, I cannot emphasize enough the value of taking the time to dry and preserve a portion of it periodically. This simple act of foresight can save you weeks of effort and offers numerous unparalleled benefits. I personally always keep a jar of dried sourdough starter in my pantry, and here’s why you should consider doing the same:
- Reliable Emergency Backup: Establishing a strong, mature sourdough starter can be a labor of love, often taking weeks of consistent feeding and dedicated care. Having a dried backup provides an invaluable safety net against unforeseen mishaps that could jeopardize your active starter. Accidents happen – your main starter might get accidentally discarded, used up entirely in a large baking project without enough left to perpetuate it, or simply succumb to neglect during an unexpectedly busy week. With a dried reserve, you can revive your precious starter without the daunting task of starting from scratch, preserving its unique lineage and strength. This acts as an insurance policy for your treasured baking companion.
- Truly Long-Term, Indefinite Storage: Unlike refrigeration, which serves as a temporary pause, dried sourdough starter offers genuinely indefinite storage capabilities. When properly dried and kept in a cool, dark, and dry environment, it can remain viable for many years, even decades. This method is perfect if you wish to take an extended, worry-free break from sourdough baking – perhaps for a long trip, a major move, or simply a seasonal hiatus – without the burden of daily feedings or the risk of your starter weakening. When you’re ready to bake again, your original starter’s strength can be fully restored in just a few days, as detailed in our dedicated guide on how to revive dried sourdough starter.
- The Perfect and Convenient Gift for Friends and Family: Sharing the joy and magic of sourdough baking with others is incredibly rewarding, and a dried starter is by far the easiest and most practical way to introduce them to it. Gifting a liquid, active starter can be messy, requires immediate attention from the recipient, and often involves specific instructions for immediate feeding. Dried starter, however, is shelf-stable, easy to transport (even by mail), and can be stored by the recipient until they’re truly ready to embark on their sourdough journey. They can then easily revive it and begin baking delicious bread in less than a week, making it a thoughtful, low-pressure, and empowering present that keeps on giving.
Step-by-Step Guide: How to Dry Sourdough Starter Effectively
Drying your sourdough starter is a surprisingly straightforward process that requires minimal effort but yields significant, long-lasting rewards. Follow these simple steps carefully to create your own reliable, long-term backup:
Step One: Prepare and Evenly Spread Your Starter
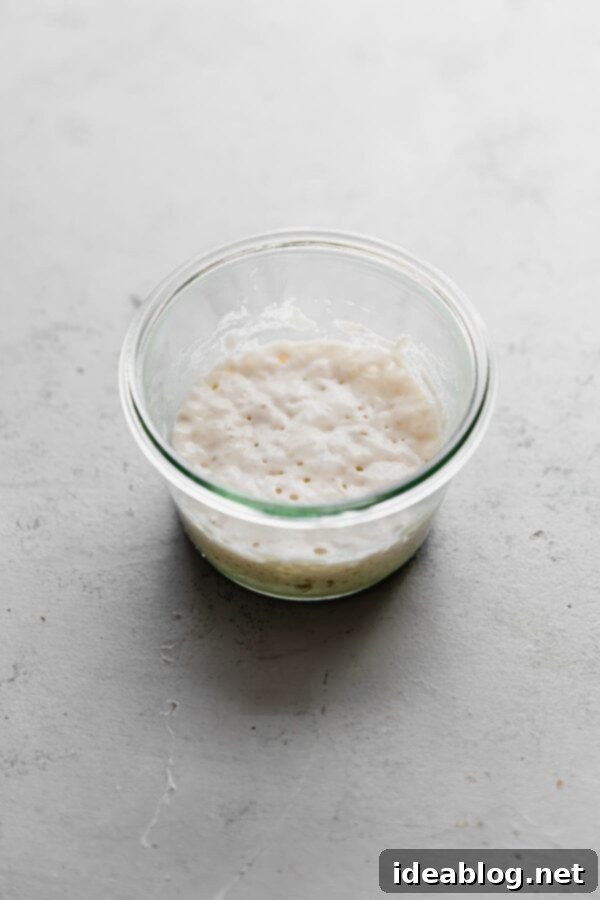
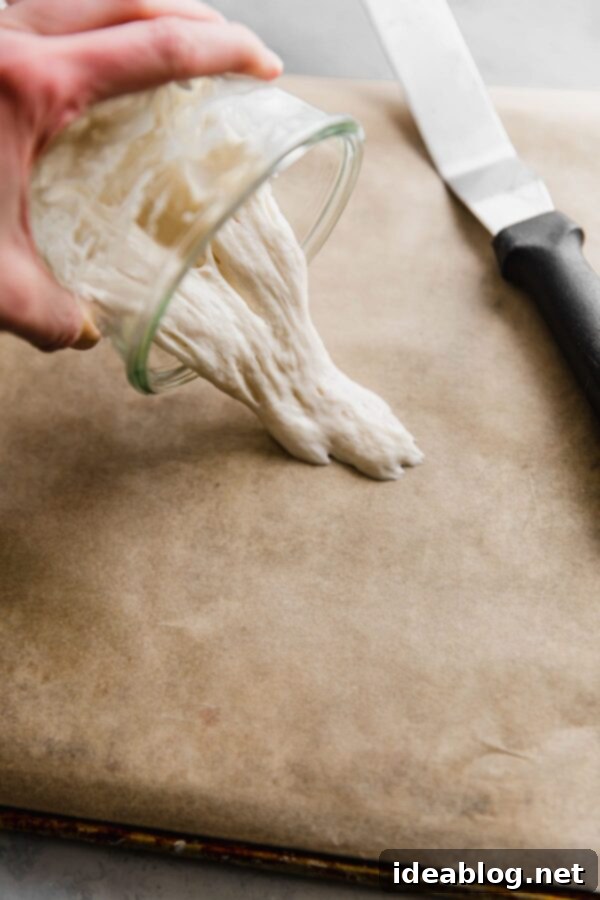
Begin by ensuring your sourdough starter is at its absolute peak activity and vigor. Perform a regular feeding using your usual flour and water ratio. Once it has become visibly lively and bubbly, typically having doubled or tripled in size and reached its maximum rise, it’s the ideal time to prepare it for drying. Carefully transfer a portion of this active starter onto a large sheet of parchment paper or a silicone baking mat. These non-stick surfaces are essential as they allow for easy and clean removal of the dried starter later. Unless you intend to take a complete long-term break from baking, remember to reserve a normal quantity of your active starter in its jar for your regular, ongoing maintenance routine. This ensures you still have an active starter for immediate use if desired.
Step Two: Create a Uniformly Thin Layer for Optimal Drying
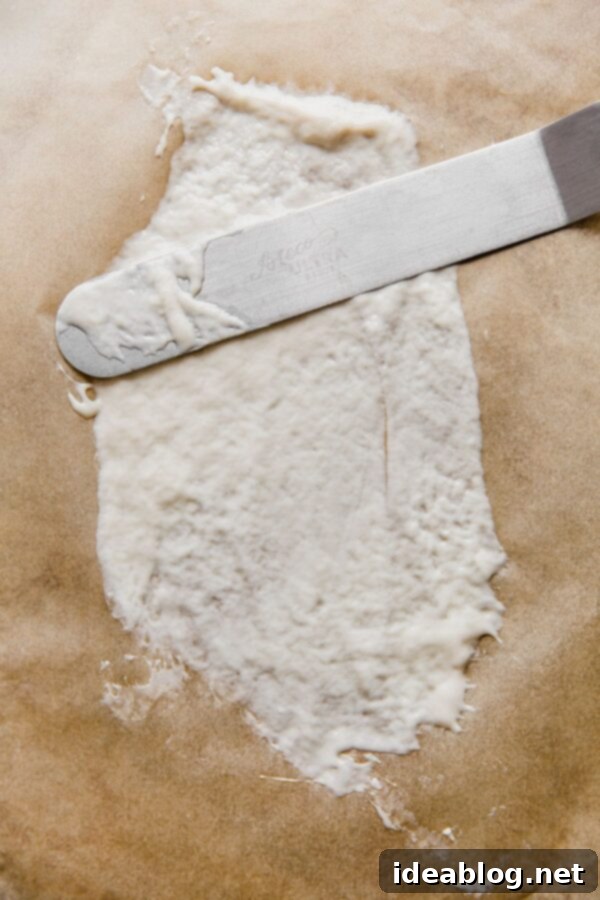
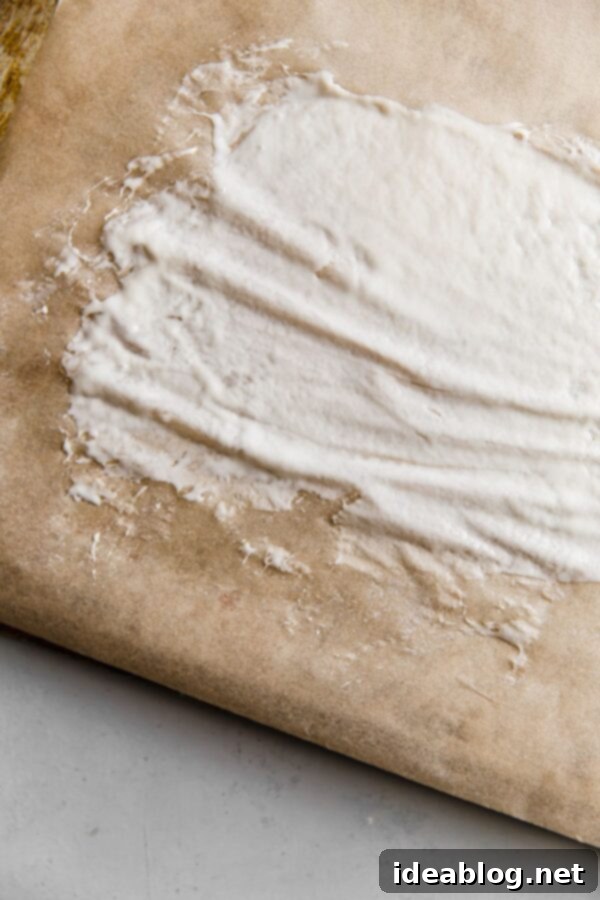
Using a large offset spatula or a bench scraper, gently and deliberately spread the sourdough starter into a very thin, even layer across the entire surface of the parchment paper or silicone mat. This is arguably the most critical step in the drying process: the thinner and more uniform the layer, the faster and more thoroughly the sourdough starter will dry out. A thin layer maximizes the surface area exposed to air, allowing moisture to evaporate efficiently and preventing pockets of dampness. Aim for a thickness similar to that of a thin crepe batter, or even thinner. Any thick spots will take significantly longer to dry and could potentially harbor residual moisture, which would compromise the long-term viability and storage success of your dried starter by encouraging mold growth.
Step Three: Allow for Complete Air Drying
Once spread, place the parchment paper or silicone mat with the thin layer of starter in an area with excellent air circulation, away from direct sunlight, and ideally in a relatively dust-free environment. Allow the sourdough starter to air dry at room temperature for a minimum of 24 to 48 hours. The total drying time can vary significantly depending on several factors, including the ambient humidity levels in your home and the precise thickness of your spread layer; it may take longer, especially in humid climates or if the layer isn’t perfectly thin. The ultimate goal is to remove every trace of moisture. When thoroughly dry, the starter should be completely brittle, easily snapping into pieces with an audible crunch, and have absolutely no tacky or moist spots whatsoever. This complete dryness is paramount as it halts microbial activity, preventing mold growth and ensuring truly indefinite storage. Some bakers opt to use a food dehydrator on its lowest temperature setting (typically below 100°F/38°C) to accelerate this process, but natural air drying is perfectly effective and foolproof.
Step Four: Proper Storage and Labeling of Your Dried Starter
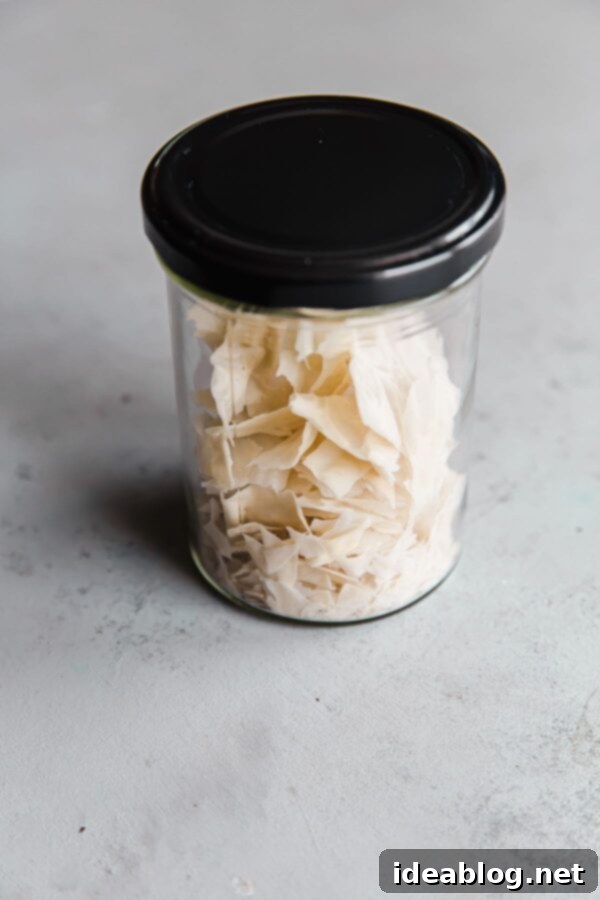
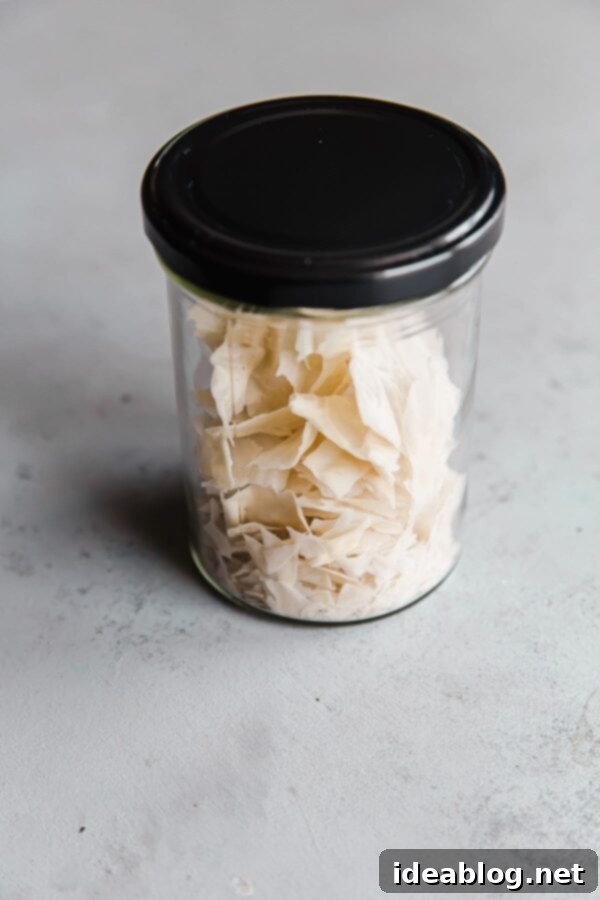
Once your sourdough starter is unmistakably dry and brittle, carefully break it into small shards or flakes. You can also crush it into a coarse powder if preferred, though larger shards are often easier to work with when you eventually decide to revive it. Transfer these dried pieces to a clean, completely airtight glass jar. It’s crucial to label the jar with the date it was dried, so you can keep track of its age, even though it stores for years without degradation. Secure the jar with a tight-fitting lid and store it in a cool, dark, and dry place, such as your pantry or a cupboard that isn’t exposed to temperature fluctuations. The key to preserving dried sourdough starter for years, potentially decades, is to protect it meticulously from heat, light, and any exposure to moisture, all of which could prematurely reactivate dormant microbes or lead to spoilage.
At this stage, your dried sourdough starter is perfectly prepared for use as a reliable emergency backup or to be shared! You can easily portion out some of the dried starter to gift to friends and family, providing them with a fantastic, hassle-free starting point for their own sourdough adventures. I always emphasize keeping even a small portion of dried starter in your pantry as an essential backup – you truly don’t need a large quantity to successfully revive it.
Short-Term Storage Options: Refrigerating Your Sourdough Starter
When drying isn’t necessary for indefinite preservation, but you still need a practical break from daily feedings – perhaps you’re going out of town for a week or two, or you simply bake less frequently than a daily schedule demands – the refrigerator is your best short-term storage solution for sourdough starters. The colder temperatures significantly slow down the metabolic activity of the wild yeast and beneficial bacteria within your starter. This natural deceleration extends the period your starter can comfortably go between feedings, making it an incredibly convenient and widely adopted option for temporary pauses in your active baking routine.
Helpful Tip: Optimizing Low Hydration Starters for Extended Refrigeration
It’s worth noting for those seeking maximum flexibility that starters with lower hydration levels (typically 80%-90% hydration, meaning 80 to 90 grams of water per 100 grams of flour) generally exhibit slower activity compared to high hydration starters (100% hydration or higher). This is because the wild yeast and cultures have reduced mobility and less free access to nutrients when less water is present in the mixture. This characteristic can be a helpful trick if you anticipate storing your starter in the refrigerator for more than a week or two without a feeding, as it will remain dormant and healthy for a slightly longer duration. While not strictly necessary for general refrigeration, adjusting hydration can offer added peace of mind and flexibility for longer stints.
While refrigeration is an excellent method for short breaks, I generally advise against continuous long-term storage in the refrigerator – meaning months on end without regular room temperature revival and feeding. Extended cold storage can gradually alter the delicate balance of wild yeast and lactic acid bacteria within your starter. This shift can sometimes lead to a less predictable starter, affecting its rising power, potentially yielding inconsistent results in your baking, or even changing the distinct flavor profile of your bread over time. Ultimately, it’s about finding a balance that works best for your personal baking schedule and the specific type of sourdough bread you aim to consistently bake!
How to Refrigerate Your Sourdough Starter Effectively:
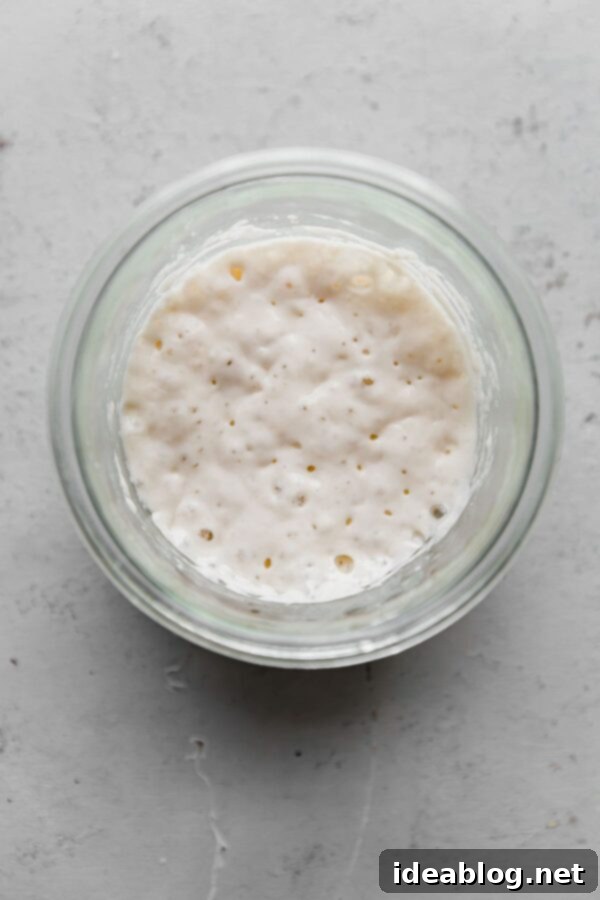
To prepare your sourdough starter for its cold slumber in the fridge, begin by discarding a portion (if needed, to manage quantity) and then giving it a fresh, regular feeding with your usual flour and water ratio. Allow this freshly fed mixture to sit at room temperature for approximately 1 hour. This brief period allows the starter to begin its fermentation cycle, ensuring it’s well-fed and active before the cold temperatures significantly slow everything down. After this initial hour, transfer your starter to a clean jar and cover it with a lid. A loosely covered lid is often preferred to allow for any residual gas exchange, though a tight-fitting lid also works perfectly well for shorter refrigeration periods.
Once you are ready to resume your regular feeding schedule or incorporate your starter into a baking recipe, carefully remove it from the refrigerator. Allow it to gradually return to room temperature, ideally within a comfortable range of 74°F-78°F (23°C-25°C), until it visibly becomes bubbly, active, and has reached its peak activity again. Observing its behavior is key here; look for the characteristic rise and fall, active bubbling, and a pleasant tangy aroma. It’s important to be patient during this “waking up” phase, as the cold will have significantly slowed its metabolic processes, and it needs time to fully re-energize.
Depending on how long your sourdough starter has been refrigerated – especially if it’s been several weeks or even longer – it may require an additional 2 to 3 regular feedings at room temperature before it fully resumes its normal, vigorous activity levels. These subsequent “rehabilitation” feedings help to re-invigorate the yeast and bacteria, ensuring it is robust and strong enough for baking complex recipes like artisan sourdough bread, which demands significant leavening power, or elastic doughs for sourdough pizza. Always perform a float test or observe consistent doubling after feeding to confirm its readiness and strength.
Even if you find yourself baking infrequently and primarily store your sourdough starter in the refrigerator, consistent maintenance is still paramount to its long-term health and strength. It is crucial to remove it from the fridge and give it fairly regular weekly or bi-weekly feedings (remembering to discard a portion before feeding to prevent excessive buildup) to keep its microbial balance thriving. Neglecting a refrigerated starter for too long can weaken it considerably, making revival more challenging and potentially altering its desired flavor profile and baking performance.
If you’re seeking additional resources and guidance to further enhance your sourdough baking journey, be sure to explore the following comprehensive guides and recipes:
- How to Revive Dry Sourdough Starter
- Sourdough Bread Baking Troubleshooting Guide
- Sourdough Starter Troubleshooting Guide
- Artisan Sourdough Bread Recipe + Step-By-Step YouTube Video
- Kalamata and Castelvetrano Sourdough Recipe
- Sourdough Pizza Dough
- Favorite Sourdough Bread Tools and Resources
- How to Store, Freeze, and Refresh Bread


