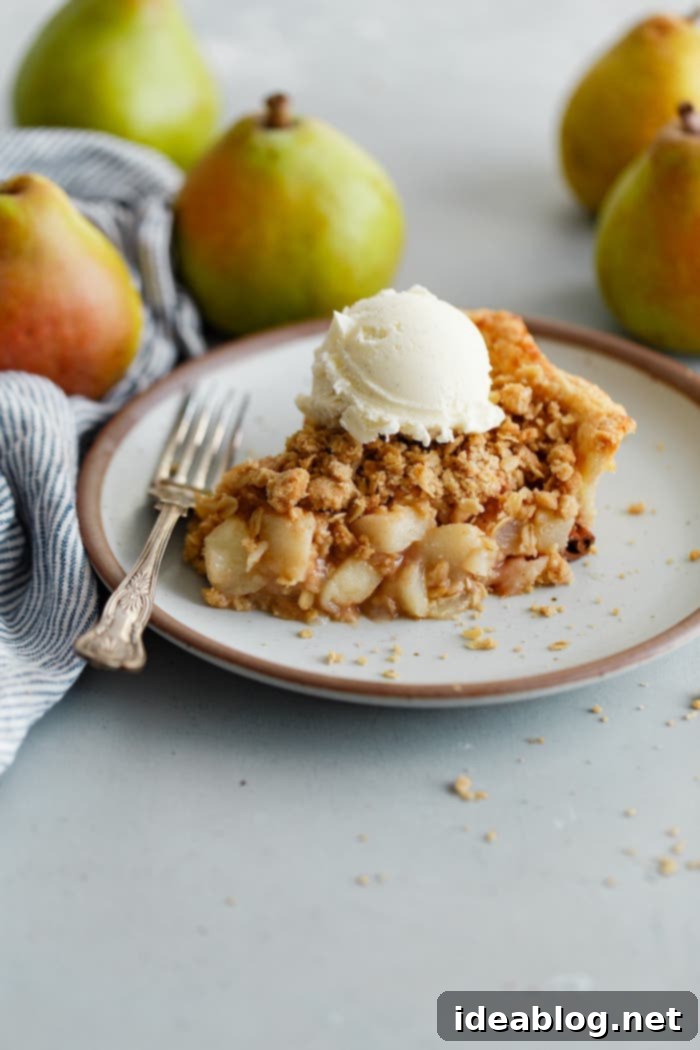
Delicious Spiced Pear Pie with Buttery Oat Streusel Topping: Your Ultimate Holiday Dessert
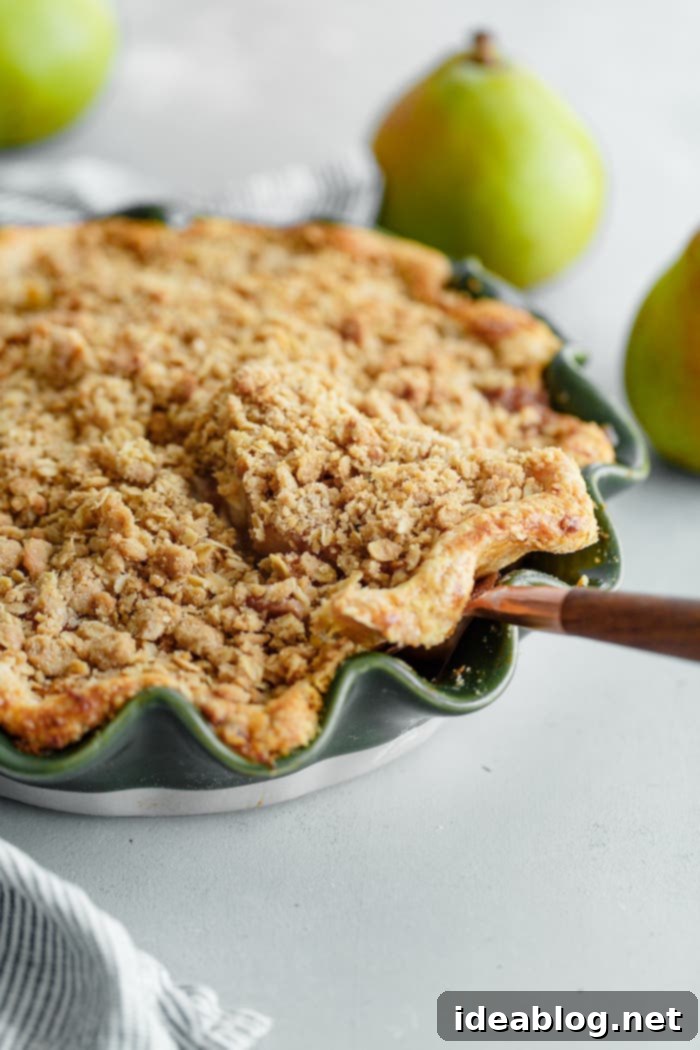
Elevate your holiday table this season with a truly spectacular dessert: a spiced pear pie crowned with a rich, buttery, and satisfyingly crumbly oat streusel topping! This recipe offers a delightful twist on traditional fruit pies, providing a perfect balance of a flaky crust, tender fruit filling, and a crunchy streusel that will leave everyone asking for more.
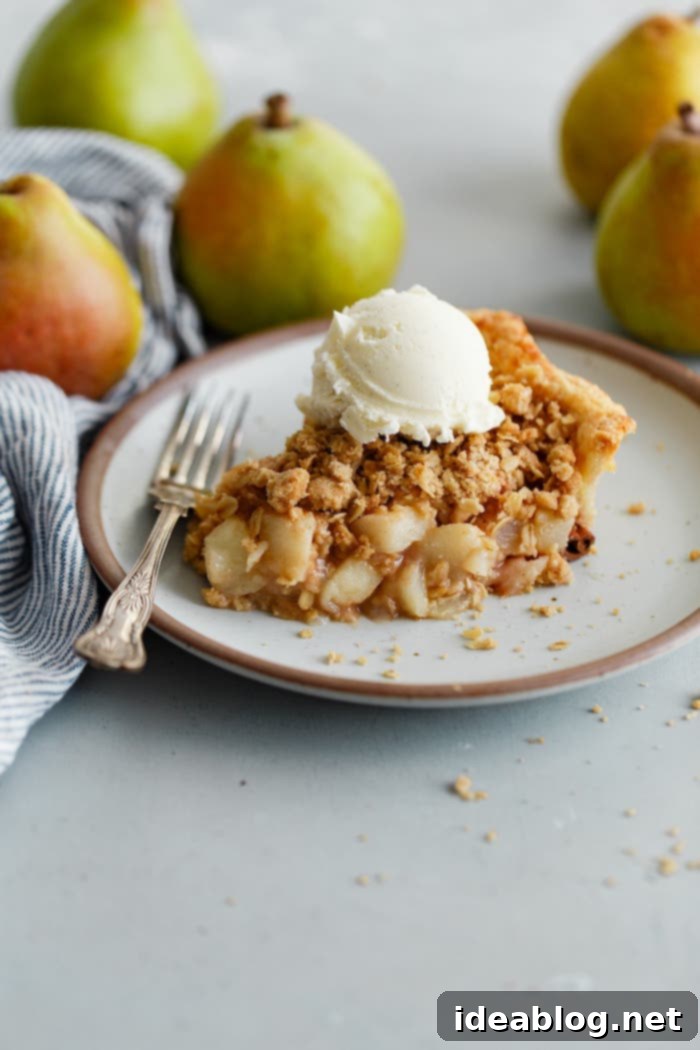
The holiday season simply isn’t complete without the comforting aroma of homemade pie wafting through your kitchen. If you’re yearning for a delightful departure from the usual apple or pumpkin pies and wish to introduce something fresh and exciting to your festive menu, then this exquisite Pear Pie with Streusel Topping is an absolute must-try! It’s a dessert that beautifully bridges the gap between a classic fruit pie and a crumbly crisp, offering the best of both worlds in every single bite.
What makes this pear pie truly exceptional is its harmonious blend of textures and flavors. Imagine sinking your fork into a perfectly baked, flaky pie crust base, followed by a generously portioned, juicy fruit filling brimming with tender, spiced pears. All of this goodness is then topped with a lightly spiced, buttery streusel topping, which adds an irresistible crunch and depth of flavor. It’s a pie that promises a memorable culinary experience, making it a stellar centerpiece for any gathering.
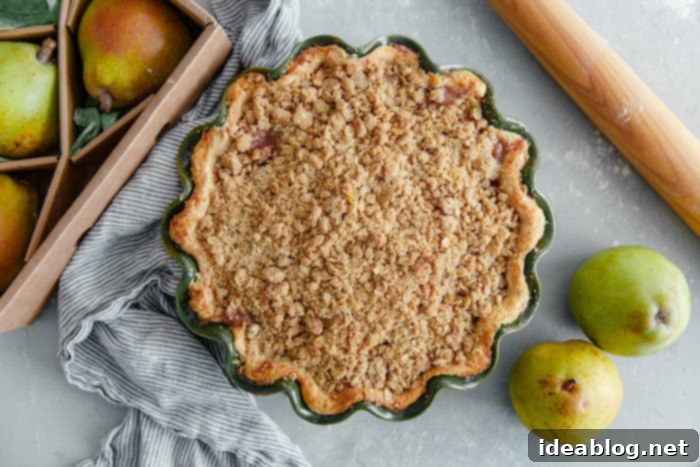
Here, we confess to being ardent admirers of pear desserts. While our tender Spiced Pear Cake and the elegant Pear Frangipane Tart have long held esteemed positions among our personal favorites, this magnificent pear pie has recently ascended to join that exclusive list. Its unique charm lies in its comforting familiarity, combined with a subtle sophistication that sets it apart. The combination of sweet, slightly tart pears with warming spices and a crumbly topping creates a truly comforting and sophisticated dessert that’s perfect for any occasion, from a casual family dinner to a grand holiday feast.
Selecting the Best Pears for Your Pie: A Guide
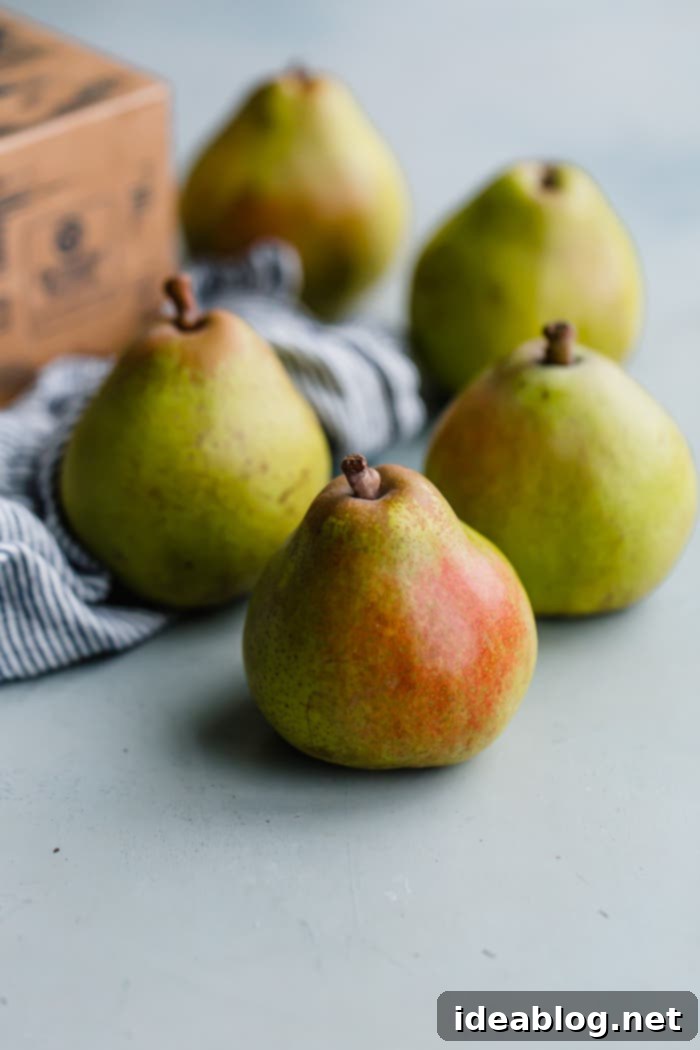
The foundation of an exceptional pear pie lies in selecting the right type and ripeness of fruit. For baking, you’ll want to gravitate towards pears that maintain their structure and offer a balanced sweetness and firmness. The best varieties for baking include: Anjou (both Red and Green varieties), Bartlett (Red or Green), Bosc, and certain premium varieties of Comice, such as Royal Rivieria®.
It is absolutely essential to use firm, yet just slightly ripened pears for your pie. This delicate balance is crucial for achieving the perfect texture in the finished product. If the pears are too ripe, they will unfortunately lose their shape completely during the baking process, transforming into a mushy, undesirable consistency. On the other hand, unripe or overly firm pears will remain hard and lack the depth of flavor expected in a delicious fruit pie once baked. Think of it as a culinary “Goldilocks-and-the-Three-Bears” situation – you need them to be just right!
To test for ideal ripeness, gently press on the neck of the pear near the stem. It should give just slightly under pressure. This indicates that the pear is ripe enough to be flavorful but firm enough to withstand the heat of the oven. Avoid pears that are soft all over, as these are past their prime for pie making.
Ingredient Shopping Tip for Pears:
To ensure you have pears at their optimal ripeness when you’re ready to bake, we highly recommend purchasing unripened pears a few days in advance. Allow them to ripen gently on your kitchen countertop, keeping a close eye on their progress daily. This proactive approach gives you full control over their firmness, ensuring they are perfectly suited for your pie.
An interesting fact about pears, unlike many other fruits, is that pears are specifically meant to ripen off the tree. They develop their best flavor and texture after being picked, making the countertop ripening method not just convenient, but actually ideal for quality.
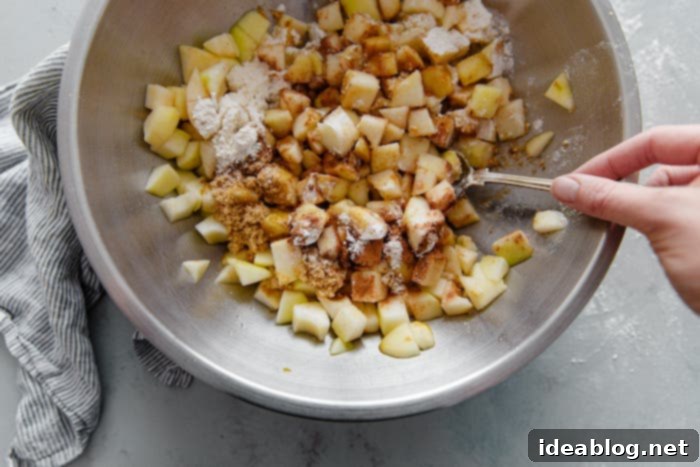
Essential Pear Pie Filling Ingredients: Crafting the Perfect Sweet and Spiced Center
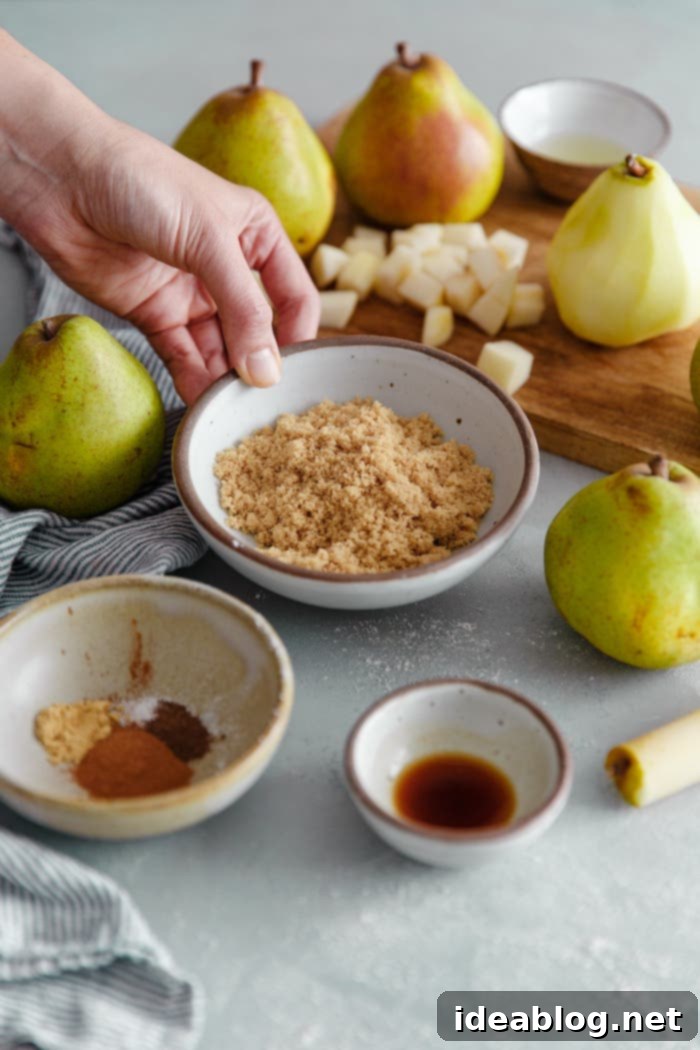
The heart of any fruit pie is its filling, and this pear pie filling is designed for maximum flavor and delightful texture. Each ingredient plays a vital role in creating a sweet, aromatic, and perfectly set interior:
- Peeled, Cored, and Chopped Pear: The stars of the show! Peeling the pears is highly recommended for the smoothest, most enjoyable texture in your pie. Chopping them into uniform pieces ensures even cooking and distribution of flavor.
- All-Purpose Flour: This acts as a crucial thickening agent for the filling. Similar to cornstarch or tapioca starch, it helps absorb excess moisture released by the pears during baking, preventing a runny, watery pie.
- Light Brown Sugar: Provides a deep, caramelly sweetness that complements the pears beautifully. The molasses content in brown sugar adds a richer, more complex flavor compared to granulated sugar alone.
- Fresh Lemon Juice: A touch of acid is indispensable in any fruit pie. Lemon juice not only brightens the flavors of the pears and spices but also helps balance the sweetness, preventing the pie from tasting cloyingly sweet. It also prevents the pears from oxidizing and turning brown.
- Warming Baking Spices: A carefully selected blend of ground cinnamon, ginger, and allspice creates the perfect trifecta of fall and winter flavors. These spices harmonize wonderfully with the natural sweetness of pears, enhancing their delicate taste without overpowering it.
- Pure Vanilla Extract: A splash of vanilla extract adds a layer of aromatic warmth and depth, rounding out the overall flavor profile of the filling.
The Irresistible Streusel Topping Ingredients: Adding a Golden Crunch
Much like a classic fruit crisp, the streusel topping for this pear pie is a simple yet incredibly effective combination of pantry staples, designed to deliver a golden, buttery, and slightly chewy crunch that contrasts beautifully with the soft pear filling. It’s a texture enthusiast’s dream!
- All-Purpose Flour: Forms the structural base of the streusel, binding the other ingredients together to create those delightful crumbs.
- Old-Fashioned Rolled Oats: These are key for adding a wonderful chewiness and rustic texture to the topping. They also contribute a subtle nutty flavor that pairs well with the fruit.
- Light Brown Sugar: Sweetens the streusel and helps it caramelize into a beautiful golden-brown color during baking. Its molasses notes echo the brown sugar in the filling, tying the flavors together.
- Warming Spices (Cinnamon, Ginger, and Allspice): To ensure a consistent and harmonious flavor throughout the pie, the same blend of comforting spices used in the filling is incorporated into the streusel. This creates a cohesive taste experience.
- Salt: A pinch of kosher salt is vital for balancing the sweetness and enhancing all the other flavors in the streusel, making them pop.
- Cubed Unsalted Butter: Cold, unsalted butter is cut into small cubes and then worked into the dry ingredients. This method is crucial for creating the perfect crumbly texture. As the butter melts during baking, it coats the flour and oats, resulting in that irresistible golden, crisp topping.
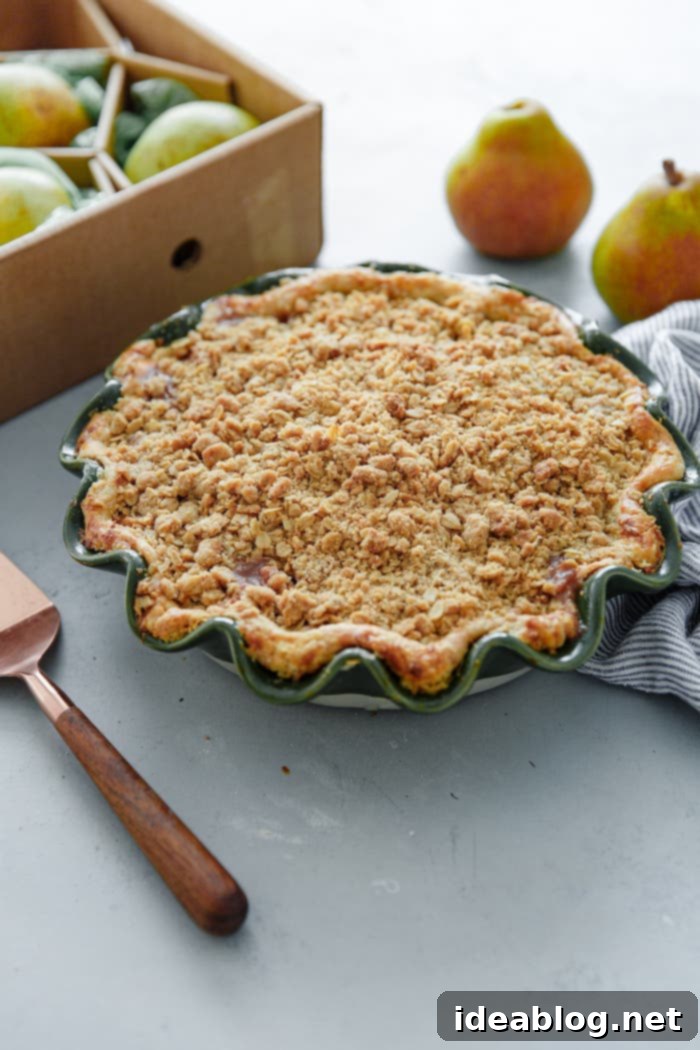
Smart Make-Ahead Tips for a Stress-Free Baking Experience
Baking a homemade pie, especially during the busy holiday season, can feel like a significant undertaking. However, with a little strategic planning and smart make-ahead techniques, you can significantly reduce stress and enjoy a more relaxed baking process. This pie, while labor-intensive, lends itself beautifully to partial preparation in advance. Here are our top make-ahead tips to ensure a seamless pie-baking experience!
- Single Pie Crust: A well-made pie dough is the foundation of a great pie. You can prepare your pie dough up to 48 hours in advance. Simply shape it into a 1-inch round disc, wrap it tightly in plastic wrap, and store it in the refrigerator. For longer storage, pie dough can be frozen for up to 3 months. Remember to allow frozen dough to thaw thoroughly in the refrigerator for at least 24 hours before you plan to use it. For ultimate convenience, you can even shape and fit the dough into your pie dish up to 24 hours ahead of time. Just be sure to cover the surface of the dough tightly with plastic wrap and refrigerate until you’re ready to fill and bake. This ensures the crust remains fresh and prevents it from drying out.
- Streusel Topping: The crumbly streusel topping can also be prepped well in advance, saving you valuable time on baking day. Prepare the streusel mixture according to the recipe instructions and store it in an airtight container or a heavy-duty Ziplock bag in the refrigerator for 3 to 4 days. When ready to use, simply sprinkle it directly from the refrigerator onto your pie. For even longer storage, the streusel can be frozen for up to 3 months. No need to thaw – just grab it from the freezer and use it!
- Bake Ahead: While there’s nothing quite like a freshly baked, warm-from-the-oven pie, you can certainly assemble and bake this pear pie the day before you plan to serve it, especially if you’re hosting. To reheat, tent the pie loosely with aluminum foil to prevent the streusel from browning further. Place it in a preheated 350°F (175°C) oven for 15 minutes. Then, remove the foil and continue heating for an additional 15 minutes, or until the filling is warmed through and bubbling slightly. This ensures a warm, comforting slice without the last-minute rush.
How to Serve Pear Pie for Optimal Enjoyment:
The anticipation of slicing into a freshly baked pie can be almost unbearable, but patience is a virtue when it comes to fruit pies! While you’ll undoubtedly be tempted to dig in as soon as it emerges from the oven, it is critically important to allow the pie to cool for at least 2 to 3 hours before serving. This crucial cooling period allows the fruit filling to properly set and firm up, preventing a messy, runny, and disappointing slice. Rushing this step will result in a soupy interior, no matter how perfectly the pie was baked.
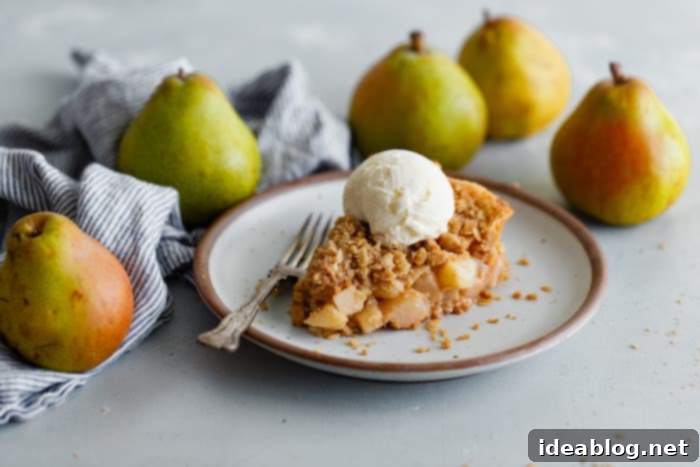
Once properly cooled, we love to serve this pear pie slightly warm. The gentle warmth enhances the spices and softens the pears beautifully. Pair it with a generous scoop of creamy vanilla ice cream, which slowly melts into the warm fruit, creating a heavenly contrast of temperatures and textures. Alternatively, a delicate drizzle of heavy cream or a dollop of lightly sweetened whipped cream adds a touch of richness and elegance. For a more decadent experience, a homemade custard or crème anglaise makes another exquisite accompaniment, truly elevating this humble pie into a gourmet dessert.
Achieving the Perfect Pie Crust: Tips and Tricks
A truly great fruit pie starts with an impeccable crust. Achieving that golden, flaky, and tender base can seem intimidating, but with a few key techniques, you can master it. The secret lies in keeping all your ingredients, especially the butter and water, as cold as possible. Cold butter creates pockets of steam during baking, which separate the layers of dough, resulting in that coveted flakiness. Avoid overworking the dough, as this develops gluten and can lead to a tough crust. Handle it gently and minimally. If your kitchen is warm, don’t hesitate to chill the dough intermittently during the rolling process. A ceramic pie dish also aids in achieving a beautifully browned bottom crust, thanks to its even heat distribution.
Troubleshooting Common Pear Pie Issues
Even experienced bakers can encounter minor challenges. Here are solutions to common pear pie problems:
- Soggy Bottom Crust: This is a common issue! To combat it, ensure your pie dish is preheated with a baking sheet in the oven. The direct heat helps cook the bottom crust quickly. Also, using a ceramic or glass pie dish can aid in better heat transfer than metal. Don’t skip the step of chilling your pie crust before adding the filling.
- Runny Filling: This usually means the thickener (flour in this case) didn’t fully do its job, or the pie wasn’t cooled long enough. Ensure you’re using the correct amount of flour and that your pears aren’t overly ripe. Most importantly, allow the pie to cool for at least 2-3 hours, or even longer, at room temperature. The filling continues to set as it cools.
- Burnt Streusel Topping: If your streusel is browning too quickly, you can gently tent the pie with aluminum foil during the last 15-20 minutes of baking. This protects the topping while allowing the filling to cook through.
- Pears Not Cooked Enough: If your pears are still too firm, it could be due to using unripe pears or not baking the pie long enough. Ensure your pears are *just* ripe as recommended. The bubbling of the filling is a good indicator, but you can also gently insert a thin skewer or knife into the center of the pie to test the tenderness of the pears.
Pear Pie with Streusel Topping
Pin
Review
SaveSaved!
For optimal texture and flavor, it is crucial to use firm, just barely ripe pears. Overly ripe pears will become mushy during baking, while unripe pears will remain hard. Refer to the detailed notes in the article above for guidance on selecting the best pear varieties.
Tips for Success: Be sure to factor in adequate chill time (minimum 1-2 hours) for homemade pie dough, or prepare it a day or two in advance. See the “Make-Ahead Tips” section for additional strategies and detailed instructions to simplify your baking process.
Equipment
-
Half Sheet Pan
-
Emile Henry Pie Dish
Ingredients
Single Crust Pie Dough:
- 1 ¼ cup (150 g) unbleached all-purpose flour plus more for dusting
- 1 teaspoon (4 g) granulated sugar
- ½ teaspoon kosher salt
- 4 ounces (1 stick; 115 g) cold unsalted butter cut into ¼-inch cubes
- 3-4 tablespoons (45-60 mL) cold ice water plus more if needed *see instructions
Streusel Topping:
- ¾ cup (90 g) unbleached all-purpose flour
- ¾ cup (75 g) old-fashioned rolled oats
- ¼ cup (55 g) light brown sugar
- ¼ teaspoon ground cinnamon
- ⅛ teaspoon ground ginger
- ⅛ teaspoon ground allspice
- ¼ teaspoon kosher salt
- 5 tablespoons (70 g) cold unsalted butter cut into small cubes
Pear Filling:
- 1 tablespoon (15 mL) freshly squeezed lemon juice
- 3 lbs (about 5-6 large) pears (*the pears should be firm and just barely ripe) such as Anjou, Bartlett, Comice, or Bosc
- ⅓ cup (75 g) packed light brown sugar
- ¼ cup (30 g) unbleached all-purpose flour
- 1 teaspoon pure vanilla extract
- 1 teaspoon ground cinnamon
- ¼ teaspoon ground ginger
- ⅛ teaspoon ground allspice
- ⅛ teaspoon kosher salt
Egg Wash (Optional):
- 1 large egg
- 1 teaspoon milk
Instructions
Prepare and Assemble Pie Dough:
-
Equipment: Before you begin, gather all necessary equipment. Set aside a rolling pin, a 9-inch (23-cm) pie plate (a ceramic one is highly recommended for even baking and a crisp bottom crust), a pastry brush, a bench scraper, kitchen scissors, and plastic wrap. Having these items within reach will streamline the pie dough preparation and assembly process.
-
In a medium bowl, combine the all-purpose flour, granulated sugar, and salt. Whisk these dry ingredients together thoroughly to ensure they are evenly combined. Next, add the cold unsalted butter pieces, cut into ¼-inch cubes. Gently toss the butter cubes with the flour mixture, ensuring each piece is lightly coated. Using your thumb and forefinger on both hands, work the butter cubes by pressing them into flat shingles or thick discs. It’s crucial to break up any excessively large pieces of butter with your fingers; they should be no bigger than the size of a half walnut. If butter pieces are too large, they can cause butter leakage during baking. If, at any point, the dough mixture feels greasy, transfer it to the refrigerator and chill for 15 minutes before continuing to work with it.
-
Add 3 tablespoons (45 mL) of very cold ice water to the flour and butter mixture. Toss and mix the ingredients together with your hands, ensuring the water is evenly incorporated throughout the mixture. If you notice any particularly dry bits of flour, add a tiny splash more water directly to those areas, as needed. *Note: While you will likely need to use the full 4 tablespoons (¼ cup; 60 mL) of water, the exact amount can vary based on the specific brand of flour you’re using and the humidity levels in your kitchen. The resulting dough will appear slightly shaggy, but it should be able to be pressed together with your hands. Transfer the shaggy dough to a clean kitchen countertop. Gently press the dough together, folding it over itself once or twice. This lamination technique helps to bring the dough together and creates layers, contributing to a flaky crust.
-
Carefully shape the dough into a round disc, approximately 1-inch thick. Wrap it tightly in plastic wrap to prevent drying. Refrigerate the dough for at least 1-2 hours (minimum) or, for optimal results and convenience, prepare it 1-2 days ahead. Make-Ahead Tip: Pie dough is also freezer-friendly and can be stored for up to 3 months. If using frozen dough, remember to thaw it overnight in the refrigerator before you intend to roll it out.
-
When you’re ready to bake, remove the chilled dough from the refrigerator and unwrap it. Place the disc on a lightly floured countertop. If the dough feels too firm or cold to roll, allow it to sit at room temperature for 5 to 10 minutes to soften slightly. Using a lightly floured rolling pin, roll the dough into a 14-inch (35-cm) diameter circle. Continuously rotate the dough and lift it occasionally to ensure it is not sticking to the countertop. Be gentle throughout this process and avoid stretching the dough, as this can cause it to shrink during baking. If the dough becomes too soft, sticky, or difficult to manage, simply transfer it back to the refrigerator and chill for another 10 to 15 minutes before resuming.
-
Carefully transfer the rolled dough into a 9-inch (22-cm) pie pan. Gently lift and nudge the dough into the edges and corners of the pan, making sure it settles without stretching. Using kitchen scissors, trim any excess overhang, leaving about ¾-inch to 1-inch of dough extending past the edge of the pan. Fold the edges under to create a neat border, then crimp as desired using your fingers or a fork for a decorative finish. Brush off any excess flour from the dough with a pastry brush. Cover the surface tightly with plastic wrap and chill the prepared crust in the refrigerator while you move on to prepare the streusel topping and pear filling. This chilling step helps the crust hold its shape during baking.
Preheat Oven and Prepare the Streusel Topping:
-
Place a half sheet pan in the center rack of your oven. Preheat the oven (and the sheet pan) to 400°F (204°C). This preheated sheet pan is crucial for achieving a perfectly crisp bottom crust by providing an initial blast of heat directly to the base of the pie. Note: If you own a baking stone or steel, position the half sheet pan on top of it for an even more intense and effective heat boost, further ensuring a beautifully cooked bottom crust.
-
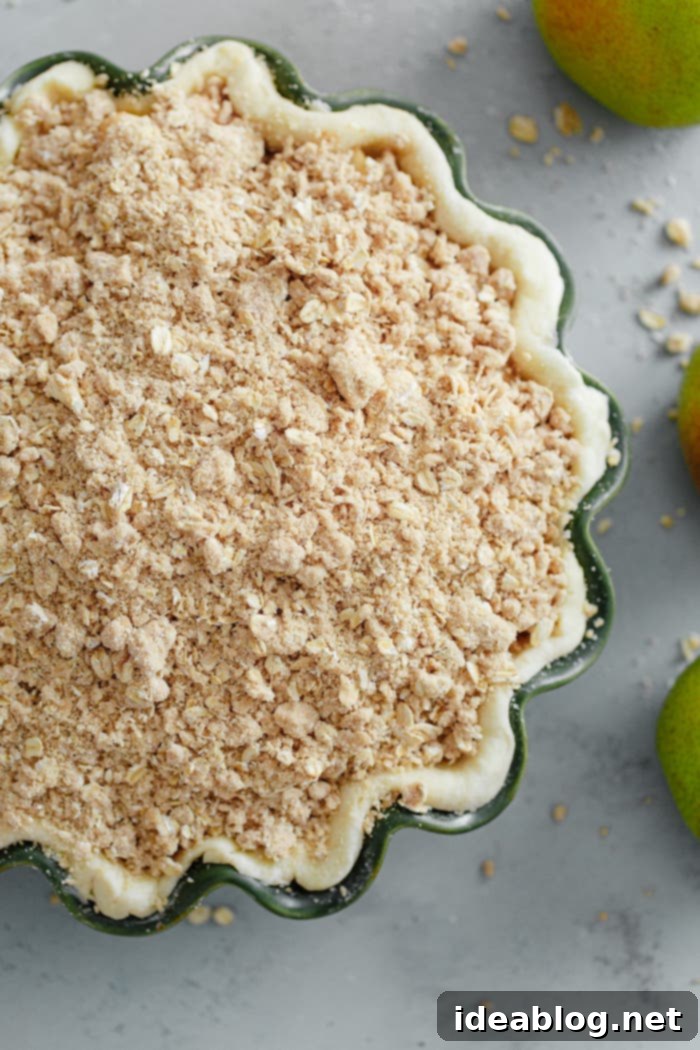
Make the Streusel Topping: In a medium mixing bowl, combine the ¾ cup (90g) unbleached all-purpose flour, ¾ cup (75g) old-fashioned rolled oats, ¼ cup (55g) light brown sugar, ¼ teaspoon ground cinnamon, ⅛ teaspoon ground ginger, ⅛ teaspoon ground allspice, and ¼ teaspoon Diamond Crystal kosher salt. Mix these dry ingredients thoroughly until well combined. Add 5 tablespoons (70g) cold unsalted butter, cut into small cubes, and toss gently to ensure the butter pieces are coated with the dry mixture.
-
Using your fingertips, work and press the cold butter into the dry ingredients. Continue this process until the butter is well dispersed throughout the mixture, and you have a good range of smaller and larger crumbs. Avoid overworking, as you want distinct crumbs, not a paste. Chill the prepared streusel topping in the refrigerator until you are ready to use it. This keeps the butter cold and ensures a perfectly crumbly texture when baked.
Prepare the Filling:
-
Pour the 1 tablespoon (15 mL) of fresh lemon juice into a large mixing bowl. Now, begin preparing your pears: peel them, cut each pear in half lengthwise, and then carefully core them (a small melon scooper works exceptionally well for cleanly removing the core). Chop the cored pears into roughly ½-inch chunks and immediately add them to the bowl with the lemon juice, tossing the pieces gently to ensure they are all lightly coated. The lemon juice is essential here as it prevents the pears from oxidizing and turning brown, preserving their fresh appearance. Note: For best results, we recommend peeling, coring, and chopping one pear at a time. Add each prepared pear to the lemon juice and toss before moving on to the next one, ensuring minimal air exposure.
-
Once all the pears are prepared, add the packed light brown sugar, unbleached all-purpose flour, pure vanilla extract, ground cinnamon, ground ginger, ground allspice, and kosher salt to the bowl with the chopped pears. Toss the entire mixture together gently but thoroughly to ensure all the ingredients are evenly incorporated and distributed among the pear chunks. This will create a uniformly flavored filling for your pie.
Assemble and Bake:
-
Prepare Egg Wash: In a small bowl, combine the large egg and 1 teaspoon of milk. Whisk these two ingredients together until the mixture is smooth and thoroughly combined. Set this egg wash aside, as it will be used to brush the edges of the pie crust for a golden finish.
-
Retrieve the shaped and chilled pie crust from the refrigerator. Gently transfer all the pear filling, including any accumulated juices, into the prepared pie shell. Spread the filling evenly into a thick, uniform layer across the bottom of the crust. Ensure the pears are nestled snugly without being overly packed.
-
Generously sprinkle the chilled streusel topping over the entire pear mixture. Don’t be shy; it should form a thick and substantial layer, completely covering the fruit. Lightly brush the crimped edges of the pie dough with the prepared egg wash mixture using your pastry brush. This will help the crust achieve a beautiful golden-brown color and a slightly crisp texture. Carefully transfer the pie dish onto the preheated half sheet pan already in the oven. The added heat from the sheet pan is essential for ensuring the bottom crust cooks through and browns properly, preventing a soggy bottom. It will also catch any potential bubbling juices that might overflow during baking, keeping your oven clean.
-
Bake the pie at 400°F (204°C) for an initial 30 minutes. After this time, reduce the oven temperature to 350°F (176°C) and continue baking for an additional 30 to 40 minutes. The pie is ready when the streusel topping is deeply golden brown, the crust is visibly cooked through, and the pear filling is bubbling gently around the edges and through any gaps in the streusel. If the streusel begins to brown too quickly, you can loosely tent the pie with aluminum foil.
-
Once baked, carefully remove the pie from the oven (still on its sheet pan) and place it on a wire rack. Allow the pie to cool for at least 2 to 3 hours before attempting to slice and serve. This cooling period is absolutely critical, as it allows the hot fruit filling to set and thicken properly. Skipping this step will result in a messy, runny filling that collapses when cut. Patience truly pays off for a perfect slice.
-
Serve the pear pie slightly warm for the best flavor experience. It’s truly delightful on its own, but for an extra treat, pair it with a scoop of vanilla ice cream, which melts into the warm fruit, or a luxurious drizzle of heavy cream. Homemade custard or a generous dollop of lightly sweetened whipped cream are also excellent choices, adding another layer of creamy indulgence.
-
Storage Tips: Any leftover pear pie can be covered tightly with plastic wrap and stored at room temperature for up to 2 days, making it convenient for continued enjoyment. For longer storage, refrigerate the covered pie for up to 4 to 5 days. Reheat individual slices gently in the microwave or oven for a warm, comforting treat.
Make-Ahead Tips:
- Single Pie Crust: Pie dough can be prepared, shaped into a 1-inch round disc, wrapped tightly in plastic wrap, and stored in the refrigerator for up to 48 hours before baking. Pie dough can also be frozen for up to 3 months. Allow frozen pie dough to thaw for 24 hours in the refrigerator before using. You can also shape and assemble the dough in your pie dish up to 24 hours in advance; be sure to cover the surface of the dough tightly with plastic wrap and refrigerate until ready to assemble.
- Streusel Topping: The streusel topping for this pear pie can be prepped ahead and stored in an airtight container (or Ziplock bag) in the refrigerator for 3 to 4 days. Use it straight from the refrigerator. It can also be frozen for up to 3 months. Use straight from the freezer.
- Bake Ahead: While I love freshly baked pie, you can assemble and bake the pie the day before serving. To reheat, tent with aluminum foil and place in a 350°F/175°C oven for 15 minutes. Remove the foil and heat for an additional 15 minutes or until heated through.
This Spiced Pear Pie with Streusel Topping is more than just a dessert; it’s a celebration of seasonal flavors and comforting textures, destined to become a new favorite in your recipe collection. Whether you’re baking for a holiday gathering or simply a cozy weekend treat, its fragrant aroma and delightful taste will enchant everyone at your table. Enjoy the process of creating this beautiful pie, and even more, the joy of sharing it with loved ones!
