Classic Rustic French Apple Tart: A Simple and Flavorful Homemade Dessert Recipe
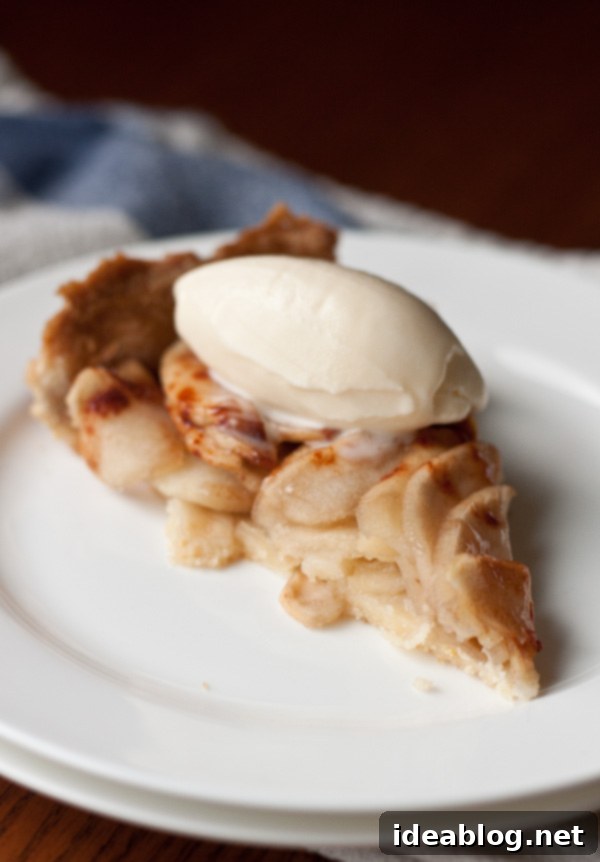
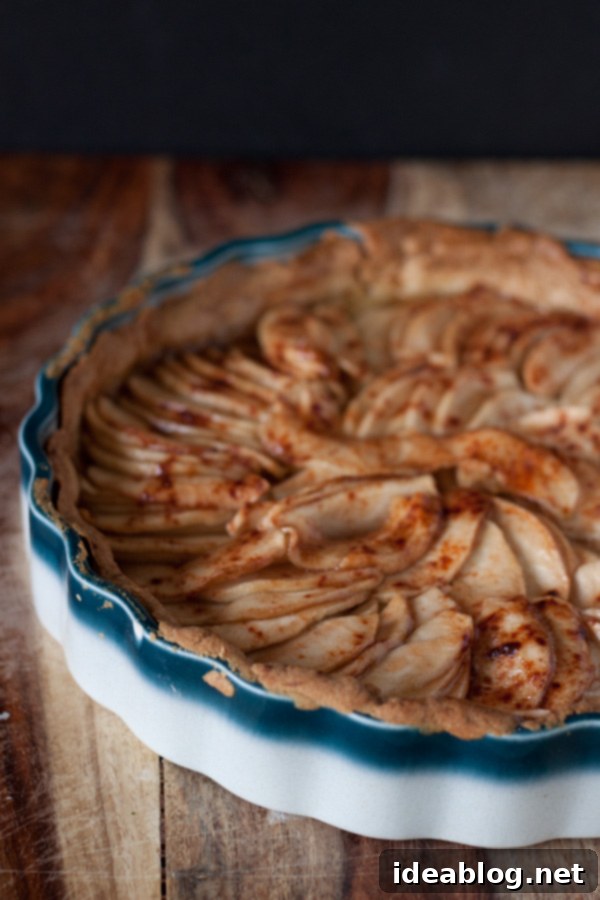
There’s an undeniable charm to a rustic dessert, and this Classic Rustic French Apple Tart embodies that perfectly. Simple to prepare yet bursting with rich, comforting flavors, it’s a dessert that speaks of tradition and warmth. Imagine a perfectly golden, buttery crust cradling tender, spiced apples, all served warm with a scoop of creamy vanilla ice cream. This tart isn’t just a recipe; it’s an experience, a delightful treat that brings people together.
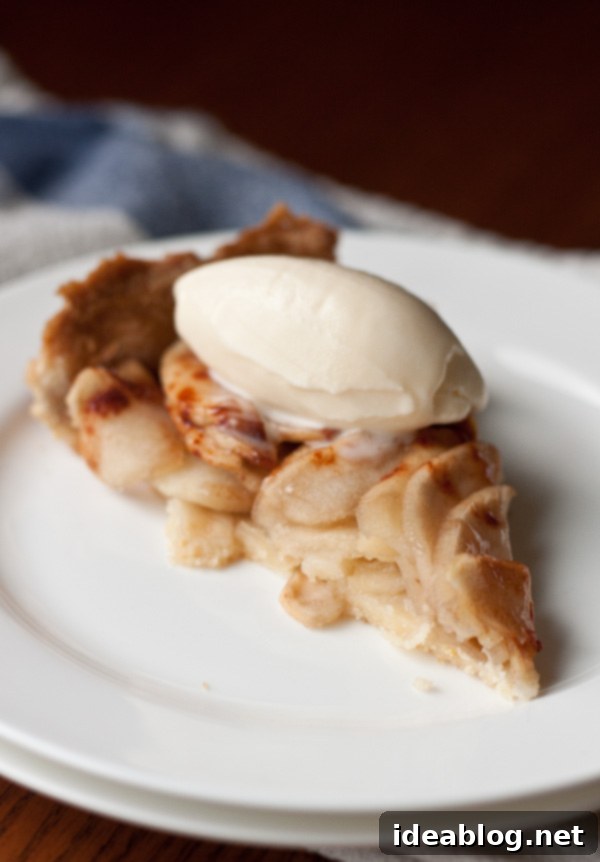
For me, a homemade French Apple Tart sits at the pinnacle of desserts. It’s inherently rustic, generously fruit-filled, and just the right amount of sweet. The beauty lies in its unpretentious appearance and the profound depth of its flavor. It’s the kind of dessert that makes you feel cozy and content, a true celebration of autumn’s bounty, though it can be enjoyed year-round.
The Art of Baking: Precision Meets Creativity
When it comes to the culinary world, baking and cooking often diverge in their fundamental approaches. Baking, especially pastry making, is frequently described as a scientific endeavor, demanding precision, exact measurements, and adherence to specific techniques. There’s a certain unforgiving nature to it; a slight misstep can significantly alter the outcome, turning a flaky crust into a tough one or a delicate cake into a dense brick. It’s a craft that rewards careful attention to detail and patience.
Cooking, by contrast, tends to be more lenient, allowing for a “wing-it” approach. It encourages improvisation, adjustments based on taste and texture, and a more intuitive connection with ingredients. While excellent cooking still requires skill, it often offers more room for creative liberties and less pressure for exact replication. You can add a pinch more spice here, a splash more liquid there, and still achieve a delicious result.
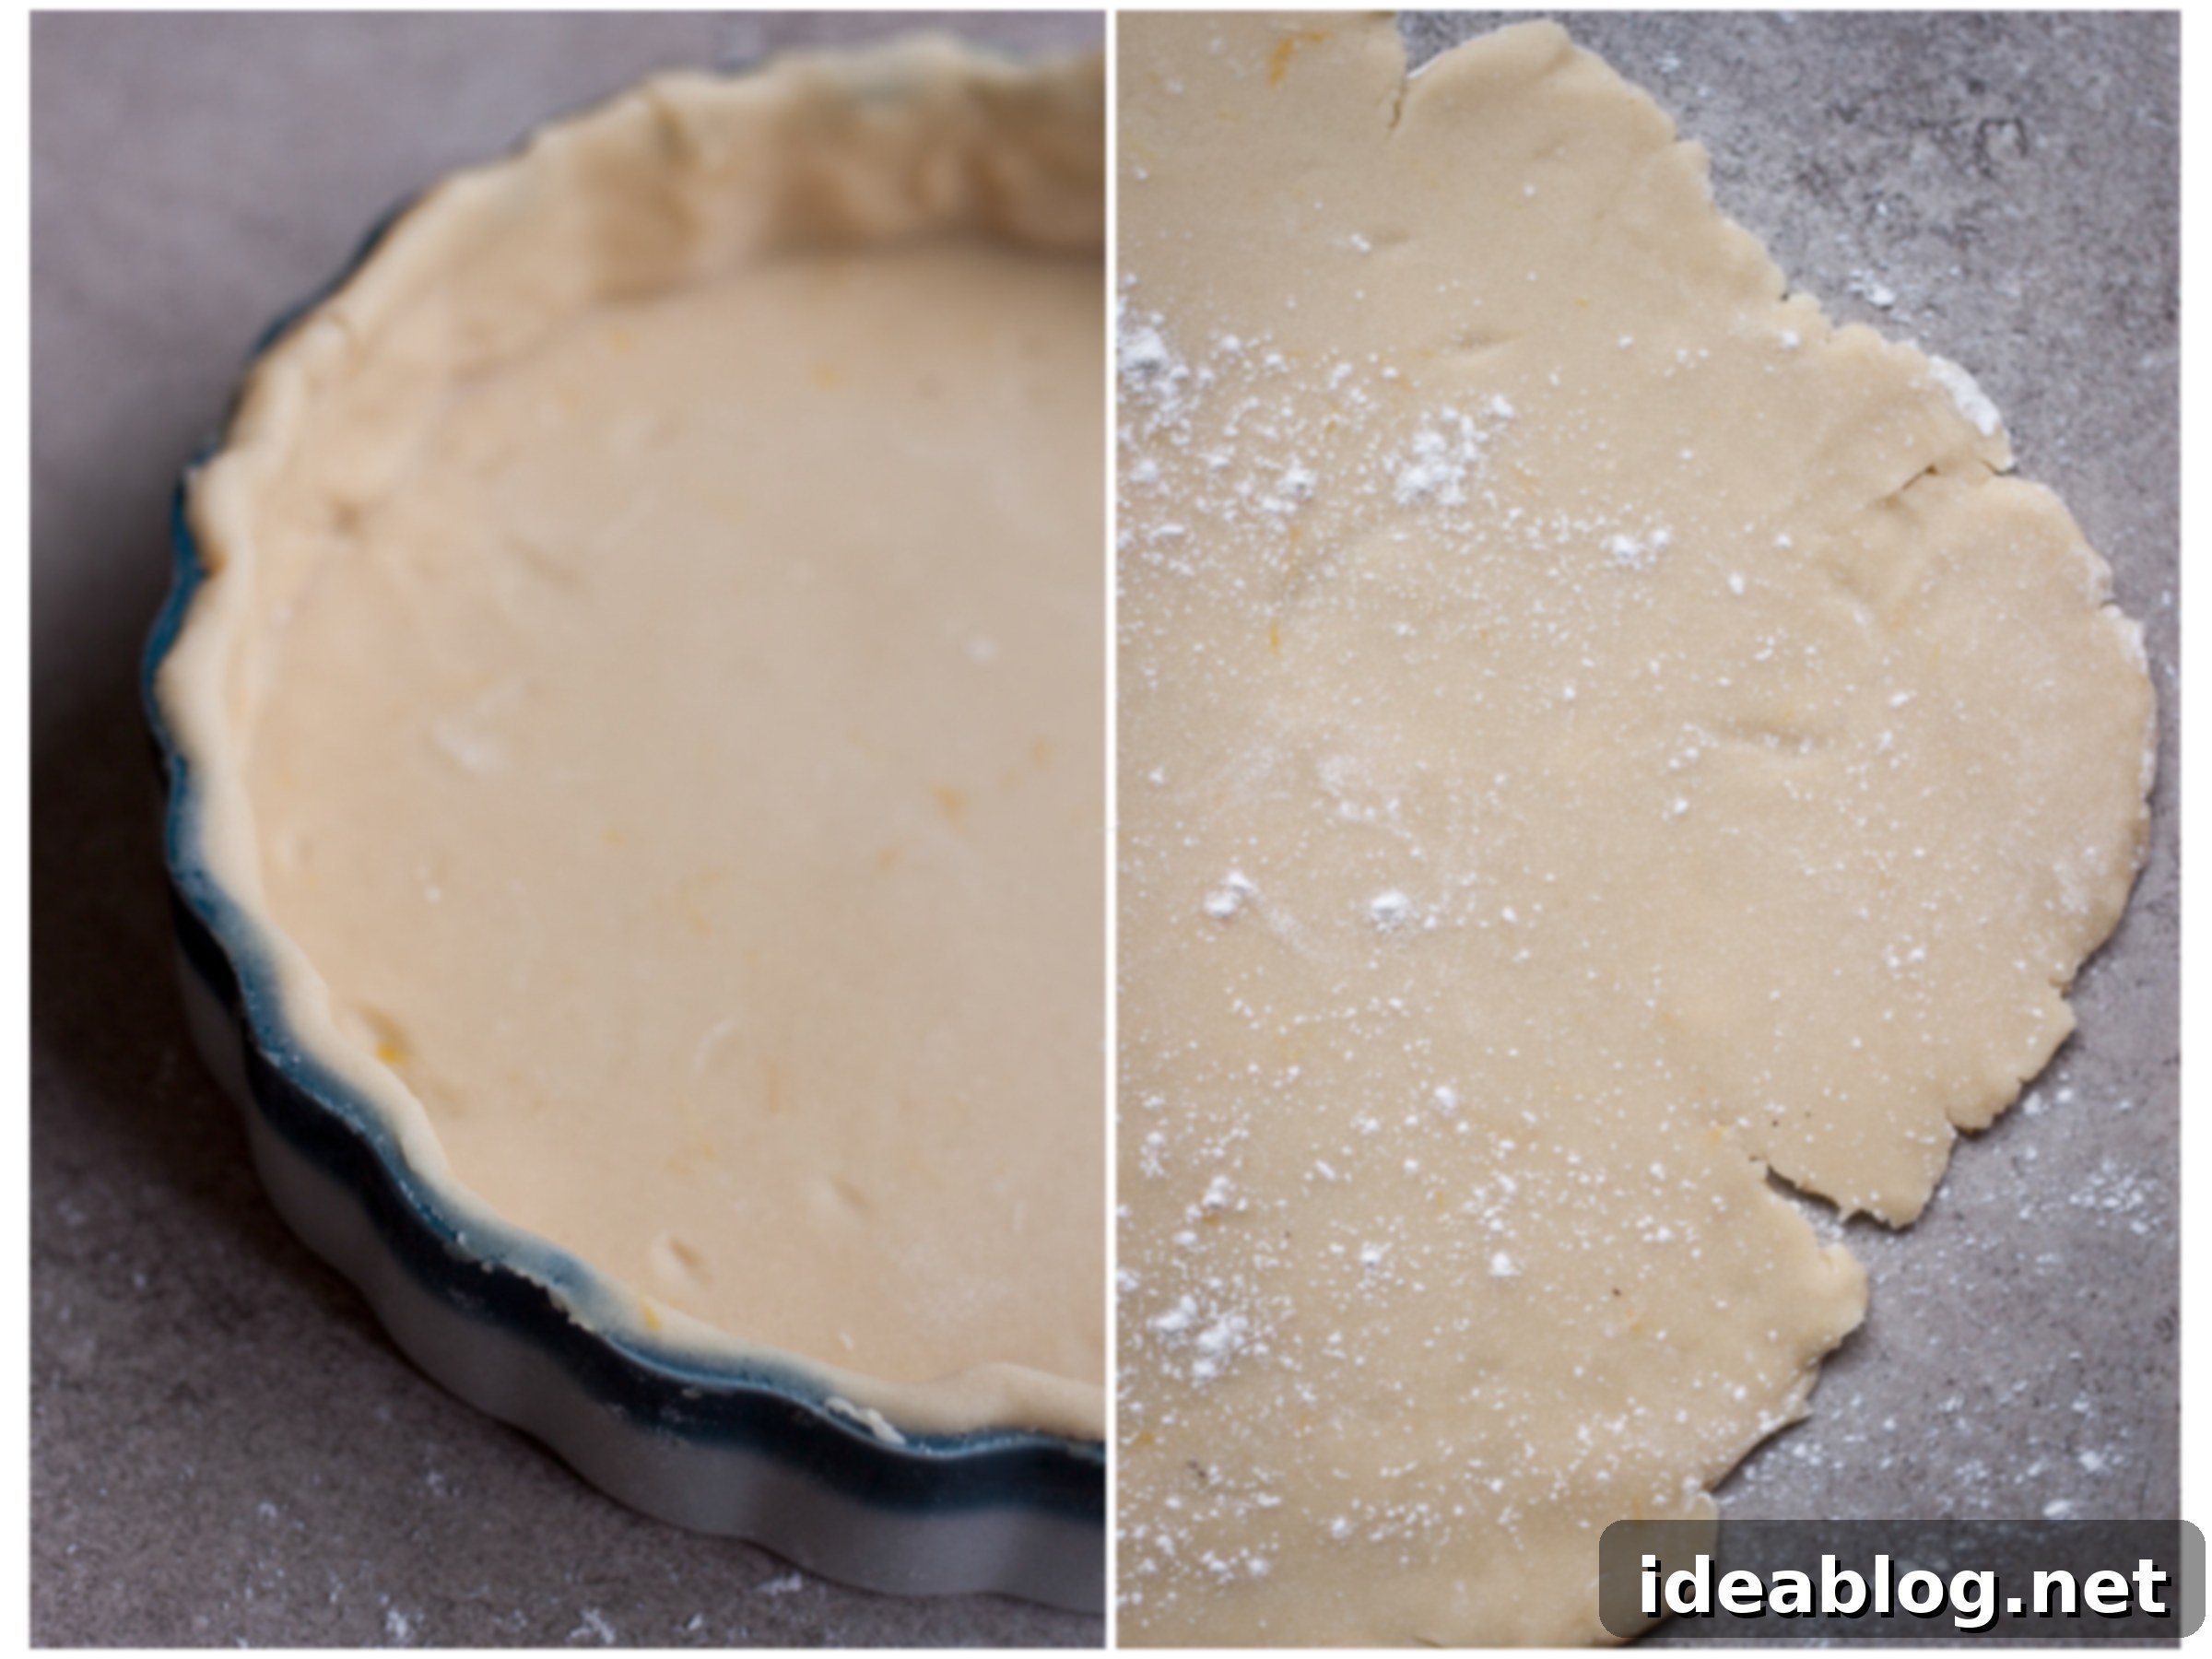
This Rustic French Apple Tart recipe beautifully bridges these two distinct culinary philosophies. The crust, a classic *pate sucree*, requires a degree of precision and specific technique to achieve its tender, buttery texture. It’s the foundation that holds everything together, a testament to the scientific side of baking. However, the apple filling offers immense freedom for adaptation, embodying the improvisational spirit of cooking. This dual nature makes the tart both satisfying to master and wonderfully versatile.
Why You’ll Love This Rustic French Apple Tart
Beyond its delicious taste, there are several compelling reasons why this particular apple tart stands out:
- **Simplicity & Flavor:** Despite its elegant appearance and rich flavor, the preparation is surprisingly straightforward, making it accessible even for novice bakers.
- **The Best of Both Worlds:** The recipe elegantly balances the methodical precision required for a perfect pastry crust with the creative freedom of the apple filling. This makes it an engaging project that yields consistently satisfying results.
- **Forgiving Crust:** The *pate sucree* crust used here is renowned for being much more forgiving than other pastry doughs. It’s less prone to tearing and easier to handle, which is a huge bonus for anyone new to tart making.
- **No Blind-Baking Required:** One of the most common hurdles in tart making is blind-baking the crust. This recipe smartly bypasses that step, simplifying the process without compromising the crispness of the bottom crust. The secret lies in baking it on a preheated pizza stone, which ensures an evenly cooked base.
- **Adaptable Filling:** Whether you prefer more tartness, extra sweetness, different spices, or even a mix of fruits, the apple filling is incredibly flexible. This allows you to customize it to your personal preference every time you bake it.
- **Perfect with Ice Cream:** There’s nothing quite like a warm slice of apple tart paired with a melting scoop of vanilla ice cream. It’s a match made in dessert heaven, creating a delightful contrast of temperatures and textures.
Mastering the Pate Sucree Crust
For those hesitant to delve into homemade tart making, this rustic French apple tart is your perfect starting point. The classic *pate sucree* crust (sweet shortcrust pastry) is not only simple to create but also incredibly forgiving. Unlike many finicky pastry doughs, it’s less likely to crack or become tough, making the rolling and shaping process much less stressful. And as mentioned, the best part? It doesn’t require blind-baking!
The secret to its perfectly cooked bottom, preventing the dreaded “soggy bottom” that plagues many tarts, lies in the baking method. By baking the tart for an extended period directly on a preheated pizza stone, the bottom crust cooks at the same speed as the sides and the filling. This ensures a beautifully crisp and golden base, providing the ideal foundation for the tender apple filling.
Choosing the Right Apples for Your Tart
The star of any apple tart is, of course, the apples. For this French-style tart, selecting the right variety is key to achieving that perfect balance of sweetness and tartness, and ensuring the apples hold their shape beautifully during baking. While the recipe suggests Pink Lady apples, which are fantastic for their crisp texture and balanced flavor, here are a few other varieties that work wonderfully:
- **Granny Smith:** Known for their distinct tartness and firm texture, Granny Smiths are excellent for baking as they maintain their shape well. If using these, you might want to increase the sugar slightly.
- **Honeycrisp:** A popular choice for its crispness, juicy texture, and sweet-tart flavor. They hold up beautifully in a tart.
- **Fuji:** Sweet and very crisp, Fuji apples are another great option.
- **Gala:** Mildly sweet and crisp, Galas are versatile and reliable for baking.
- **Braeburn:** Offers a good balance of sweet and tart, with a firm texture.
Often, a mix of two or three apple varieties can create a more complex and interesting flavor profile in your tart, combining different levels of sweetness and acidity.
Customizing Your Apple Filling: Make it Your Own!
One of the joys of this rustic apple tart is its incredible adaptability. The recipe provides a fantastic base, but don’t hesitate to personalize it to your taste. Here are some ideas for customization:
- **Adjust Sweetness:** If your apples are particularly tart (like Granny Smiths), feel free to sprinkle on a bit more granulated sugar before baking. Conversely, if you have very sweet apples, you might reduce the sugar slightly.
- **Spice It Up:** While cinnamon is a classic, consider adding other warm spices like a pinch of nutmeg, allspice, or even a tiny dash of ground cloves for a more complex flavor. A touch of cardamom can also be delightful.
- **Add Citrus Zing:** A little more lemon zest in the filling, beyond what’s in the crust, can brighten the flavors considerably.
- **Introduce Other Fruits:** While an apple tart is wonderful on its own, you could experiment with adding a handful of berries (raspberries or blackberries work well) for a pop of color and extra tang, or thin slices of pear alongside the apples.
- **Nutty Crunch:** For added texture, sprinkle some finely chopped walnuts, pecans, or almonds over the apple filling before baking.
- **Maple or Brown Sugar:** Substitute some of the granulated sugar in the filling with light brown sugar for a deeper, caramelly note, or drizzle a touch of maple syrup over the apples before baking.
The beauty of this rustic tart lies in its ability to adapt to your preferences and what you have on hand. Feel free to experiment and make it uniquely yours!
Rustic French Apple Tart
Pin Recipe
1 (9-Inch) Tart
45 minutes
1 hour 30 minutes
15 minutes
2 hours 30 minutes
This Rustic French Apple Tart is simple to prepare, but delivers big flavor. Serve this classic tart warm with vanilla ice cream! Leftover tart can be stored at room temperature, covered with plastic wrap, for 3 to 4 days.
Ingredients
Pate Sucree Crust (Yields Dough for Two 9-inch Tart Shells):
- 8 ounces (230g) unsalted butter, softened
- 4 ounces (115g) granulated sugar
- 1 teaspoon pure vanilla extract
- ½ teaspoon fresh lemon zest
- ¼ teaspoon kosher salt
- 1 large egg, lightly beaten
- 12 ounces (340g) unbleached all-purpose flour
Filling:
- 1 lemon, sliced in half
- 4-5 Pink Lady apples (or other baking apples)
- 2 tablespoons granulated sugar
- 1½ tablespoons cold unsalted butter, cut into very small pieces
- 1 teaspoon ground cinnamon
Glaze:
- ⅓-½ cup apricot jelly (or substitute another variety like peach or apple)
- ⅓-½ cup water
Instructions
- Make Tart Dough (Yields 2 9-inch Tart Shells): In the bowl of a stand mixer fitted with a paddle attachment, beat the softened butter and granulated sugar over medium-speed for about 1 minute until light and creamy.
- Add the vanilla extract, lemon zest, kosher salt, and the lightly beaten egg. Mix over low speed until thoroughly combined, making sure to scrape down the bowl with a spatula as needed to incorporate all ingredients.
- With the mixer still on low speed, add all the flour at once. Mix until the dough just begins to come together and forms large clumps. Be careful not to overmix, as this can develop the gluten and make the crust tough.
- Transfer the dough to a clean countertop. Using the traditional “fraisage” method, use the heel of your hand to gently press down and smear small portions of the dough onto the counter. This helps to fully incorporate the butter and create a smooth, homogenous dough without overworking it. Push the dough back together and repeat this process until it is smooth and all ingredients are well combined. The dough should have a slight sheen to it.
- Divide the dough equally in half (using a kitchen scale ensures consistent results for two tart shells). Pat each portion into a thin disc, approximately 1-inch thick, and wrap tightly in plastic wrap. Refrigerate for at least one hour, or ideally for several hours, to allow the butter to firm up and the gluten to relax. The additional portion of tart dough can be frozen for up to 3 months; thaw it in the refrigerator overnight before using.
- Assemble Tart: Preheat your oven to 350°F (175°C) and place a pizza stone inside to heat for at least 45 minutes. This crucial step ensures a crisp bottom crust.
- Remove one tart dough disc from the refrigerator and place it on a lightly floured countertop. Allow the dough to rest at room temperature for 5 to 10 minutes; this makes it easier to roll without cracking. Using a lightly floured rolling pin, start rolling the dough from the center outwards, turning the dough frequently to ensure it doesn’t stick. Roll it into a ¼-inch thick round disc, large enough to fit your 9-inch tart pan. If the dough cracks, gently press the pieces back together with your hands and continue rolling.
- Carefully lift the rolled dough with the rolling pin and lay it over a 9-inch (1-inch deep) tart pan. Gently guide the dough into the edges and corners of the tart pan, trying to avoid stretching the dough, which can cause it to shrink during baking. Press the dough firmly against the sides and bottom to shape the tart shell. Trim any dough overhang with a knife for a neat edge. Any dough scraps can be pressed together, wrapped, frozen, and reused for small cookies or decorative elements.
- Cover the tart shell tightly with plastic wrap and refrigerate it while you prepare the apple filling. This helps the crust maintain its shape.
- Prepare Apple Filling: Work with one apple at a time to prevent excessive browning. Peel an apple, then immediately rub the exposed surfaces with the cut halves of a lemon to reduce oxidation. Slice the apple in half, remove the core, and then slice the apple very thinly (about ⅛-inch thick). Place the apple slices into a large mixing bowl, squeezing and tossing with a touch of fresh lemon juice as you work. Repeat with the remaining apples. Roughly chop any apple trimmings and set them aside separately.
- Remove the prepared tart shell from the fridge. Spread the reserved chopped apple trimmings evenly onto the bottom of the tart shell. This forms a protective layer and adds more apple flavor.
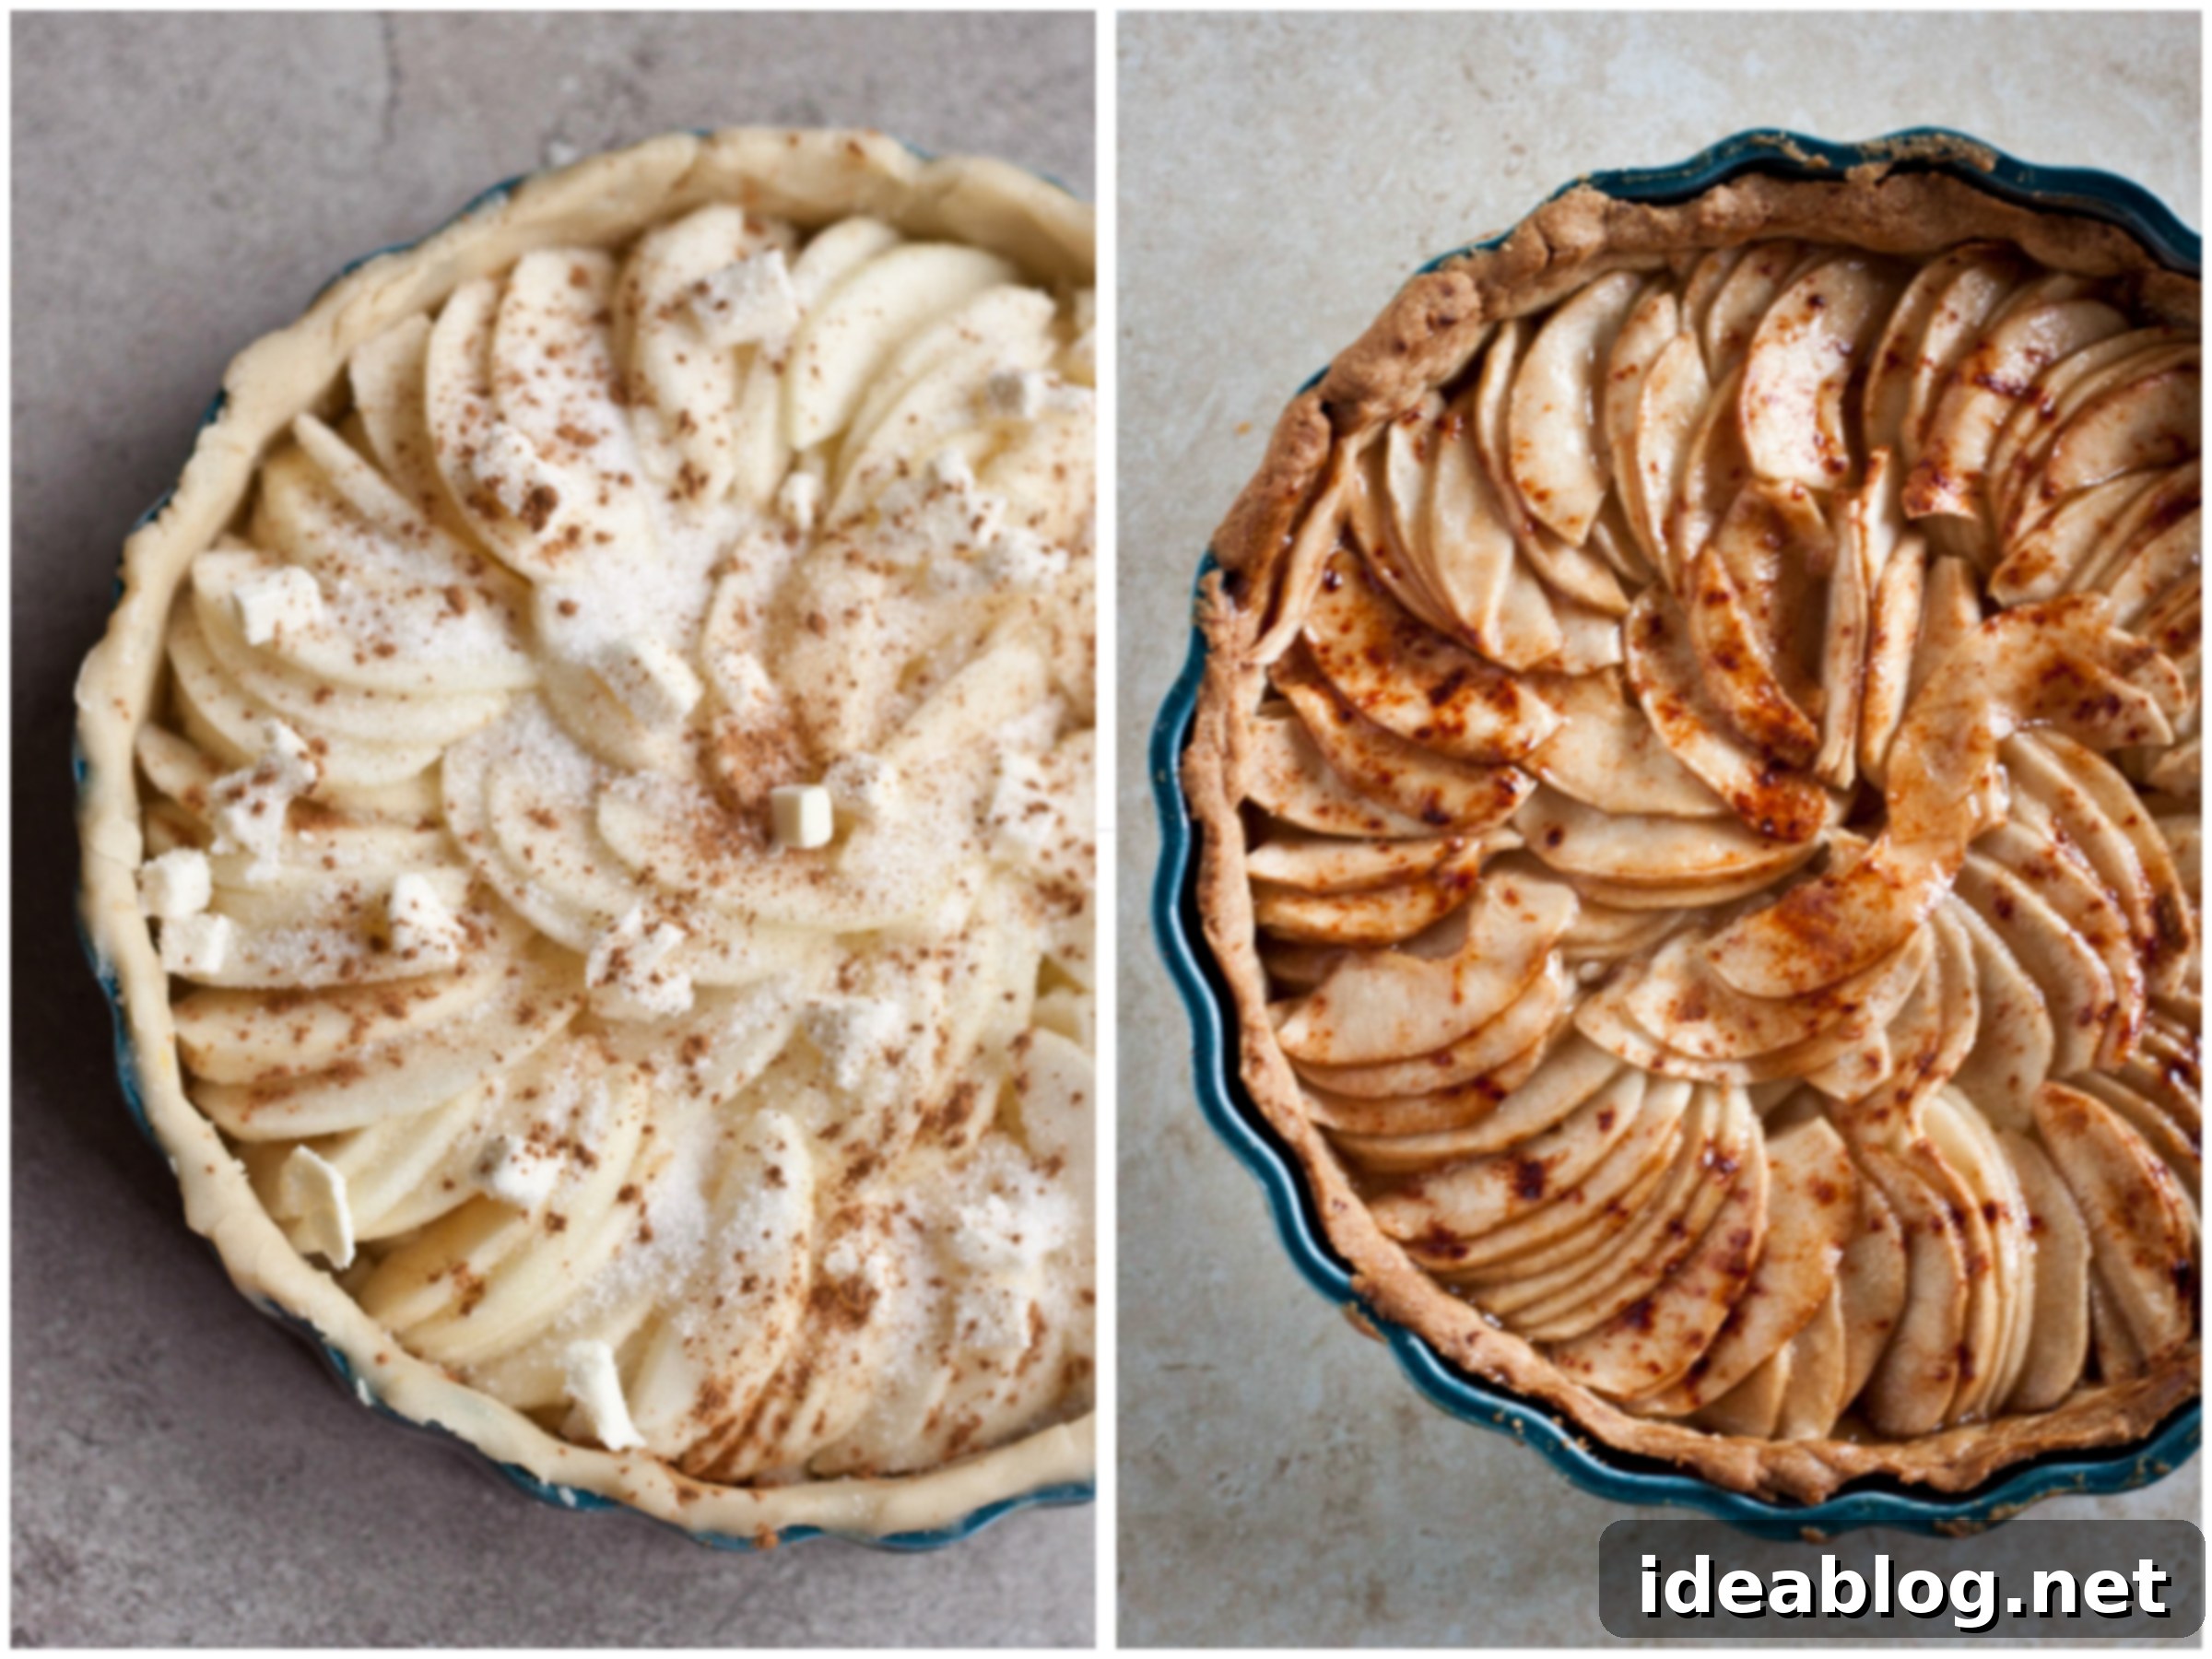
- Arrange the thinly sliced apples in a circular pattern around the tart shell, starting from the outside edge and overlapping the slices slightly as you work your way towards the center. Don’t worry if it’s not absolutely perfect; the rustic charm is part of its appeal.
- Sprinkle the arranged apples evenly with the granulated sugar, then dot the top with the very small pieces of cold butter. Finally, using a spoon or your fingers, sprinkle the ground cinnamon over the apples.
- Carefully transfer the tart (still in its pan) directly onto the preheated pizza stone in the oven. Bake for 75 to 90 minutes, or until the edges of the tart crust are golden brown and the apples are visibly tender and slightly caramelized. The precise baking time will depend on your oven and the thickness of your apple slices.
- Once baked, carefully remove the tart from the oven and allow it to cool on a wire rack for 15 to 20 minutes before serving.
- Brush with Apple Glaze: While the tart is cooling slightly, prepare the glaze. In a small saucepan over medium heat, combine the apricot jelly and water (use roughly equal parts, adjusting as needed). Whisk frequently until the mixture heats through, bubbles slightly, and becomes smooth, thin, and consistent in texture. If it’s too thick, add a little more water; if too thin, reduce it slightly by simmering a bit longer.
- Using a pastry brush, gently brush the warm glaze over the entire surface of the apple filling. This adds a beautiful shine, enhances flavor, and helps preserve the apples. Let the glaze set for a few minutes.
- The tart is best served slightly warm, allowing the flavors to meld beautifully. A generous scoop of vanilla ice cream or a dollop of whipped cream is the perfect accompaniment.
Nutrition Information (per serving):
Serving: 1 serving, Calories: 461kcal, Carbohydrates: 66g, Protein: 5g, Fat: 21g, Saturated Fat: 13g, Polyunsaturated Fat: 7g, Cholesterol: 72mg, Sodium: 71mg, Fiber: 4g, Sugar: 33g
Serving Suggestions & Storage Tips
This Rustic French Apple Tart is truly at its best when served warm. The warmth enhances the aroma of the cinnamon-spiced apples and creates a delightful contrast with cold toppings. A generous scoop of premium vanilla bean ice cream is the classic accompaniment, its creamy texture melting into the tender apples and buttery crust. You could also serve it with a dollop of freshly whipped cream, perhaps infused with a hint of vanilla or a splash of Calvados (apple brandy) for an extra French touch. For an even more indulgent experience, a drizzle of homemade caramel sauce can elevate this humble tart to new heights.
If you find yourself with leftovers – though that’s a rare occurrence with this delicious tart! – store them properly to maintain their freshness. Once cooled completely, cover the tart loosely with plastic wrap or aluminum foil. It will keep well at room temperature for 3 to 4 days. For longer storage, you can refrigerate it for up to a week. To reheat, simply place a slice in the microwave for 30-60 seconds, or warm it gently in an oven preheated to 300°F (150°C) for about 10-15 minutes, until heated through and the crust regains some of its crispness.
This Rustic French Apple Tart is more than just a dessert; it’s an invitation to savor simple, honest flavors and enjoy the rewarding process of baking from scratch. Its rustic charm and delectable taste make it a perfect centerpiece for any gathering, or a comforting treat for a quiet evening at home. Enjoy the journey of creating this classic, and delight in every flavorful bite!
