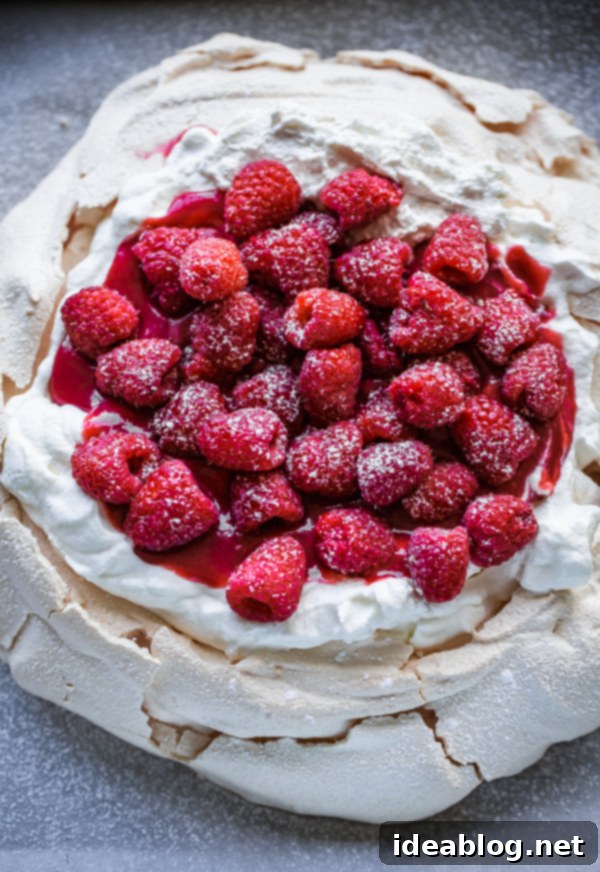
Exquisite Raspberry Pavlova with Homemade Curd & Vanilla Whipped Cream: A Summer Dessert Masterpiece
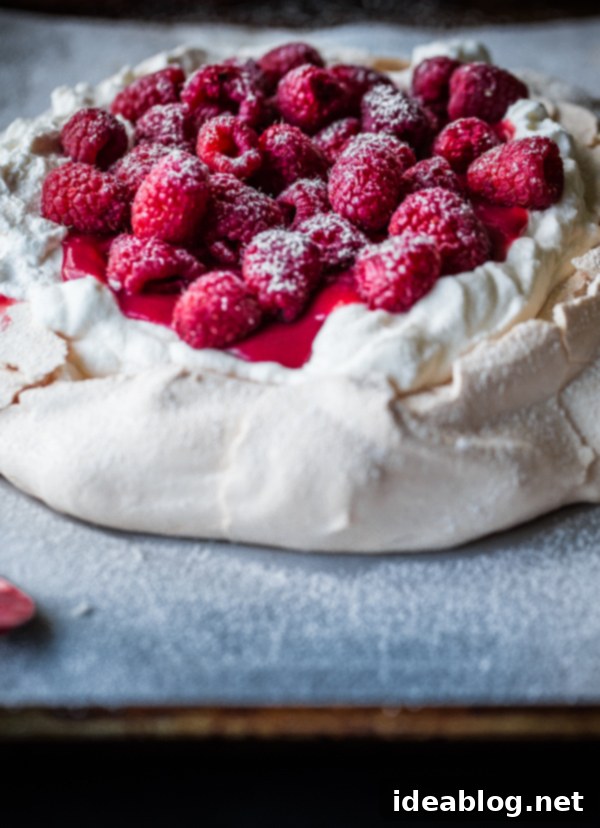
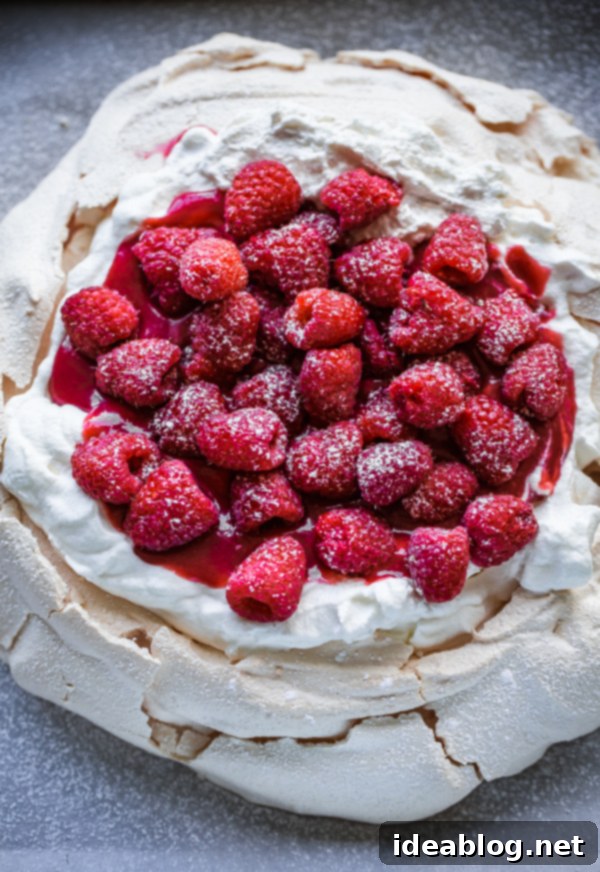
Indulge in the perfect summer dessert: a crisp yet chewy pavlova shell, generously filled with vibrant homemade raspberry curd, luscious vanilla whipped cream, and adorned with a bounty of fresh, juicy berries. This show-stopping treat is as delightful to behold as it is to eat, offering a symphony of textures and flavors that captivate the senses.
As the golden days of Indian Summer embrace us, nature offers one of its sweetest gifts: an abundance of ripe, succulent raspberries. Just recently, we ventured out for a delightful raspberry picking excursion, returning home with baskets overflowing with these ruby-red gems. There’s something truly special and deeply satisfying about fresh, hand-picked berries, and they immediately inspire a flurry of culinary creativity in the kitchen.
From that bountiful harvest, a large portion of the raspberries (approximately 60%) found their way into the freezer, preserving their exquisite flavor for future baking projects and winter cravings. Another 10% vanished almost immediately, enjoyed straight out of the fridge – a simple, refreshing pleasure that highlights their natural sweetness and slight tartness. The remaining 30%? They were destined for something truly spectacular: today’s Fresh Raspberry Pavlova with Vanilla Whipped Cream. This dessert isn’t just a treat; it’s a celebration of summer’s finest flavors, combining the delicate crunch of meringue with the creamy richness of whipped cream and the bright, tangy burst of fresh raspberries.
This particular pavlova recipe takes decadence to the next level by incorporating two distinct doses of raspberry goodness: a silky, vibrant homemade raspberry curd and a generous topping of fresh, whole berries. This dual approach ensures every bite is infused with that unmistakable sweet-tart raspberry essence, creating a rich, layered flavor profile that makes it a truly unforgettable and visually stunning dessert for any occasion, from casual family gatherings to elegant dinner parties.
The Elegant Charm of Pavlova: A Beloved Dessert with a Rich History
Pavlovas stand as the quintessential embodiment of rustic elegance in the dessert world, a culinary masterpiece that never fails to impress. For me, they are an absolute favorite, effortlessly combining breathtaking beauty with an irresistible flavor and a captivating texture. If you’ve enjoyed my rhubarb meringue cups or my classic berry pavlova, you’ll undoubtedly understand the profound appeal of these meringue-based delights. They require a bit of dedicated time and patience to assemble, but the process is surprisingly straightforward, yielding results that look far more intricate and professional than they are to create. This unique blend of simple preparation and stunning presentation perfectly aligns with the “rustic elegance” style I constantly strive for in both life and the kitchen – whether I consistently achieve it is, of course, a delightful ongoing journey!
Beyond its aesthetic and gastronomic appeal, the pavlova carries a fascinating and somewhat contested history. Did you know this iconic dessert was named in honor of the renowned Russian ballet dancer Anna Pavlova? While often associated with Russia due to her name, the dessert itself originated in either New Zealand or Australia during the 1920s, a period when the celebrated dancer was touring both regions. Its light, ethereal quality, combined with its crisp exterior and soft interior, was said to reflect her graceful, delicate, and yet incredibly strong performances, cementing its place in culinary lore and popularizing it as a beloved dessert worldwide. The debate over its exact origin continues to this day, but one thing remains undisputed: its ability to enchant diners with its unique charm and delectable taste.
What Makes Pavlova Unique from Standard Meringue?
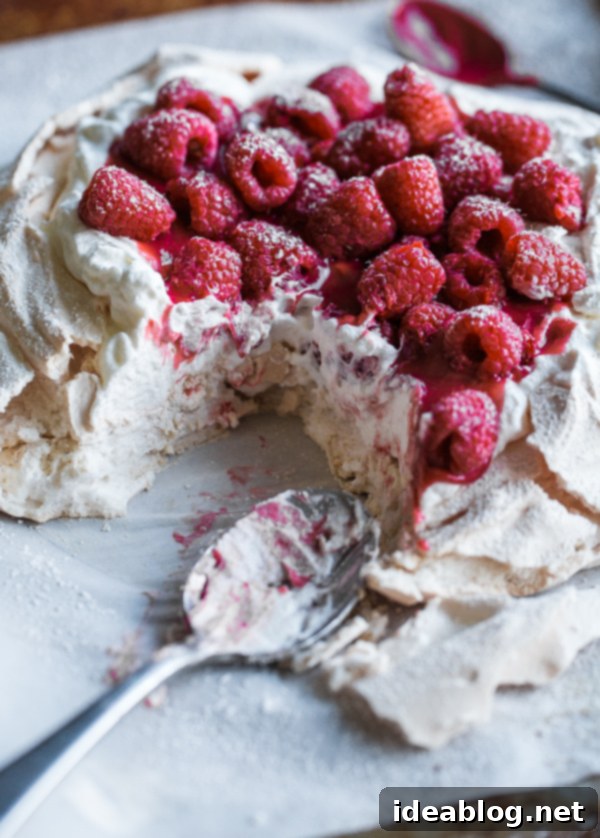
While pavlovas are indeed a meringue-based dessert, they possess distinct characteristics that profoundly set them apart from a traditional, crisp meringue. The primary and most celebrated difference lies in their texture. A standard meringue is typically baked until it is completely dry and solid throughout, offering a uniform, often brittle, crunch from edge to center. A pavlova, however, presents a delightful and complex textural contrast: a wonderfully hard, crisp outer shell that shatters beautifully with the first touch, giving way to an incredibly soft, ethereal, and marshmallow-like interior. This unique internal softness and chewiness is the hallmark of a perfectly made pavlova, providing a truly exquisite eating experience.
This exquisite and sought-after texture is achieved through the clever addition of specific, seemingly small, ingredients to the meringue base: vinegar and cornstarch. The vinegar (or sometimes lemon juice, providing a similar acidic component) plays a crucial role in stabilizing the egg whites, allowing them to whip up into a more voluminous and stable foam. More importantly, its slight acidity contributes to the delicate crust formation during the baking process, ensuring the exterior becomes perfectly crisp. The cornstarch, on the other hand, plays an even more critical role in the interior texture; it interferes with the protein structure of the egg whites just enough to prevent them from drying out completely during baking. Instead of becoming brittle and dry, the cornstarch promotes that characteristic soft, chewy, and melt-in-your-mouth center. When baked at a moderate temperature and cooled slowly, these ingredients work in harmony to create a meringue shell that’s strong enough to hold its shape and toppings, yet tender and yielding on the inside, ready to be filled with luxurious whipped cream and vibrant fresh fruit, transforming it into a truly delicious and absolutely gorgeous dessert.
Crafting the Perfect Homemade Raspberry Curd
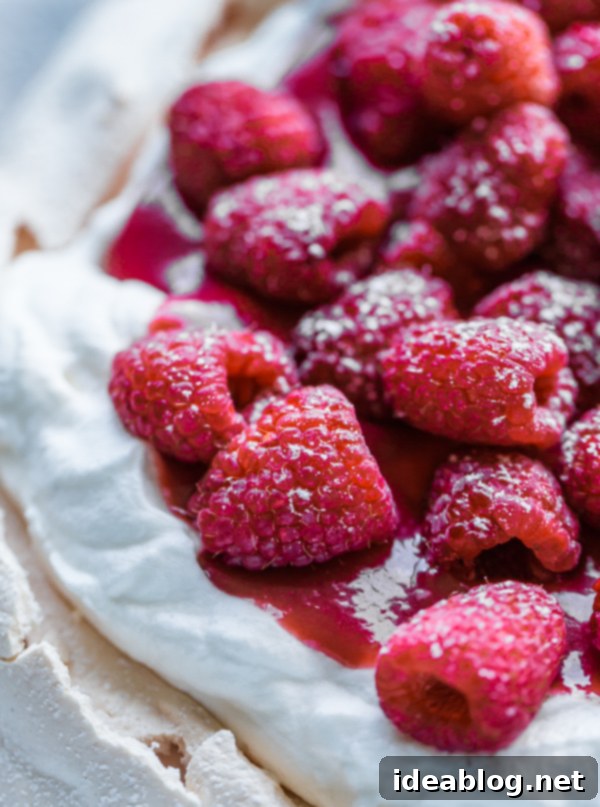
One of the elements that truly elevates this pavlova recipe from simply delicious to absolutely unforgettable is the inclusion of a fresh, homemade raspberry curd. Paired with cloud-like vanilla whipped cream and an abundance of fresh, juicy raspberries, it delivers an unparalleled burst of fruity flavor and a sophisticated tang. The dual application of raspberries – both in the silky curd and as a fresh garnish – ensures a rich, layered experience of “raspberry goodness” in every single bite, creating a harmonious and vibrant flavor profile.
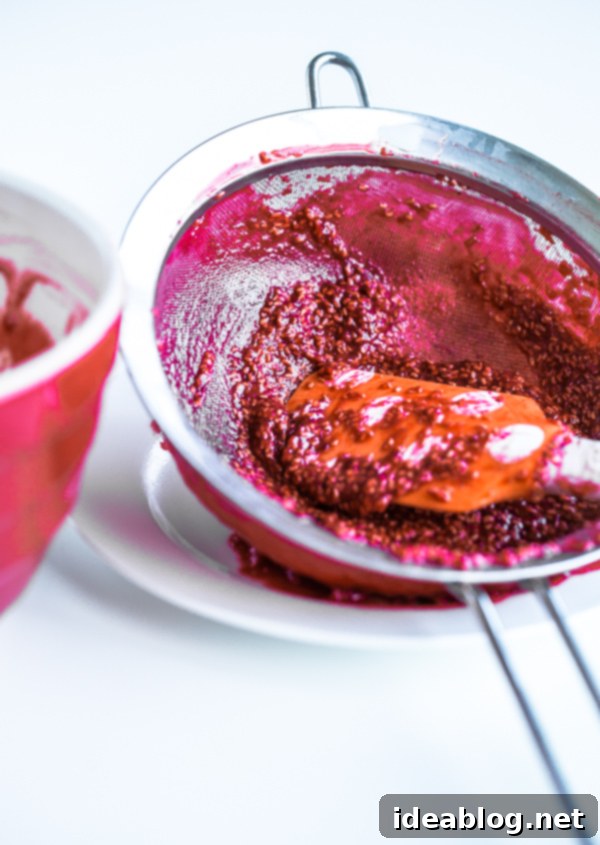
Despite its sophisticated taste and luxurious texture, the raspberry curd could not be simpler to prepare! Seriously, you just combine all the primary ingredients – fresh raspberries, two large egg yolks, granulated sugar, cubed unsalted butter, freshly squeezed lemon juice, cornstarch, and a tiny pinch of kosher salt – in a medium-sized saucepan. Stir all these ingredients together thoroughly to ensure they are well combined before you even introduce heat. Place the saucepan over medium heat and bring the mixture to a gentle boil, stirring continuously and frequently with a whisk or heatproof spatula. This constant stirring is crucial to prevent the egg yolks from scrambling and to ensure even cooking and thickening, guaranteeing a smooth consistency. Continue to boil, stirring diligently for 2 to 3 minutes, or until the curd visibly thickens and coats the back of a spoon. It will still be relatively fluid compared to a thick jam, but the cornstarch should be fully cooked, preventing any starchy aftertaste. Immediately remove the saucepan from the heat and, while hot, strain the curd through a fine-meshed sieve into a clean, heatproof bowl. This essential step removes all the tiny raspberry seeds and any cooked egg particles, resulting in an exceptionally smooth and truly luxurious curd. Cover the surface of the curd directly with plastic wrap, pressing it down onto the surface to prevent a skin from forming as it cools. Then, transfer the bowl to the refrigerator. Allow it to cool completely for at least 1-2 hours, or until thoroughly chilled and slightly thicker. Unlike richer, more robust curds like those for Meyer lemon tarts or grapefruit curd-stuffed doughnuts I’ve shared previously, this raspberry curd is intentionally crafted to be ultra-light in both texture and richness. It strikes a beautiful balance of sweet and tart, and its delicate, spreadable nature allows it to melt almost seamlessly into the vanilla whipped cream, creating a harmonious flavor profile that perfectly complements the delicate pavlova shell. This inherent lightness prevents the entire dessert from feeling overly heavy, making it an ideal and refreshing choice for a bright summer treat or a celebratory spring gathering.
Crucial Tip for Pavlova Perfection: Since pavlovas are inherently delicate and their distinct texture is paramount to their appeal, it is absolutely vital that you allow the meringue base to cool completely inside the oven once it has finished baking. This step cannot be rushed. After the baking time is up, turn off the oven completely. Then, use a sturdy wooden spoon or a heatproof utensil to prop the oven door open slightly (about 1-2 inches), creating a small vent. This allows the meringue to cool down very slowly and gradually, preventing thermal shock, which can cause the pavlova to crack excessively, collapse, or become sticky. This patient cooling ensures that signature crisp exterior and soft, marshmallowy interior remain perfectly intact, guaranteeing a stunning and delicious result ready for assembly.
The Complete Raspberry Pavlova Recipe
Raspberry Pavlova with Vanilla Whipped Cream
Pin
Review
SaveSaved!
Equipment
-
KitchenAid 5 Qt. Artisan Stand Mixer (or a powerful hand mixer with whisk attachment)
-
Half Sheet Pan
-
Parchment Paper
-
Fine-Meshed Sieve
-
Medium Saucepan
-
Heatproof Bowl
-
Small Offset Spatula (optional, but highly recommended for shaping)
Ingredients
Fresh Raspberry Curd:
- 6 ounces (170g) fresh raspberries
- 2 large egg yolks
- ½ cup (100g) granulated sugar
- 4 ounces (8 tablespoons; 115g) unsalted butter, cut into small cubes for quicker melting
- 3 tablespoons (45 mL) freshly squeezed lemon juice (from about 1 medium lemon, adds crucial tartness)
- 2 teaspoons cornstarch (helps thicken the curd)
- ⅛ teaspoon kosher salt (enhances overall flavor)
Meringue Shell:
- 4 large egg whites at room temperature (approximately 120-130g, crucial for volume)
- pinch kosher salt (helps stabilize egg whites)
- 1 cup (200g) granulated sugar (provides structure and sweetness)
- 1 teaspoon vanilla bean paste or ¾ teaspoon pure vanilla extract for a more subtle flavor and white meringue
- 2 teaspoons cornstarch (essential for the chewy interior)
- 1 teaspoon distilled white vinegar (crucial for stability and the classic pavlova texture)
Vanilla Whipped Cream:
- 1 cup (240 mL) cold heavy cream (ensure it’s very cold for best results and maximum volume)
- 1 teaspoon vanilla bean paste or ¾ teaspoon pure vanilla extract for a lighter vanilla presence
Assembly:
- 8 – 12 ounces (220g -340g) fresh raspberries for garnishing and adding a fresh burst of flavor and color
- powdered sugar for a beautiful dusting and touch of extra sweetness, optional
Instructions
-
1. Prepare Your Baking Surface: Begin by precisely preheating your oven to 275°F (135°C), ensuring a rack is positioned in the very center. This moderate temperature is absolutely key to achieving the pavlova’s unique delicate texture and preventing it from browning too quickly. Next, take a large piece of parchment paper and, using a pencil and the bottom of a 9-inch (23-cm) cake pan or a similar-sized plate as a guide, trace a perfect circle in the center. Once traced, flip the parchment paper over so the pencil mark is facing down – this essential step prevents any graphite from transferring to your pristine meringue. Lay this prepared parchment paper flat onto a sturdy half sheet pan, ensuring it lays smoothly and is ready to receive the meringue.
-
2. Prepare the Fresh Raspberry Curd: In a medium-sized saucepan, combine the 6 ounces of fresh raspberries, two large egg yolks, ½ cup of granulated sugar, the 4 ounces of cubed unsalted butter, three tablespoons of freshly squeezed lemon juice, two teaspoons of cornstarch, and ⅛ teaspoon of kosher salt. Stir all these ingredients together thoroughly with a whisk or rubber spatula to ensure they are well combined and homogenous before applying heat. Place the saucepan over medium heat. Bring the mixture to a light boil, stirring continuously and frequently. This constant agitation is crucial to prevent the egg yolks from scrambling and to ensure even cooking and thickening of the curd. Continue to boil, stirring for 2 to 3 minutes, or until the curd visibly thickens and coats the back of a spoon. It will still be relatively fluid compared to a thick jam, but the cornstarch should be fully cooked, preventing any starchy taste. Immediately remove the saucepan from the heat and strain the hot curd through a fine-meshed sieve into a clean, heatproof bowl. This critical step removes all the tiny raspberry seeds, resulting in an exceptionally smooth and luxurious curd. Cover the surface of the curd directly with plastic wrap, pressing it down onto the surface to prevent a skin from forming as it cools. Then, transfer the bowl to the refrigerator. Allow it to cool completely for at least 1-2 hours, or until thoroughly chilled and slightly thicker in consistency.
-
3. Craft the Meringue Shell: For the meringue, it is absolutely essential that your stand mixer bowl (or a very large, clean mixing bowl if using a powerful hand mixer) is impeccably clean and completely free of any grease. Even a tiny amount of oil or fat can prevent the egg whites from whipping properly and achieving their full volume. Place the four room-temperature large egg whites and a pinch of kosher salt into the bowl. Begin whisking on low speed for 1 to 2 minutes, allowing the egg whites to become foamy and frothy. This slow start helps create small, uniform air bubbles. Gradually increase the speed to high and continue whipping for another 1 to 2 minutes until soft peaks begin to form – meaning the peaks droop slightly when the whisk is lifted. With the mixer still running on high speed, gradually add the granulated sugar, one tablespoon at a time, allowing each addition to fully dissolve before adding the next. This slow, steady incorporation of sugar is critical for developing a stable, glossy meringue that won’t weep. Continue whisking on high until the meringue is very stiff, glossy, and holds firm, upright peaks when the whisk is lifted (this is known as stiff peaks). The mixture should look bright white and smooth.
-
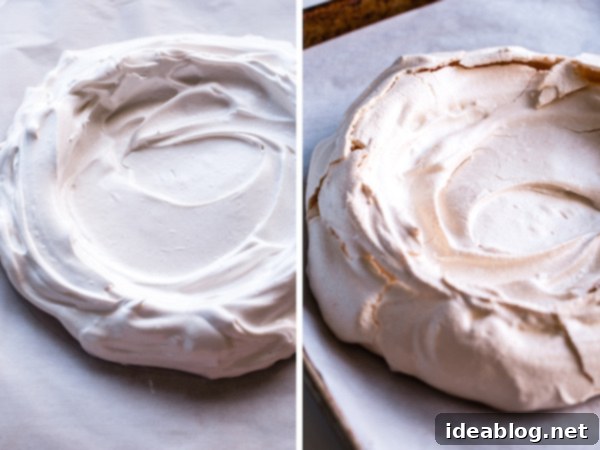
4. Finish and Shape the Meringue: Once stiff peaks are achieved and the meringue is glossy, gently fold in the vanilla bean paste (or extract), cornstarch, and distilled white vinegar. Whisk briefly on high speed, just enough to ensure these final ingredients are thoroughly combined into the meringue. The cornstarch and vinegar are vital for creating the signature chewy interior of the pavlova, so don’t omit them! Using a rubber spatula, carefully scrape the bottom and sides of the bowl to confirm that all ingredients are evenly incorporated without deflating the meringue too much. Transfer the beautiful, glossy meringue to the center of your parchment paper-lined sheet pan. Use a small offset spatula to gently spread the meringue into a neat, even round, using your traced 9-inch circle as a precise guide. Then, build up the sides of the meringue slightly with the offset spatula, creating a subtle ridge or a ‘nest’ effect. This intentional shaping will form a natural well in the center, perfect for holding the generous fillings of whipped cream, raspberry curd, and fresh berries during assembly without them spilling over.
-
5. Bake and Cool Properly: Carefully place the sheet pan with the meringue into the preheated 275°F (135°C) oven. Bake for approximately 1 hour. During this crucial baking time, the meringue will expand slightly and develop a beautifully crisp exterior. Once the baking time is complete, turn off the oven completely. This is a critical step for perfect pavlova: do not open the oven door immediately. Instead, use a sturdy wooden spoon or a heatproof utensil to prop the oven door open slightly (about 1-2 inches), allowing the meringue to cool down very gradually inside the still-warm oven. This slow cooling process prevents thermal shock, which can cause the pavlova to crack excessively, collapse, or become sticky and soft. Allow it to cool completely in the oven for at least 1 hour, or even longer (up to several hours or overnight), until it reaches room temperature. When fully cooled, the pavlova shell will be beautifully crisp and slightly cracked on the outside, while retaining its signature soft and wonderfully marshmallowy texture on the inside.
-
6. Whip the Vanilla Cream: In a separate, impeccably clean bowl of a stand mixer fitted with a whisk attachment (or using a powerful hand-held mixer with whisk attachments), combine the very cold heavy cream and vanilla bean paste (or extract). It’s absolutely essential for the cream to be well-chilled to achieve the best volume, most stable peaks, and lightest texture. Beat the cream on medium-high speed until it forms soft, billowy peaks. Be careful not to over-beat, as over-whipped cream can quickly become grainy, buttery, or separate. For this particular dessert, since the raspberry curd and meringue provide ample sweetness, I find it best and most balanced to omit any additional sugar from the whipped cream. This allows its pure, creamy vanilla flavor to shine through and beautifully balance the other components.
-
7. Assemble Your Raspberry Pavlova: Once the meringue shell has completely cooled and is ready, it’s time for the exciting assembly! Carefully transfer the cooled meringue shell to your desired serving platter. Dollop generous amounts of the freshly prepared vanilla whipped cream over the center of the meringue. Using an offset spatula or the back of a spoon, gently spread the whipped cream into a rustic, yet even, layer within the well you created earlier. Next, generously spoon the chilled raspberry curd over the whipped cream, allowing some of its vibrant red color to peek through enticingly. Finally, artistically arrange your fresh raspberries over the curd and whipped cream, creating a beautiful and appealing presentation. For an elegant finish and a hint of extra sweetness, sift a light dusting of powdered sugar over the fresh raspberries just before serving. To serve, use a large spoon or a sharp cake server to gently scoop individual portions, ensuring each guest gets a delightful taste of the crisp meringue, tangy curd, creamy whipped cream, and fresh berries in every single bite.
Storage Tips for Your Pavlova Masterpiece:
- For the absolute best texture, pavlova is unequivocally best assembled and served fresh. The meringue is at its crispiest right after cooling and before the moisture from the cream and fruit has a chance to soften it.
- If you find yourself with leftovers, they can be carefully wrapped in plastic film and stored overnight in the refrigerator. However, it’s important to note that the meringue will inevitably absorb moisture from the cream and fruit, causing it to lose some of its initial crispness and become softer over time. While still delicious, it won’t have the same delicate crunch that makes fresh pavlova so special.
- To prepare components ahead of time and ensure the freshest possible result for your event: bake the meringue shell and store it in an airtight container at room temperature for up to 2-3 days. Make the raspberry curd and store it chilled in an airtight container in the refrigerator for up to a week. Whip the cream just before final assembly to maintain its peak freshness and volume.
Serving Suggestions & Creative Variations:
- Individual Pavlovas: Instead of one grand large pavlova, consider creating smaller individual meringue nests for a charming and personal presentation. Simply trace smaller circles (about 3-4 inches in diameter) on your parchment paper and bake for a shorter duration (around 35-45 minutes), adjusting the cooling time accordingly. These are perfect for entertaining!
- Add a Touch of Citrus Zest: While lemon juice is already incorporated into the curd, a finely grated lemon or lime zest sprinkled over the vanilla whipped cream can add another vibrant layer of bright, aromatic flavor and visual appeal.
- Decadent Chocolate Drizzle: For dedicated chocolate lovers, a light drizzle of melted high-quality dark chocolate over the fresh raspberries can introduce a wonderfully decadent and complementary flavor dimension.
- Explore Other Berries: Feel free to experiment with other fresh berries that are in season, such as luscious strawberries, plump blueberries, or tangy blackberries. These can be used either alone or in a colorful combination with raspberries, adapting the dessert to your taste preferences or seasonal availability.
- Introduce a Nutty Crunch: A delicate sprinkle of toasted slivered almonds, finely chopped pistachios, or even candied walnuts can add an interesting textural contrast and a subtle nutty flavor that beautifully complements the fruit and cream.
Meringue recipe thoughtfully adapted from Ina Garten’s classic and reliable approach, ensuring a consistently delicious and perfectly textured base every single time.
