Delightful Meyer Lemon Tarts: A Guide to Baking the Perfect Sweet and Tangy Dessert
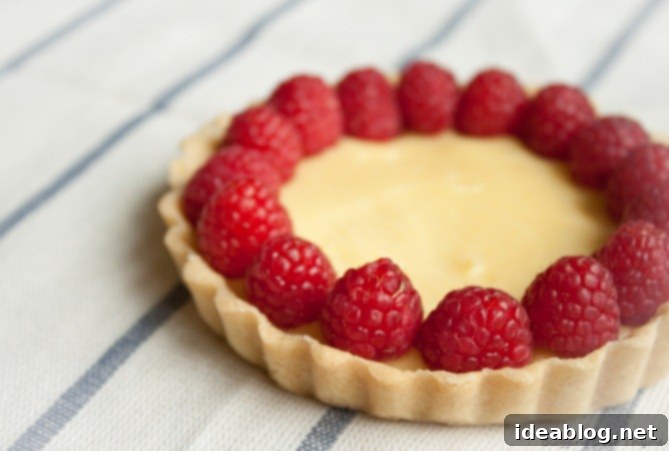
Indulge in these exquisite Meyer Lemon Tarts, featuring a delicate pâte sucrée crust and a vibrant, luscious Meyer lemon curd. Whether topped with fresh, juicy raspberries or a cloud of toasted meringue, these tarts promise a truly unforgettable dessert experience that will captivate any palate.
Without a doubt, these Meyer Lemon Tarts stand out as one of the most phenomenal desserts to emerge from my kitchen in recent memory. There’s something truly magical about the combination of a buttery, crisp crust and a bright, intensely flavored lemon filling that simply makes them irresistible. They are a testament to the beauty of classic French patisserie, refined with the unique charm of Meyer lemons.
My journey into the world of tarts began with culinary school, where I discovered an immense passion for baking these elegant confections. The precision required, the delicate balance of flavors, and the sheer artistry involved quickly made tarts one of my absolute favorite things to create. So, when I stumbled upon fresh Meyer lemons at my local grocery store, I knew it was the perfect opportunity to share a recipe for a classic lemon tart that truly celebrates this exceptional citrus.
The Star Ingredient: Understanding Meyer Lemons
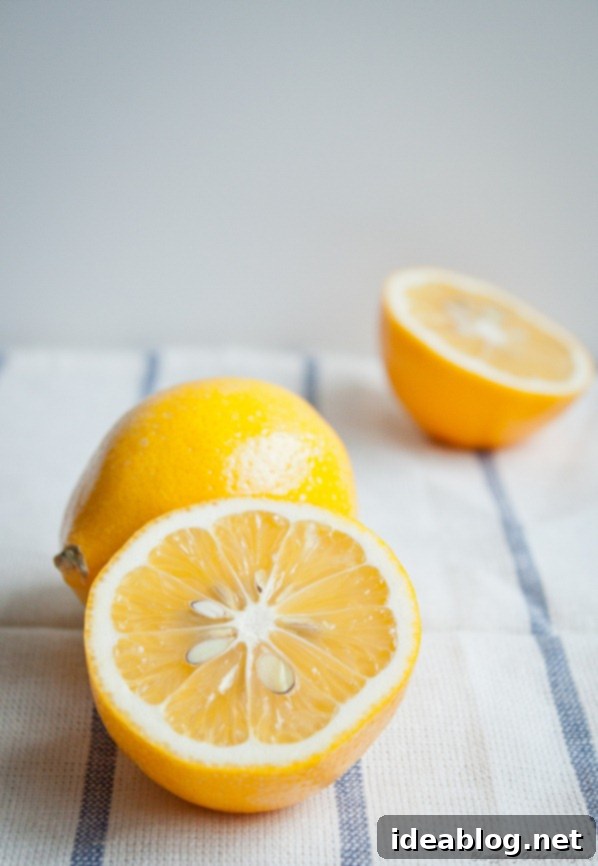
Meyer lemons are not your average lemons, and understanding their unique characteristics is key to appreciating this tart. Native to China, these remarkable fruits are actually a natural hybrid, a delightful cross between a traditional lemon and a Mandarin orange. This genetic lineage gives them a distinct advantage over their more common counterparts.
Visually, Meyer lemons are striking. Their zest boasts a deep, vibrant yellow color, often leaning towards an orange hue, which hints at their sweet origins. But it’s the flavor where they truly shine. The juice is notably sweeter and less acidic than that of standard Eureka or Lisbon lemons. This translates to a more nuanced, floral, and aromatic flavor profile, with subtle notes of honey and even a hint of tangerine. This natural sweetness means a Meyer lemon curd requires slightly less sugar than one made with conventional lemons, allowing the inherent fruitiness to take center stage.
While their unique flavor makes them highly sought after, Meyer lemons can sometimes be more expensive and, depending on your region and the season, a bit difficult to find. Typically, their peak season is from late fall through early spring. If fresh Meyer lemons are unavailable, or if you prefer a more intensely tart flavor, you can certainly substitute the Meyer lemon juice in this recipe with regular lemon juice. However, be prepared to add a touch more granulated sugar to the curd to balance the increased acidity and achieve a harmonious flavor profile, much like the original Meyer lemon’s natural sweetness.
Crafting the Perfect Base: Pâte Sucrée Crust and Luscious Lemon Curd
The foundation of these classic Meyer Lemon Tarts lies in two crucial components: the pâte sucrée crust and the exquisite homemade Meyer lemon curd. Together, they create a symphony of textures and flavors that is truly unparalleled.
The Pâte Sucrée: A Sweet, Buttery Delight
Pâte sucrée, often translated as “sweet pastry dough,” is the ideal choice for this tart. Unlike a traditional flaky pie crust, pâte sucrée is rich, tender, and has a crumbly, almost cookie-like texture – think of a high-quality sugar cookie dough. This delicate crispness provides a wonderful contrast to the smooth, creamy lemon curd. Its higher sugar content also helps it brown beautifully and hold its shape perfectly during baking. Working with pâte sucrée can be a joy, as it’s generally quite forgiving. For visual guidance on how to prepare and handle this delicate tart dough, I highly recommend watching the instructional video included in my recipe for Citrus and Berry Tartlets! The techniques demonstrated there apply perfectly to shaping these Meyer Lemon Tart shells, ensuring you achieve a flawless crust every time.
The Meyer Lemon Curd: Silky Smooth and Bursting with Flavor
The filling for these tarts is a luscious homemade Meyer lemon curd that comes together in a cinch. There’s nothing quite like the vibrant, fresh taste of homemade lemon curd, and with Meyer lemons, it reaches new heights of flavor. The process involves gently cooking egg yolks, whole eggs, sugar, cornstarch, and fresh Meyer lemon juice until thickened, then enriching it with cold butter. The cornstarch helps stabilize the curd, ensuring a smooth, silken texture that won’t weep or become too runny. This simple yet elegant preparation yields a curd that is intensely lemony, perfectly balanced between sweet and tart, and incredibly satisfying.
Essential Equipment and Smart Make-Ahead Strategies
Successful baking often comes down to having the right tools and planning ahead. These tips will help you achieve perfect Meyer Lemon Tarts with ease.
Recommended Equipment
While this recipe specifically details preparation for individual (4-inch) tarts, offering a charming presentation for gatherings or personal enjoyment, feel free to adapt it to your preferred bakeware. You can easily substitute the mini tart rings with a standard 9-inch or 10-inch tart pan, ideally one with a removable bottom for effortless demolding. If you opt for a larger tart pan, remember that baking times will need to be adjusted accordingly. A larger tart will typically require a longer blind-baking period for the crust and a longer setting time for the curd. Always monitor your tart closely and rely on visual cues for doneness, such as golden edges on the crust and a slightly jiggly but mostly set center for the curd.
Seamless Make-Ahead Preparation
One of the beauties of this recipe is its flexibility for advance preparation, making it perfect for entertaining or when you want to minimize stress on the day of serving. Both the pâte sucrée tart dough and the Meyer lemon curd can be prepared well in advance. The tart dough can be made the night before or even several days ahead of assembly and baking. Simply wrap it tightly in plastic wrap and store it in the refrigerator. Leftover dough is also incredibly versatile; it can be frozen for up to three months. Just ensure it’s pressed into a flat disc and wrapped securely before freezing. When ready to use, thaw it in the refrigerator overnight. Similarly, the luscious lemon curd can be cooked and chilled 1-2 days prior to filling the tart shells. Store it in an airtight container in the refrigerator, and give it a quick whisk before piping or spooning into the baked crusts. This make-ahead approach ensures maximum freshness and convenience.
Elevating Your Tarts: Creative Decoration Ideas
Beyond their incredible taste, Meyer Lemon Tarts offer a blank canvas for beautiful decoration, allowing you to tailor them for any occasion or simply to add an extra flourish.
Classic Toppings
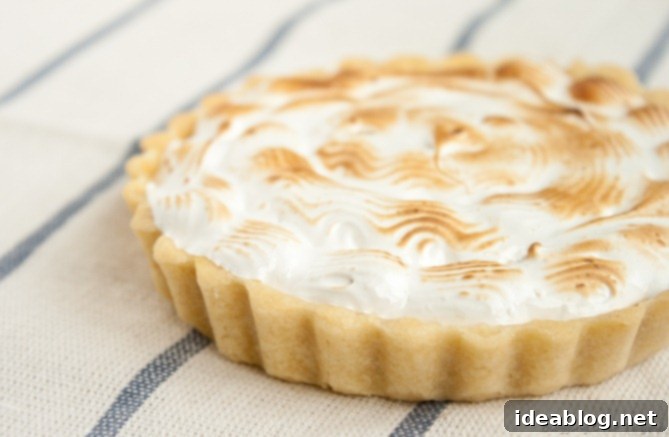
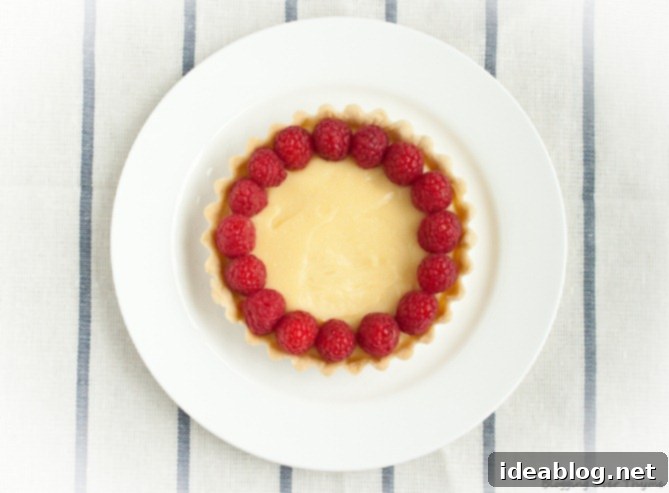
To make these tarts truly special, consider adorning their bright surfaces. A simple yet elegant choice is a scattering of fresh raspberries. Their vibrant red color and slight tartness provide a lovely contrast to the yellow curd, both visually and texturally. Alternatively, you can cover the entire surface of the curd with a soft, marshmallow-y Swiss meringue. The recipe for this delightful topping is included below in the detailed instructions. Once piped onto the tart, the meringue can be lightly browned either in the oven under a broiler (watch *very* carefully to prevent burning!) or, for more control and precision, with a hand-held kitchen torch, creating beautiful peaks and a caramelized flavor.
Further Decoration Inspirations
Don’t stop there! Other fantastic decoration ideas include a dusting of powdered sugar, delicate candied lemon slices for an extra burst of citrus, or even a swirl of freshly whipped cream. For a sophisticated touch, you could shave white chocolate over the top or add a sprig of fresh mint. No matter how you choose to decorate them, these Meyer Lemon Tarts are sure to win over any crowd, proving to be a show-stopping dessert that combines simple elegance with profound flavor. They are best served slightly chilled or at room temperature, allowing the flavors of the lemon curd to fully develop and shine.
Meyer Lemon Tarts
Pin
Review
SaveSaved!
Make-Ahead Tip: The tart dough and lemon curd can be prepared 1-2 days in advance of assembly and baking. See recipe instructions for additional guidance.
Equipment
-
4 (4-Inch) Mini Tart Pans with Removable Bottoms
Ingredients
Pâte Sucrée Tart Dough:
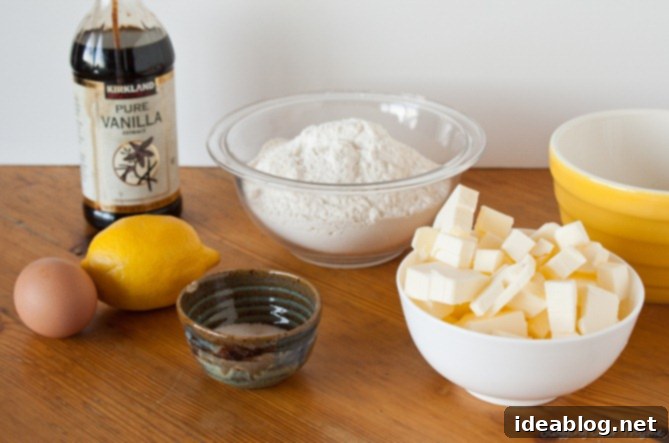
- 12 ounces (340g) unbleached all-purpose flour
- 1½ teaspoons kosher salt
- 8 ounces (230g) cold unsalted butter cubed
- 4 ounces (115g) granulated sugar
- 1 large egg
- 1 teaspoon pure vanilla extract
- ½ teaspoon fresh lemon zest
Meyer Lemon Curd:
- 3 large egg yolks
- 2 large eggs
- 1 oz (28g) cornstarch
- 7 ounces (200g) granulated sugar
- ¾ cup + 1 tablespoon (195 mL) freshly squeezed Meyer lemon juice roughly 4-5 juicy lemons
- 7 oz (200g) cold unsalted butter cubed
Decoration:
- fresh raspberries
- toasted swiss meringue see recipe below
Swiss Meringue (Optional):
- 3 ounces (85g) egg whites roughly 3 large egg whites
- 6 ounces (170g) granulated sugar
Instructions
-
Prepare Pâte Sucrée Tart Dough: Place the flour and salt in a pile on a clean working surface. Using a metal bench scraper, chop the cold, unsalted butter into the flour mixture until the butter is finely distributed in small pieces. Pour the sugar over the flour and butter mixture and incorporate thoroughly. Create a well in the center of the mixture.
-
Pour the sugar over the flour mixture and incorporate thoroughly. Create a well in center of mixture and add the whole egg, vanilla, and zest. Using your hands and the bench scraper, incorporate the wet ingredients into the dry ingredients by pressing the mixture together as you combine.
-
Knead the dough using the “fraisage” method: Use the heel of your hand to press down and smear the dough onto the countertop. Push the dough back together and repeat until the dough is smooth and all ingredients are well incorporated. The dough will have a slight sheen.
-
Place the dough between two pieces of parchment or wax paper. Using a rolling pin, roll the dough into a disc roughly ½-inch to ¾-inch thick. This initial rolling out step will help make the final assembly process much easier. Set the dough on a sheet pan and refrigerate for 45 to 60 minutes or until very firm. Freeze any remaining dough for up to 3 months; press into a round disc and wrap tightly in plastic wrap (thaw in the refrigerator overnight before using).
-
Shape Tart Shells and Blind Bake: Preheat the oven to 325°F (165°C) with a rack in the center position. Line a half sheet pan with parchment paper and set aside.
-
Remove the chilled tart dough from the fridge. You may want to work with half the dough at at time. Using a lightly floured rolling pin and starting from the center of dough and working outward, roll the dough until it is ⅛-inch thick. Throughout the process, lift and move the dough repeatedly on the countertop to ensure it is not sticking. Note: If dough cracks, gently press the pieces back together with your hands and continue to roll. This type of dough is very forgiving.
-
Set a tart shell pan on top of the rolled dough to use as a guide. Using a sharp knife, trace and cut out a circle of dough that is 1-inch larger in diameter than the tart pan. Repeat with the remaining tart dough. Set the tart pans on the lined sheet pan and gently transfer the dough pieces on top of each respective tart pan. Using your fingers, press the dough into the edges of the pans to shape each tart shell. Be sure to press the dough tightly inside the corners and sides. Repeat until all tarts are assembled. Note: Leftover scraps of dough can be pressed together and rolled out again to use as needed.
-
Dock the bottom of each tart shell with a fork. Line each tart shell with a small square of aluminum foil, ensuring that it reaches into the corners. Fill with dried beans (or pie weights) so that they reach to the top of each tart shell. This will ensure that the tart retains its shape during the blind-baking process.
-
Bake the tart shells for roughly 15 minutes. Remove from the oven and carefully lift out the foil with the beans. Place the uncovered tart shells back in oven and bake for an additional 5 to 7 minutes or until the tart dough is cooked all the way through and looks dry. Set the tart pans on a wire rack to cool completely.
-
Prepare Meyer Lemon Curd: Combine the egg yolks, whole eggs, cornstarch, sugar, and Meyer lemon juice in a medium saucepan. Whisk until smooth. Set the pan over medium-low heat and cook the curd, whisking constantly, until it starts to bubble and become thick.
-
Remove the curd from the heat and add the cubed butter, a little bit at a time, whisking continuously until incorporated and smooth. Strain the curd through a fine-meshed sieve set over large bowl. Cover the curd tightly with plastic wrap and refrigerated until chilled.
-
Assemble and Decorate Tarts: Carefully remove the blind-baked tart shells from the tart pans. Remove the chilled lemon curd from the fridge and stir until smooth. Using a pastry bag fitted with a round tip (or a spoon), fill each tart shell with lemon curd. Leftover lemon curd can be stored in an airtight container in the refrigerator for 1 to 2 weeks.
-
Just before serving, top with swiss meringue (see instructions below), fresh raspberries, or serve as is. Serve the tarts slightly chilled or at room temperature.
-
Prepare Swiss Meringue Topping (optional): Combine the egg whites and granulated sugar in a stand mixer bowl. Set the bowl over a bain-marie and using the stand mixer whisk attachment, whisk the mixture until the sugar has fully dissolved (you should feel no sugar when you rub a small portion of the warm mixture together between your fingertips).
-
Remove from the heat and using the stand mixer, beat at high speed until stiff peaks form. Transfer the meringue to a piping bag fitted with a small star tip. Once the lemon tarts have been assembled, pipe the meringue onto the lemon curd. Toast the meringue using a hand-held kitchen torch or under the oven broiler watching carefully the entire time to avoid burning.
