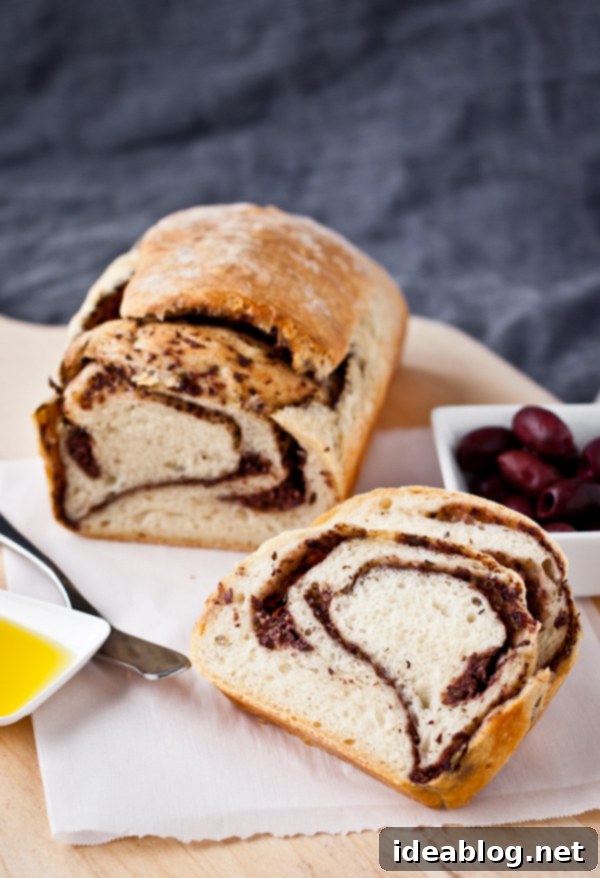
Homemade Olive Tapenade Swirl Bread: An Irresistible Savory Loaf Recipe
Imagine a bread that offers the perfect duality: a wonderfully crisp crust giving way to an incredibly soft, tender, and wonderfully doughy interior. Now, picture that luscious bread infused with vibrant, briny ribbons of homemade olive tapenade, swirled throughout every slice. This isn’t just bread; it’s an experience. Our homemade Olive Tapenade Swirl Bread promises to elevate your baking prowess and delight your senses with its exquisite flavor and satisfying texture, making it a truly unforgettable addition to your table.
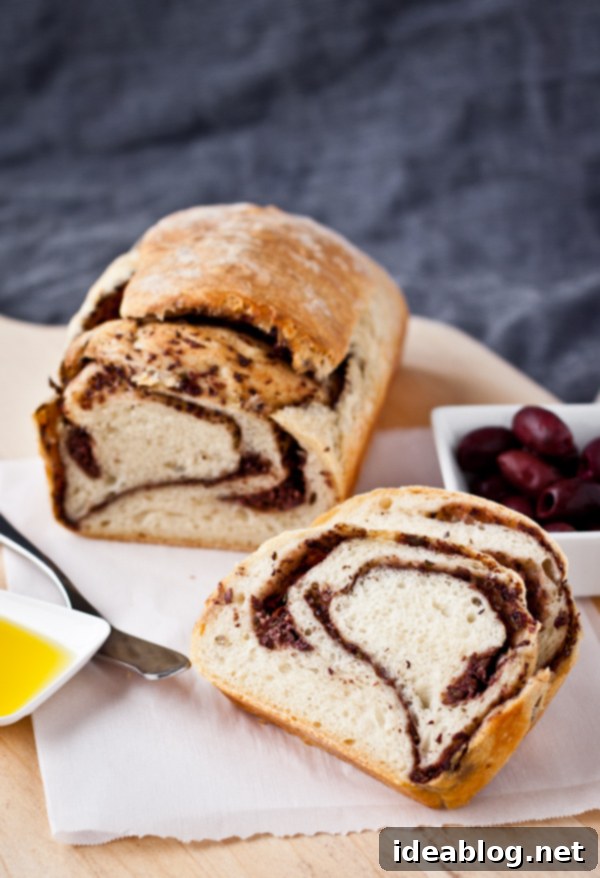
The Inspiration Behind This Unique Savory Bread Creation
Let’s be candid: this recipe for Olive Tapenade Swirl Bread was born out of pure, unadulterated passion for two culinary masterpieces. For years, my kitchen has been a sanctuary for two of my absolute favorite things: the comforting aroma and taste of freshly baked bread and the rich, complex flavors of authentic olive tapenade. Separately, they are magnificent; a warm, crusty loaf paired with a generous bowl of tapenade is a simple joy that I could happily indulge in endlessly.
The challenge, and ultimately the triumph, was figuring out a way to combine these two beloved elements into a single, cohesive, and even more delicious creation. While a simple olive bread often features olives mixed directly into the dough, this tapenade swirl bread takes the concept to an entirely new level. It’s not just about adding olives; it’s about infusing every bite with the concentrated, savory essence of a perfectly crafted, spreadable tapenade. This innovative approach offers a multitude of benefits: it eliminates the need to painstakingly slather tapenade onto each slice (my previous, albeit delicious, method) because the intense flavor is already *in* the bread, elegantly swirled into its very core. The result is an unparalleled depth of flavor and an appealing visual marbling effect that makes this homemade bread a true showstopper. Consider it a delightful two-for-one deal – a delectable bread and its perfect savory companion, all harmoniously united in one glorious package.
Crafting the Perfect Olive Tapenade: A Purist’s Approach to Flavor
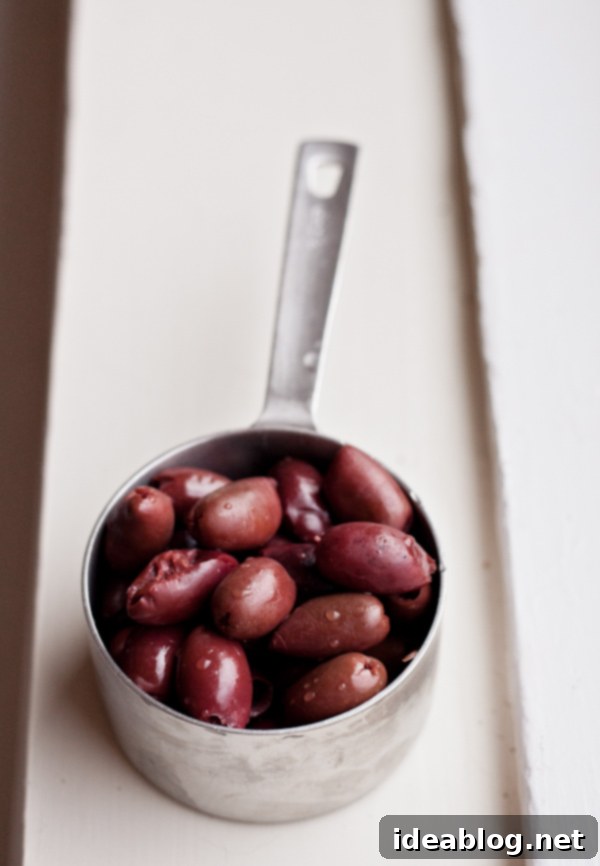
When it comes to olive tapenade, I confess to being a bit of a purist. Traditionally, tapenade is a vibrant, savory paste originating from the Provence region of France, celebrated for its simplicity and intense flavor. The classic recipe relies on a handful of high-quality ingredients to create a bold, unforgettable condiment. My preferred version adheres closely to this classic philosophy, utilizing the finest pitted Kalamata olives for their robust, fruity, and slightly wine-like notes. These are complemented by briny capers, pungent fresh garlic, umami-rich olive oil-packed anchovy fillets, and, of course, the essential drizzle of high-quality extra virgin olive oil to bind everything together. These core elements combine to create a symphony of Mediterranean flavors that truly shines through, especially when baked into bread.
The Secret to Exceptional Flavor: Light Sautéing for Depth
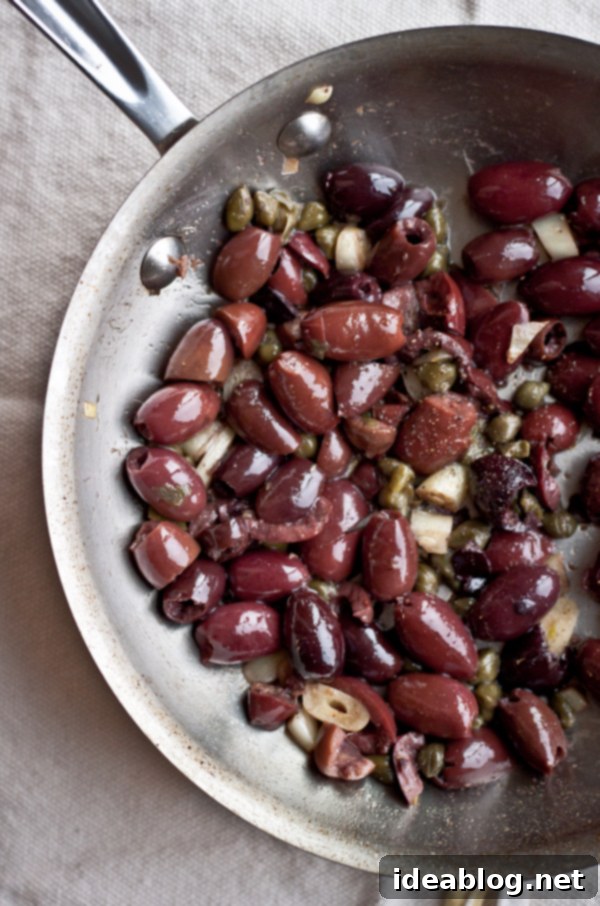
What sets this particular tapenade recipe apart, and what I’ve discovered through years of experimentation, is a subtle yet transformative preliminary step: lightly sautéing the key ingredients. Rather than simply pulsing everything raw in a food processor, a brief sauté in olive oil over medium heat performs culinary magic. This gentle cooking mellows the raw, sharp edge of the garlic, intensifies the savory notes of the anchovies and capers, and deepens the overall complexity and richness of the olives. This process coaxes out a much richer, more nuanced, and wonderfully aromatic flavor profile, making the tapenade incredibly irresistible. It’s a small, additional step that yields significant dividends in taste and makes all the difference when this flavorful paste is swirled and baked into our exquisite bread.
The Journey to Perfect Bread Dough: From Experimentation to Triumph
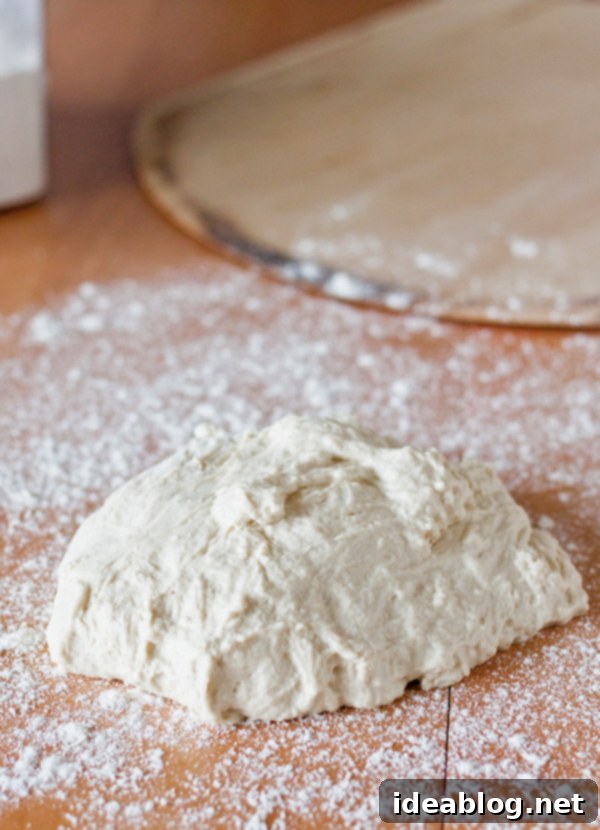
Developing the ideal bread component for this recipe was a journey filled with delightful (and sometimes slightly chaotic) experimentation. Over the past few weeks, my kitchen transformed into a bread-making laboratory, resulting in a considerable amount of dough. There was a memorable instance when a particularly ambitious batch of dough nearly took over my entire refrigerator—a fun clean-up adventure, to say the least! Another attempt involved stubbornly trying to shape the very wet and loose dough into a classic boule, complete with artistic slits on top. While the resulting loaf tasted fantastic, its appearance was, shall we say, uniquely rustic, and the coveted tapenade swirl was practically non-existent. At one point, my partner Connor and I even resorted to sketching bread diagrams, a testament to our dedication (and perhaps a touch of endearing desperation!) in achieving the perfect swirl.
Why a Loaf Pan is Key for the Ultimate Swirl and Uniformity
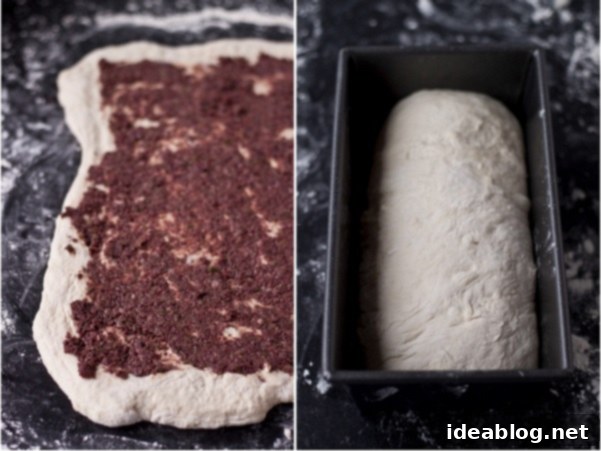
Ultimately, after much trial and error, I settled on using a classic loaf pan for baking, and for very good reason. The bread dough, by design, is intentionally wet and loose. This high hydration is absolutely crucial for achieving that incredibly soft, tender, and wonderfully airy crumb we all crave in a homemade loaf. Confining this wet dough within the structured environment of a loaf pan serves several crucial purposes: it helps the bread maintain its form and structure as it bakes, resulting in a beautifully uniform shape. Most importantly for this specific recipe, this method facilitates the best and most consistent tapenade marbling throughout the entire loaf. Rolling the dough, spreading the tapenade, and then rolling it again before placing it into the pan ensures that each slice reveals those gorgeous, savory ribbons of olive goodness, making every bite as visually appealing as it is delicious. While every homemade loaf will inevitably possess its own unique character – a slight variation here, a unique swirl there – that’s precisely part of the charm and inherent joy of baking your own artisan bread at home!
The Reward: A Loaf Beyond Expectation and a House Full of Aroma
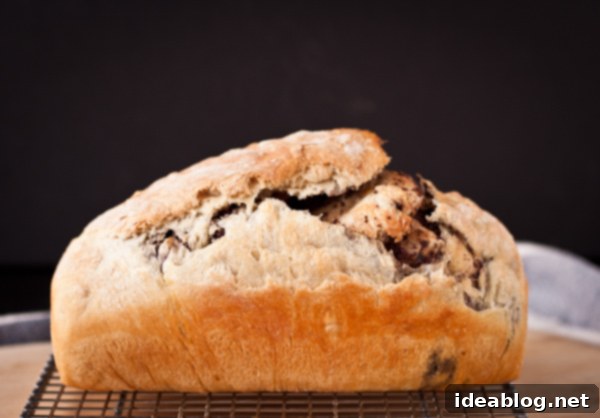
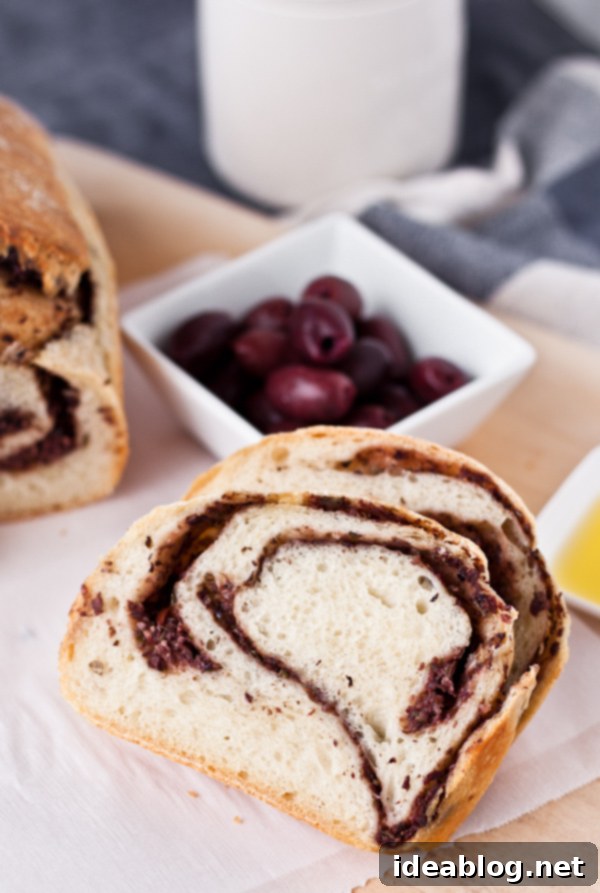
The culmination of these efforts is a bread that truly stands out and delights on every level. It boasts a perfectly balanced crust – just enough crispness and golden-brown hue to provide a satisfying bite, yet yielding immediately to an interior that is wonderfully soft, airy, and deeply satisfying. The carefully prepared olive tapenade, swirled generously throughout the dough, creates distinct ribbons of concentrated, briny, and savory flavor, transforming each slice into a delightful culinary adventure. I can confidently promise that you’ll find it nearly impossible to resist reaching for multiple slices, whether it’s for breakfast, a snack, or alongside a meal.
Furthermore, one of the most immediate and enchanting rewards of baking this bread is the truly tantalizing aroma that will fill your home during the baking process. The fragrant combination of warm bread, garlic, and olives creates a captivating scent that promises a delicious treat long before it emerges from the oven. Prepare to fall in love not only with the taste and texture of your new favorite savory bread but also with the inviting atmosphere it creates. Enjoy every marvelous bite!
Essential Tips for Homemade Bread Success
- **Embrace the Wet Dough:** Don’t be alarmed if your dough feels unusually wet and sticky after mixing. This high hydration is not a mistake; it’s the secret ingredient for achieving an incredibly soft, moist, and airy crumb in your finished bread. Resist the urge to add excessive amounts of extra flour during the initial mixing stage.
- **Cold Fermentation for Flavor:** The overnight chilling of the dough in the refrigerator is more than just a convenience factor; it’s a crucial step that allows the yeast to work slowly, developing deep, complex flavors and a superior texture that simply can’t be achieved with a quick room-temperature rise. Plan ahead for this vital step.
- **Proper Flour Dusting is Your Friend:** When it’s time to handle and shape the chilled dough, be generous with flour on your countertop, your hands, and your rolling pin. This liberal dusting prevents sticking and makes the rolling and shaping process much smoother and less frustrating.
- **Even Tapenade Spread for Beautiful Swirls:** When spreading the olive tapenade onto the rolled-out dough, aim for an even, thin layer. Leaving a small border around the edges helps to ensure that the tapenade doesn’t seep out during rolling and baking, contributing to a more defined and beautiful swirl pattern and consistent flavor distribution throughout the entire loaf.
- **Don’t Rush the Cooling Process:** While the temptation to slice into a warm, fragrant loaf straight from the oven is immense, patience is key. Allowing the bread to cool completely on a wire rack is essential for its final texture. Hot bread can be gummy and difficult to slice cleanly; cooling allows the internal starches to set and firm up, resulting in a perfect, sliceable crumb.
- **Make-Ahead Tapenade Convenience:** To streamline your baking day, prepare the olive tapenade up to a day in advance. Store it in a covered, airtight container in the refrigerator. This allows the flavors to meld even further and saves valuable time when you’re ready to assemble and bake your bread.
- **Test Your Yeast:** Before you begin, ensure your active dry yeast is still potent. Dissolve it in a small amount of the lukewarm water with a pinch of sugar. If it foams and becomes bubbly within 5-10 minutes, your yeast is active and ready to go!

Olive Tapenade Swirl Bread
Pin Recipe
Review Recipe
Save RecipeSaved!
Ingredients
Olive Tapenade (Yields 1 Cup):
- 1 tablespoon (15 mL) extra virgin olive oil
- 3 garlic cloves roughly chopped
- 1 tablespoon drained capers rinsed
- 3 olive oil-packed anchovy fillets roughly chopped
- 1 cup pitted kalamata olives rinsed
- kosher salt
- freshly ground black pepper
Bread Dough:
- 1½ cups (360 mL) lukewarm water
- 2¼ teaspoons active dry yeast
- 2¼ teaspoons kosher salt
- 3¼ cups (390 g) unbleached all-purpose flour plus more for dusting
Instructions
-
1. Prepare Tapenade: Heat the extra virgin olive oil in a small skillet over medium heat. Add the roughly chopped garlic cloves and sauté for 1 to 2 minutes, stirring constantly, until fragrant but not browned. Add the drained and rinsed capers, anchovy fillets (roughly chopped), and rinsed pitted Kalamata olives. Sauté for an additional 3 to 4 minutes, allowing the flavors to meld and deepen. Remove the skillet from heat and allow the mixture to cool down in the pan until it reaches lukewarm or room temperature. Transfer the cooled tapenade mixture to the bowl of a small food processor.
-
2. Process Tapenade: Pulse the mixture several times, stopping as needed to scrape down the sides of the bowl with a spatula, until the ingredients combine into a coarse, spreadable paste. Be careful not to over-process; you want some texture, not a completely smooth purée. Season with kosher salt and freshly ground black pepper to taste. Transfer the finished tapenade to an airtight container. If using immediately, ensure it is at room temperature. Otherwise, chill it in the fridge. This tapenade can be made up to a day in advance and stored in a covered container in the refrigerator, allowing its flavors to further develop.
-
3. Prepare Dough: In a large container or bowl (preferably one with a non-airtight lid to allow for gas release during rising), whisk together the lukewarm water, active dry yeast, and kosher salt until the yeast dissolves. Gradually add the unbleached all-purpose flour, mixing initially with a dough whisk or a sturdy wooden spoon. As the dough becomes too difficult and thick to stir, use your hands to gently mix until all the flour is fully incorporated and the dough appears uniform. It’s crucial that the dough remains very wet and sticky – this is key to its soft texture. Do not knead it. Lightly cover the container (do not seal tightly) and allow the dough to rise at room temperature for at least two hours, or until visibly expanded. After the initial rise, place the covered container in the refrigerator and allow the dough to chill overnight (for at least 12 hours, or up to a week) to develop optimal flavor and texture.
-
4. Prepare for Baking: On baking day, preheat your oven to 425°F (220°C). Grease a standard 9 x 5 inch loaf pan thoroughly with butter or non-stick spray and set it aside. This preparation ensures easy removal of the baked loaf.
-
5. Roll Out Dough: Liberally flour your clean countertop. Gently scrape the chilled dough onto the floured surface. Dust the top of the dough with a bit more flour. Using a floured rolling pin, carefully roll the dough into a rectangle approximately 10-inches x 13-inches. Don’t stress if the shape isn’t perfectly precise; close enough is fine. Periodically move the dough and add more flour underneath if necessary to ensure it doesn’t stick to the countertop.
-
6. Spread Tapenade & Swirl: Evenly spread about ½ cup of the prepared olive tapenade over the entire surface of the rolled-out dough, making sure to leave a ½-inch border clear around the edges. Carefully roll up the dough tightly, starting from one of the short ends and rolling towards the other short end. Once rolled, firmly pinch the seam together along the length of the loaf to seal it securely. Place the rolled dough into the prepared loaf pan with the seam side facing down. Lightly cover the pan with a clean kitchen towel and allow it to rest at room temperature for an additional 15 to 20 minutes. This short rest allows the dough to relax and rise slightly before baking.
-
7. Bake & Cool: Bake the bread in the preheated oven for 50 to 60 minutes, or until the crust is golden brown and the internal temperature, measured with an instant-read thermometer inserted into the center of the loaf, reads between 190°F-200°F (88°C-93°C). Once baked, remove the pan from the oven and allow the bread to cool in the pan on a wire rack for 10 minutes. After 10 minutes, carefully remove the loaf from the pan and place it directly on the wire rack to cool completely. It’s crucial to allow the loaf to cool completely before slicing to ensure the best texture and prevent a gummy interior. Patience will be rewarded!
Notes:
- The bread dough can be made ahead of time and kept in the refrigerator in a covered, non-airtight container for up to one week. This makes fresh bread readily available throughout the week with minimal effort.
- Ensure your yeast is active for proper rising. Test it by dissolving it in lukewarm water with a pinch of sugar; it should foam within 5-10 minutes.
- For an extra crispy crust, you can place a pan of hot water on the bottom rack of your oven during the first 15-20 minutes of baking.
Basic dough proportions adapted from Artisan Bread in Five Minutes a Day.
