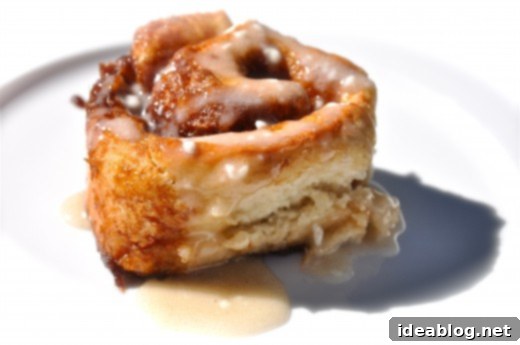
Quick & Easy Yeast Free Cinnamon Rolls: Indulge in Deliciousness Without the Wait
Imagine the aroma of freshly baked cinnamon rolls wafting through your kitchen, but without the hours of waiting for dough to rise. Sound like a dream? It’s now a delicious reality with these incredible yeast free cinnamon rolls! This recipe eliminates the need for any proofing time, meaning you can go from craving to enjoying these warm, sticky buns in less than an hour.
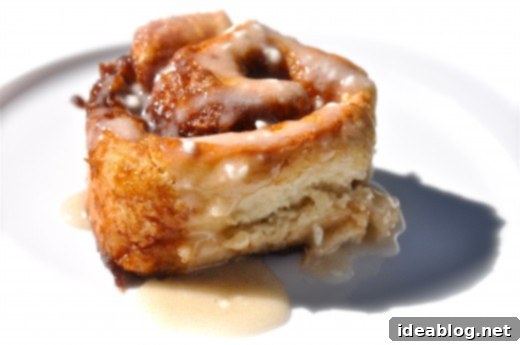
Life is busy, and sometimes a sudden craving for something sweet and comforting like cinnamon rolls strikes without warning. Traditional cinnamon roll recipes, while undeniably delicious, often come with a significant time commitment, primarily due to the yeast proofing process. But what if we told you it’s entirely possible to whip up a batch of delectable cinnamon rolls in under an hour, with absolutely no yeast required? It is possible, and these cinnamon rolls without yeast are here to prove it!
These speedy cinnamon buns are the perfect solution for those last-minute dessert emergencies, a spontaneous brunch treat, or simply when you discover your pantry is out of active dry yeast. They’re incredibly simple to make, using common baking ingredients you likely already have on hand, and deliver all the warm, gooey goodness you expect from a classic cinnamon roll, just with a slightly different (but equally delightful!) texture.
The Secret to Speedy Cinnamon Rolls: Chemical Leaveners
The ingenious trick behind making these amazing yeast free cinnamon rolls lies in substituting traditional active dry yeast with readily available chemical leavening agents: baking powder and baking soda. Instead of relying on yeast to produce carbon dioxide and make the dough rise slowly, these ingredients react with liquids (especially acidic ones like buttermilk) and heat to create gas bubbles almost instantly, causing the rolls to rise beautifully during baking.
This method completely bypasses the need for the time-consuming proofing stage, allowing you to prepare, bake, and enjoy your cinnamon rolls in a fraction of the time. This technique, notably championed by culinary experts like Cook’s Illustrated magazine, ensures a delicious outcome even without yeast.
Understanding the Texture Difference
It’s important to set expectations regarding the texture of these no yeast cinnamon rolls. Since they don’t contain yeast, they will naturally have a more cake-like, biscuit-like crumb compared to the super soft, chewy, and slightly elastic texture of traditional yeasted cinnamon rolls. This is a fundamental difference inherent to the leavening method.
While the texture is distinct, it doesn’t diminish their deliciousness or decadence. In fact, many people prefer the slightly denser, tender crumb of a baking powder-leavened dough. They are incredibly moist, tender, and packed with that classic cinnamon sugar swirl and rich icing. Think of them as a delightful hybrid: all the flavor and comfort of a cinnamon roll, with the speed and satisfying bite of a scone or biscuit. They are just as delicious and indulgent, but significantly easier and faster to make.
Why Choose No Yeast Cinnamon Rolls?
Beyond the simple convenience of not having yeast on hand, there are several compelling reasons to embrace this quick cinnamon roll recipe:
- Speed: The most obvious benefit! From mixing to baking to devouring, you’re looking at under an hour. Perfect for last-minute guests or urgent sweet cravings.
- Simplicity: No complex yeast activation, no multiple proofs, no worrying about dough temperature. It’s a straightforward baking process that even beginners can master.
- Pantry Staples: All-purpose flour, sugar, butter, baking powder, baking soda, and buttermilk are common ingredients that most home bakers keep in their kitchens.
- Consistently Delicious: While the texture differs, the flavor profile is spot on. That sweet, spicy cinnamon filling and creamy icing remain the stars of the show.
- Dietary Considerations: For those who have sensitivities or preferences against yeast, this recipe offers a fantastic alternative without sacrificing flavor.
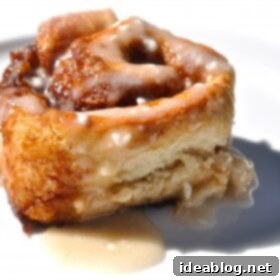
Yeast Free Cinnamon Rolls Recipe
Pin
Review
SaveSaved!
Equipment
-
9-Inch (23 cm) Round Cake Pan
-
Large Mixing Bowls
-
Whisk
-
Rolling Pin
-
Pastry Brush
-
Sharp Knife or Bench Scraper
-
Small Food Processor (for icing, or simply a whisk)
-
Wire Rack
Ingredients
Cinnamon Sugar Filling:
- ¾ cup packed dark brown sugar (adds deep molasses flavor)
- 1 tablespoon powdered sugar (helps create a softer filling)
- 2 heaping teaspoons ground cinnamon (the star spice!)
- pinch ground cloves (enhances cinnamon flavor)
- ⅛ teaspoon kosher salt (balances sweetness)
- 1 tablespoon unsalted butter melted (binds the filling)
Yeast Free Dough:
- 2 cups (240g) unbleached all-purpose flour (provides structure)
- ½ cup (60g) whole wheat flour (adds depth of flavor and tenderness)
- 2 tablespoons (24g) granulated sugar (sweetens the dough)
- 1½ teaspoons baking powder (primary leavener for rise)
- ½ teaspoon baking soda (reacts with buttermilk for additional lift)
- ½ teaspoon kosher salt (enhances all flavors)
- 1¼ cup (300 mL) buttermilk (adds tang and activates baking soda)
- 1 tablespoon (15g) unsalted butter melted (for dough richness)
For Shaping and Baking:
- 4 tablespoons (60g) unsalted butter melted and divided (for brushing dough and rolls)
Maple Cinnamon Icing:
- 2 tablespoons (30 mL) buttermilk (for smooth consistency and slight tang)
- 1 tablespoon cream cheese softened (for richness and creamy texture)
- 1 tablespoon pure maple syrup (adds wonderful flavor and sweetness)
- ½ teaspoon ground cinnamon (ties into the roll’s flavor)
- ¾ cup powdered sugar sifted (for smooth, lump-free icing)
Instructions
-
1. Prepare the Cinnamon Sugar Filling: In a medium-sized bowl, combine the dark brown sugar, powdered sugar, ground cinnamon, ground cloves, and kosher salt. Pour in the 1 tablespoon of melted unsalted butter and mix everything thoroughly until a thick, crumbly paste forms. This paste is crucial for that gooey center. Set this flavorful mixture aside.
-
2. Preheat Oven and Prep Pan: Preheat your oven to 425°F (220°C). Position an oven rack in the center of the oven. Lightly grease a 9-inch (23 cm) round cake pan with butter. This will prevent the rolls from sticking and help them achieve a beautiful golden-brown bottom crust. Set the prepared pan aside.
-
3. Combine Dry Dough Ingredients: In a large mixing bowl, whisk together the unbleached all-purpose flour, whole wheat flour, granulated sugar, baking powder, baking soda, and kosher salt. Whisking ensures that the leavening agents and salt are evenly distributed throughout the flours, which is vital for an even rise. Set this bowl of dry ingredients aside.
-
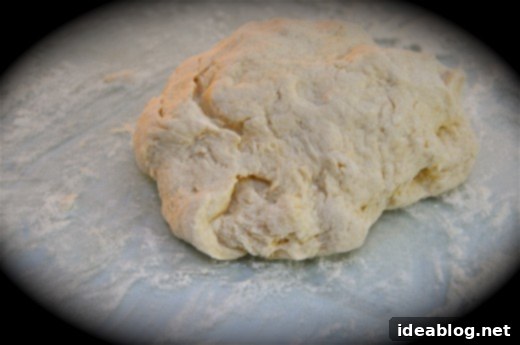
4. Mix Wet Dough Ingredients and Form Dough: In a separate medium bowl, whisk together the buttermilk and 1 tablespoon of melted unsalted butter until well combined. Gradually add this wet mixture to the dry ingredients in the large bowl. Stir with a spoon or spatula until the ingredients are *just* combined. The dough will appear shaggy and quite wet at this stage, which is perfectly normal. Avoid overmixing, as this can lead to tough rolls.
-
5. Knead the Dough: Lightly flour a clean countertop or a large pastry mat. Transfer the shaggy dough onto the floured surface. Knead the dough gently for approximately 1 to 2 minutes, just until it becomes smooth and cohesive. The goal is to bring the dough together, not to develop excessive gluten like with yeasted dough. If the dough is too sticky, add a very small amount of flour, but try not to add too much.
-
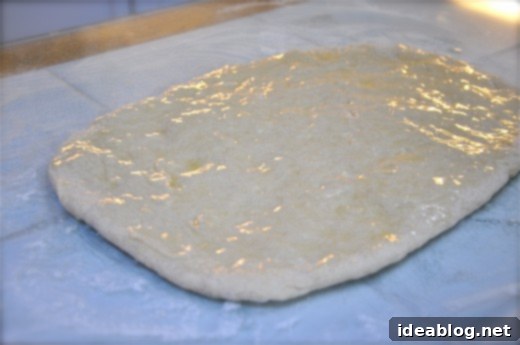
6. Shape the Dough Rectangle: Using your hands or a rolling pin, pat or roll the dough into a roughly 9 x 12 inch (23 x 30 cm) rectangle. Aim for an even thickness across the entire rectangle to ensure uniform rolls. Don’t stress too much about perfect edges; they will be rolled up. Brush the entire surface of the dough with 2 tablespoons of the melted butter, leaving a small border free of butter if desired for better sealing.
-
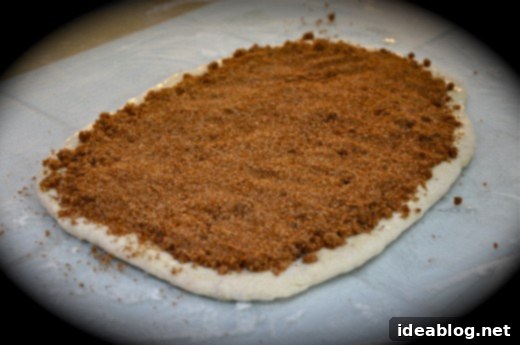
7. Apply the Filling: Evenly sprinkle the prepared cinnamon sugar filling over the buttered dough, leaving a ½-inch border clear on all sides. Gently press down on the sugar filling with your fingertips to help it adhere to the dough and prevent it from falling out during rolling.
-
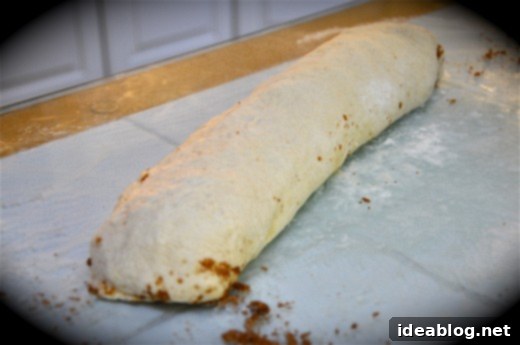
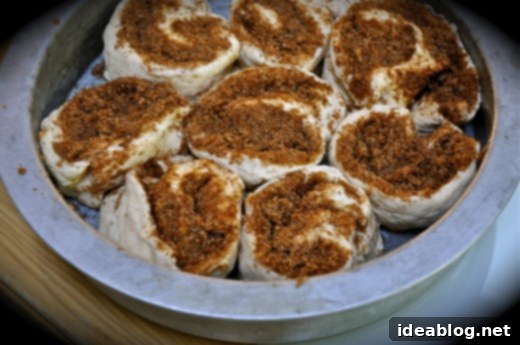
8. Roll and Slice: Starting from one of the long edges of the rectangle, carefully and tightly roll the dough into a log. Once rolled, pinch the seam firmly to seal it completely, then place the log seam-side down on your work surface. To get 8 equally sized rolls, it’s helpful to first slice the log in half, then slice each half in half, and finally slice each quarter in half. This method helps ensure uniformity. Arrange these 8 slices, spiral side facing up, into your greased 9-inch cake pan. Don’t worry if there are small gaps between the rolls; they will expand and fill the pan as they bake. Brush the tops of the buns with the remaining 2 tablespoons of melted butter for extra richness and golden-brown tops.
-
9. Bake the Rolls: Transfer the pan to your preheated oven and bake for 23 to 25 minutes. The rolls are ready when they are beautifully golden brown on top and cooked through. While your delicious no yeast cinnamon rolls are baking, it’s the perfect time to prepare the maple icing.
-
10. Prepare the Maple Cinnamon Icing: In a small food processor (or using a whisk and a bowl for a slightly thicker consistency), combine all of the icing ingredients: buttermilk, softened cream cheese, pure maple syrup, ground cinnamon, and sifted powdered sugar. Pulse or whisk until the icing is completely smooth and creamy. If it’s too thick, add a tiny bit more buttermilk; if too thin, add a touch more powdered sugar.
-
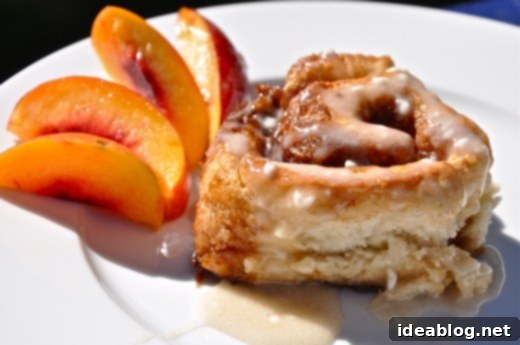
11. Serve and Enjoy: Once the cinnamon rolls are out of the oven, immediately transfer the hot pan to a wire rack. While they are still warm, generously drizzle the smooth maple icing over the top of the rolls. The warmth of the rolls will allow the icing to slightly melt and seep into every crevice, creating an incredibly decadent finish. Serve your freshly baked yeast free cinnamon rolls warm and savor every bite!
Tips for Making the Best Yeast Free Cinnamon Rolls
To ensure your no yeast cinnamon rolls turn out perfectly every time, keep these essential tips in mind:
- Measure Flour Accurately: For baking, especially with quick breads and doughs, accurate flour measurement is key. Use a kitchen scale for the most precise results (grams are provided in the recipe!), or use the spoon-and-level method: spoon flour into your measuring cup and level it off with a straight edge, without packing it down. This prevents adding too much flour, which can lead to dry rolls.
- Don’t Overmix the Dough: Overmixing can develop too much gluten, resulting in tough rolls. Mix until just combined, and knead only enough to make the dough smooth (1-2 minutes is usually sufficient). The less you handle the dough, the more tender your easy cinnamon rolls will be.
- The Role of Buttermilk: Buttermilk is crucial here. Its acidity reacts with baking soda to produce carbon dioxide, which gives the rolls their rise. If you don’t have buttermilk, you can make a quick substitute (see FAQ below).
- Ensure Even Rolling: Try to roll your dough into a uniform 9×12 inch rectangle. This helps ensure that all your cinnamon rolls are roughly the same size and bake evenly, preventing some from being overdone while others are underbaked.
- Tight Roll is Key: When rolling the dough into a log, make sure it’s as tight as possible. A tight roll creates those beautiful, defined spirals and helps prevent the delicious filling from oozing out during baking, keeping it neatly tucked inside.
- Don’t Overbake: Keep a close eye on your rolls, as ovens can vary. Overbaking can dry them out and make them less tender. They should be beautifully golden brown on top and cooked through, but still feel soft to the touch.
- Warm Rolls, Melty Icing: For that ultimate gooey experience, drizzle the icing over the rolls while they are still warm, fresh from the oven. The warmth helps the icing melt slightly, creating an irresistible glaze that seeps into every crevice, enhancing the overall decadence.
Variations to Try
While the classic maple cinnamon combination is divine, feel free to get creative with your quick cinnamon rolls and customize them to your liking!
- Nutty Delight: Add finely chopped pecans, walnuts, or almonds (about ½ cup) to your cinnamon sugar filling for extra crunch and a rich, nutty flavor that complements the spices beautifully.
- Orange Zest Twist: Incorporate 1-2 teaspoons of fresh orange zest into the dough, the filling, or even the icing for a bright, citrusy note that pairs wonderfully with cinnamon and adds a delightful aroma.
- Cream Cheese Glaze: If you prefer a more traditional cream cheese frosting, simply adjust the icing recipe by increasing the cream cheese slightly (to 2-3 tablespoons) and omitting maple syrup, or adding a touch of vanilla extract for a classic tang.
- Chocolate Swirl: For a truly decadent treat, sprinkle mini chocolate chips or a dusting of cocoa powder along with the cinnamon sugar filling. The melted chocolate will create pockets of indulgence.
- Apple Cinnamon: Finely dice a small apple (like a Granny Smith for a slight tartness, or Honeycrisp for sweetness) and mix it into your cinnamon sugar filling for a seasonal twist. Just ensure the pieces are very small so they cook through adequately.
- Spiced Pecan Filling: Instead of just cinnamon, experiment with other warm spices like nutmeg, cardamom, or ginger in your filling, and add toasted pecans for an elevated flavor profile.
Storage and Reheating
These easy cinnamon rolls are best enjoyed fresh and warm from the oven, when the icing is perfectly melty and the rolls are at their most tender. However, if you happen to have leftovers, here’s how to store and reheat them to maintain their deliciousness:
- At Room Temperature: Store cooled cinnamon rolls in an airtight container at room temperature for up to 2-3 days. While the icing may lose some of its initial sheen, the rolls will still be wonderfully tasty and soft.
- In the Refrigerator: For slightly longer storage, you can keep them in an airtight container in the fridge for up to 5 days. Be aware that the dough might firm up a bit in the cold.
- Freezing Unbaked Rolls: If you want to prepare ahead, you can freeze the rolls before baking. Once sliced and arranged in the pan (without the butter brushed on top), cover the pan tightly with plastic wrap, then with aluminum foil, and freeze for up to 1 month. When ready to bake, place the frozen rolls directly into a cold oven, then preheat to 375°F (190°C) and bake for 30-35 minutes, or until golden brown and cooked through. Brush with melted butter halfway through baking.
- Freezing Baked Rolls: Fully baked and cooled rolls (with or without icing) can also be frozen. Wrap them individually or in a single layer in an airtight container, or wrap the entire pan tightly with plastic wrap and then foil. Freeze for up to 1-2 months. Thaw at room temperature for a few hours before reheating.
- Reheating: To reheat individual rolls, place them in the microwave for 15-30 seconds until warm and soft. For multiple rolls, warm them in a preheated oven at 300°F (150°C) for 5-10 minutes. If reheating frozen baked rolls, you may need a slightly longer oven time. If they were un-iced before freezing, you can prepare fresh icing to drizzle on top after reheating.
Frequently Asked Questions About No Yeast Cinnamon Rolls
- Q: Can I substitute regular milk for buttermilk?
- A: Buttermilk is crucial for the chemical reaction with baking soda, which helps these rolls rise and achieve their tender texture. If you don’t have store-bought buttermilk, you can easily make a DIY version: pour 1¼ cups of regular milk (dairy or non-dairy, but full-fat works best) into a liquid measuring cup, then add 1 tablespoon of white vinegar or lemon juice. Stir briefly and let it sit for 5-10 minutes until it slightly curdles. Then use as directed in the recipe.
- Q: Can I make the dough ahead of time and bake later?
- A: Unlike yeasted dough, which can be proofed overnight, this dough relies on baking powder and baking soda. These leavening agents start reacting immediately upon contact with liquid. For the best rise and texture, it’s recommended to bake these rolls shortly after preparing the dough. You can, however, prepare the dry ingredients and the filling ahead of time and store them separately. When you’re ready to bake, simply combine the wet ingredients with the dry, form the rolls, and bake immediately!
- Q: My rolls didn’t rise much, what happened?
- A: This could be due to several factors: expired baking powder or baking soda (they lose potency over time, so always check their freshness!), overmixing the dough which can inhibit rise, or not having a hot enough oven. Ensure your leavening agents are fresh and your oven is accurately preheated to the specified temperature. Also, try to handle the dough gently.
- Q: Can I make these dairy-free?
- A: Yes, you can absolutely make these cinnamon rolls without yeast dairy-free! You’ll need to use a dairy-free buttermilk substitute (as described above, using a plant-based milk like almond or soy with lemon juice/vinegar) and use a high-quality dairy-free butter substitute for both the dough and the filling. For the icing, use dairy-free cream cheese and plant-based milk for the buttermilk component to ensure it’s fully dairy-free.
- Q: What if I don’t have whole wheat flour?
- A: No problem! You can substitute the whole wheat flour with an equal amount of unbleached all-purpose flour. The whole wheat flour adds a subtle depth of flavor and a touch of tenderness, but the rolls will still be delicious and rise well with all-purpose flour alone.
- Q: How do I get a perfectly gooey center?
- A: The key to a gooey center is ensuring your filling is well-distributed and pressed gently into the dough. The melted butter in the filling also helps create that moist, sticky texture. Don’t overbake, as this can dry out the center. Baking just until golden brown will keep them perfectly soft inside.
Conclusion: A New Favorite for Quick Treats
These yeast free cinnamon rolls are more than just a quick fix; they’re a testament to how adaptable and delicious home baking can be. Whether you’re pressed for time, new to baking, or simply prefer a lighter, cake-like texture, these no-proof cinnamon buns are sure to become a cherished recipe in your repertoire. They offer all the warmth, spice, and sweet satisfaction of traditional cinnamon rolls, but with unparalleled speed and ease. Say goodbye to long waiting times and hello to instant cinnamon roll gratification. Bake a batch today and experience the joy of homemade goodness, fast!
