Flaky Butternut Squash & Feta Hand Pies: A Savory Winter Delight
Indulge in these exquisitely savory and flaky butternut squash hand pies, generously filled with perfectly roasted vegetables and tangy feta cheese – a true winter comfort food that’s both elegant and wonderfully portable.

As the chill of winter truly settles in, there’s nothing quite like warming up with hearty, homemade dishes. In my continuous quest to embrace the colder months with delicious, seasonal ingredients, I’m thrilled to share another delightful butternut squash recipe with you! This versatile gourd has become a true staple in my kitchen, proving its adaptability across a spectrum of culinary creations.
Butternut squash, with its naturally sweet and earthy flavor profile, has graced many of my favorite recipes. From the sophisticated Butternut Squash Tartines, to my go-to Roasted Brussels Sprouts and Squash side dish, it consistently adds depth and comfort. I’ve even pureed it to create a silky Roasted Butternut Squash Soup and added it for a unique twist in my Fully Loaded Guacamole. Given its incredible versatility and widespread appeal, it was only a matter of time before I channeled its deliciousness into a portable and utterly satisfying form: the **Butternut Squash Hand Pie**.
The Allure of Savory Hand Pies
While many associate hand pies with sweet fillings like apples or berries, I have always held a special affection for savory pastries. My love for a rich, hearty, and non-dessert pie is well-documented, as evidenced by my popular Roasted Butternut Squash Pie. The concept of a savory handheld delight has been brewing in my mind for quite some time, manifesting in various ideas before finally settling on these irresistible hand pies. They offer all the comforting appeal of a traditional pie, but in a more playful, individualized, and perfectly portable format.
Imagine a sophisticated, gourmet version of a toaster pastry, but savory and made with real, wholesome ingredients. That’s precisely what these butternut squash hand pies deliver. Miniature and designed for eating on the go, they embody the ultimate fun food experience, whether you’re packing them for lunch, a picnic, or serving them as an elegant appetizer. Their individual portions make them perfect for entertaining or simply enjoying a quick, satisfying meal.
Crafting the Perfect Savory Filling
Choosing butternut squash as the primary filling for these hand pies felt like an intuitive decision. Its inherent mild sweetness and firm texture are ideal, as it doesn’t release excessive moisture during cooking, which is crucial for preventing soggy pastry—the absolute last thing you want in a hand pie! Furthermore, butternut squash’s adaptable flavor profile allows it to harmonize beautifully with a wide array of ingredients, making it an excellent canvas for building complex and satisfying flavors.
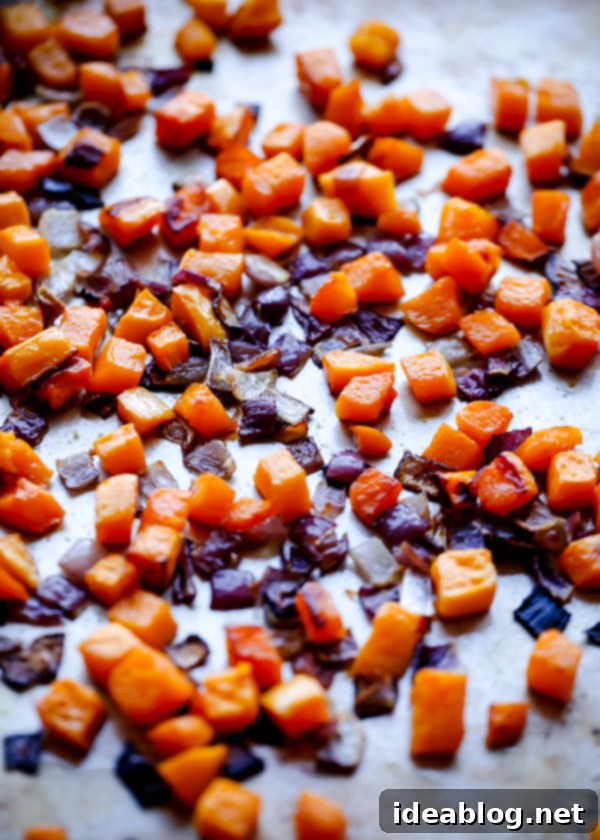
To prepare the squash, I opted for my favorite method: roasting. Roasting not only cooks the squash quickly but also intensifies its natural sweetness and develops a lovely depth of flavor through caramelization. This simple technique transforms the squash, making it incredibly tender and flavorful, ready to become the star of our hand pies.
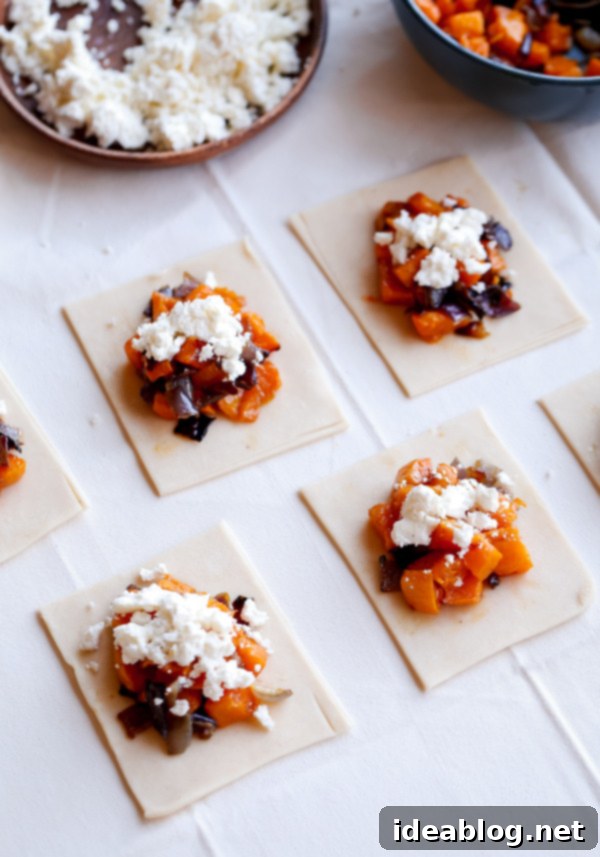
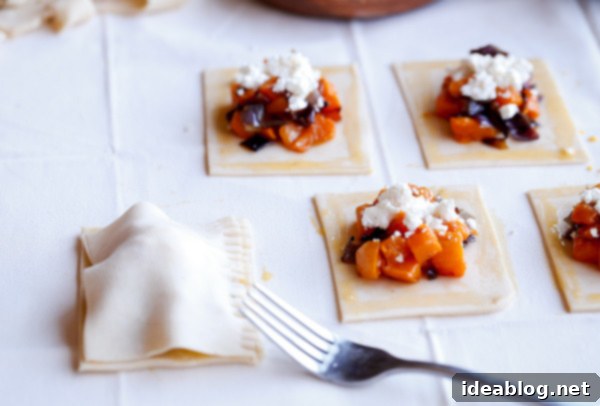
To introduce a delightful contrast and enhance the overall taste, I incorporated diced red onions into the filling (though any type of onion would work wonderfully!). As the onions roast alongside the butternut squash, they gradually caramelize, developing a delicate sweetness and a subtle, appealing bitterness that perfectly balances the squash’s richness. This combination creates a truly harmonious flavor profile that is both comforting and intriguing.
Taking inspiration from a unique recipe, Butternut Squash Locro, I decided to add tangy, salty feta cheese to the mix. If you’ve never experienced the magic of butternut squash paired with feta, prepare to be amazed. The creamy, slightly sweet squash finds its perfect counterpart in the salty, briny notes of the feta, creating a “match made in heaven” that elevates these hand pies to an extraordinary level of deliciousness. The feta melts just enough to become creamy, providing a wonderful textural and flavor counterpoint.
Mastering the Flaky Pie Dough
While creating individual hand pies might seem like a more labor-intensive process compared to a single large pie, the steps are easily manageable and can even be broken down over time. Both the savory filling and the pie dough can be prepped ahead of time, significantly simplifying assembly day. This make-ahead capability makes these hand pies a fantastic option for meal prep or for when you need a quick, delicious bite.
My hand pie dough recipe is designed to be forgiving and comes together quickly, making it accessible even for those new to pastry making. While there are numerous schools of thought on the ultimate method for preparing pie dough, I find the food processor to be an invaluable tool. It dramatically speeds up the process, ensuring that the butter remains cold—a critical factor for a truly flaky crust—and helps prevent overworking the dough. Overworked dough develops too much gluten, resulting in a tough, rather than tender, pastry. The food processor also helps achieve a consistently textured dough, which, in my humble opinion, is *particularly* important for the delicate nature of hand pies, ensuring each bite is perfectly flaky.
Achieving a perfectly flaky pie crust relies on a few key principles. First, always use very cold butter, cut into small cubes. This creates pockets of steam during baking, which separate the layers of dough, giving you that coveted flaky texture. Second, don’t overmix the dough. The goal is to just bring the ingredients together until they form a cohesive mass, with some visible bits of butter still present. This “shaggy” texture is a good sign! Finally, adequate chilling time is essential. Refrigerating the dough allows the gluten to relax and the butter to firm up again, making the dough easier to roll and ensuring a superior texture once baked.
Assembly and Serving Suggestions
Please don’t be intimidated by the detailed instructions in today’s recipe! While brevity isn’t always my strong suit, I’ve aimed to be as thorough as possible to ensure the assembly process is clear, easy-to-follow, and ultimately leads to success in your kitchen. Each step is designed to guide you through creating these beautiful and delicious hand pies with confidence.
These savory butternut squash feta hand pies are wonderfully versatile. They make a perfect and satisfying snack on their own, offering a burst of flavor and a comforting texture. However, they also shine when paired with other dishes. Consider serving them alongside a simple green salad dressed with a light vinaigrette for a balanced and delightful dinner. A warm bowl of your favorite soup would also complement their richness beautifully. And for those busy days, they are ideal for packing into lunchboxes or enjoying as a convenient, delicious meal on-the-go. Their sturdy, portable nature makes them a fantastic alternative to sandwiches.
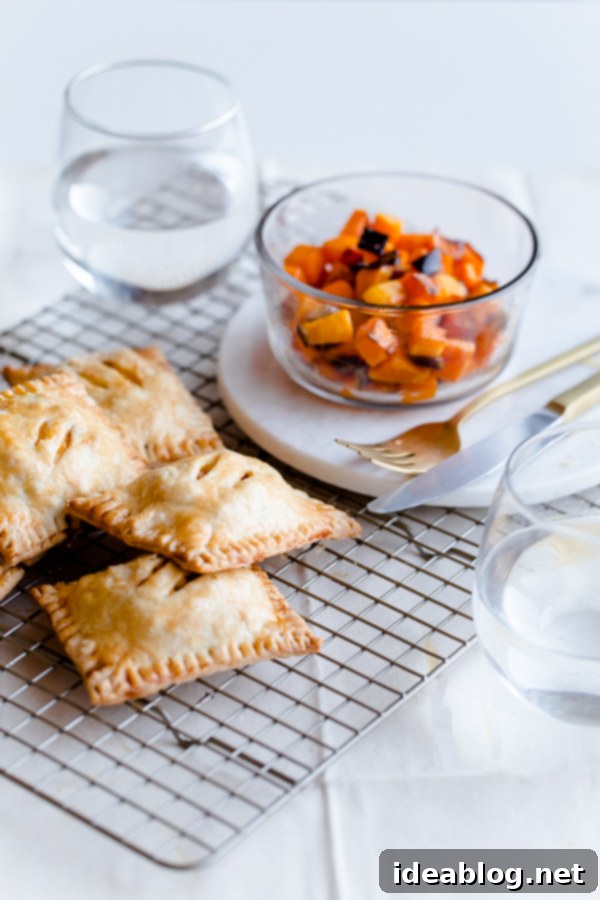

Butternut Squash Feta Hand Pies
Pin
Review
SaveSaved!
Equipment
-
2 Half Sheet Pan
Ingredients
Pie Dough:
- 1½ cups (180g) unbleached all-purpose flour plus more for dusting
- ½ teaspoon kosher salt
- 4 oz (8 tablespoons; 115g) cold unsalted butter cut into ¼-inch cubes
- ¼ cup (60 mL) ice water
Filling:
- 1 lb (16 oz) butternut squash trimmed, peeled, and cut into ½-inch chunks
- ½ red onion diced
- 2 tablespoons extra virgin olive oil
- kosher salt
- freshly ground pepper
- 1-2 ounces feta cheese crumbled
Egg Wash:
- 1 large egg beaten
Instructions
-
Prepare Pie Dough: Combine the flour and salt in the bowl of a large food processor. Pulse several times to mix thoroughly.
-
Add the butter and pulse several times until the butter is thoroughly incorporated and the texture resembles that of a coarse meal—you want the butter pieces to be in varying sizes, some small and others slightly larger. This will result in a flakier texture.
-
While pulsing, slowly add the water – you may not need all of it or you may need a touch more – and continue to pulse until the dough just begins to clump together loosely.
-
Remove the dough to a clean counter top, shape together with your hands into a square disc, and cover tightly in plastic wrap. Refrigerate the dough for 1½ to 2 hours. The dough can also be prepped in advance, wrapped tightly in plastic wrap, and refrigerated for 1-2 days.
-
Filling: Preheat the oven to 425°F (220°C) with a rack in the center position. Combine the cubed butternut squash and diced red onion on a half sheet pan and toss with the extra virgin olive oil, and season with salt and pepper. Spread out evenly onto the baking sheet.
-
Roast the vegetables for 20 to 28 minutes, tossing with a wooden spoon every halfway, or until the vegetables have softened and have begun to caramelize. Set onto a rack to cool completely.
-
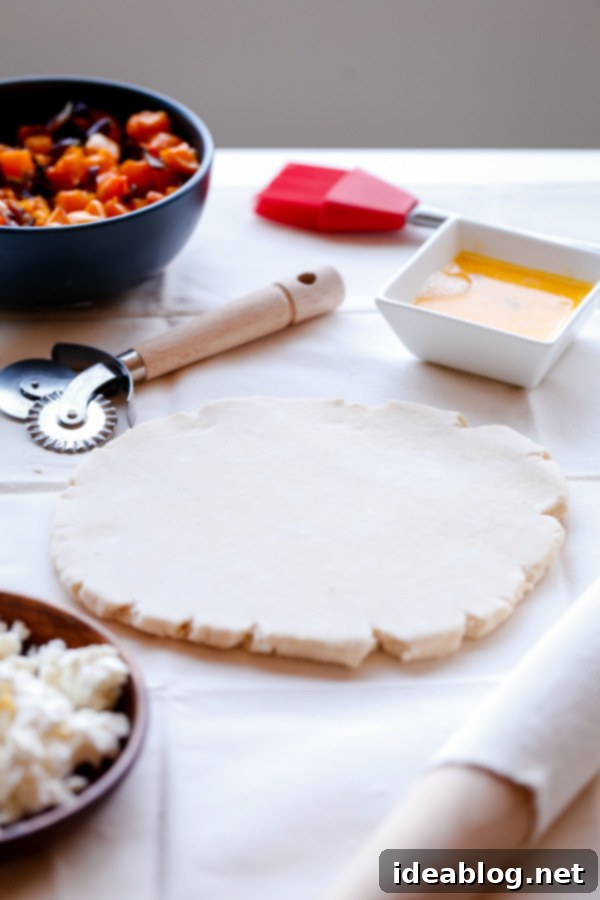
Assembly: Reduce the oven to 375°F (190°C). Set aside the egg wash and a pastry brush. Line two half sheet pans with parchment paper.
-
Remove the pie dough from the fridge, and allow it to rest at room temperature for 5 to 10 minutes. Once it has rested, place the dough on a lightly floured counter top.
-
Using a lightly floured rolling pin, roll the dough into a square that is slightly larger than 12 x 12-inches (don’t worry if the edges are not perfectly straight). Using a pastry cutter or knife, trim off the rough edges. Using a pastry cutter, cut the dough into 12 (3 x 4-inch) rectangles. Note: The easiest way to do this is to use a ruler to notch one side of the square of dough at 4-inch intervals and the perpendicular side of the square at 3-inch intervals). Use the ruler to line up the notches and cut the dough into 12 rectangles.
-
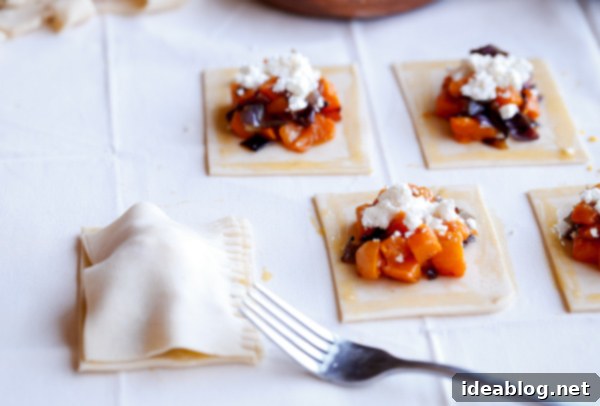
Place six of the pie dough rectangles onto the lined sheet pan. Place the remaining six pie dough pieces on a separate parchment-paper lined sheet pan sheet and chill in the refrigerator while you work. Using a spoon, portion the butternut squash onion filling into the center of each rectangle, pressing down slightly to compact the filling into a mound, leaving a ½-inch border on all sides. Sprinkle the tops of the squash and onion with crumbled feta, dividing the cheese evenly among the pies.

-
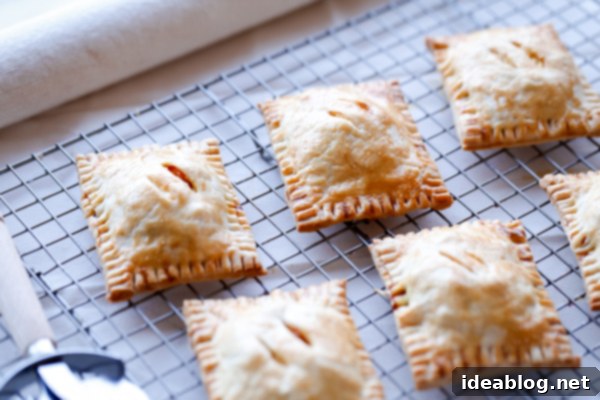
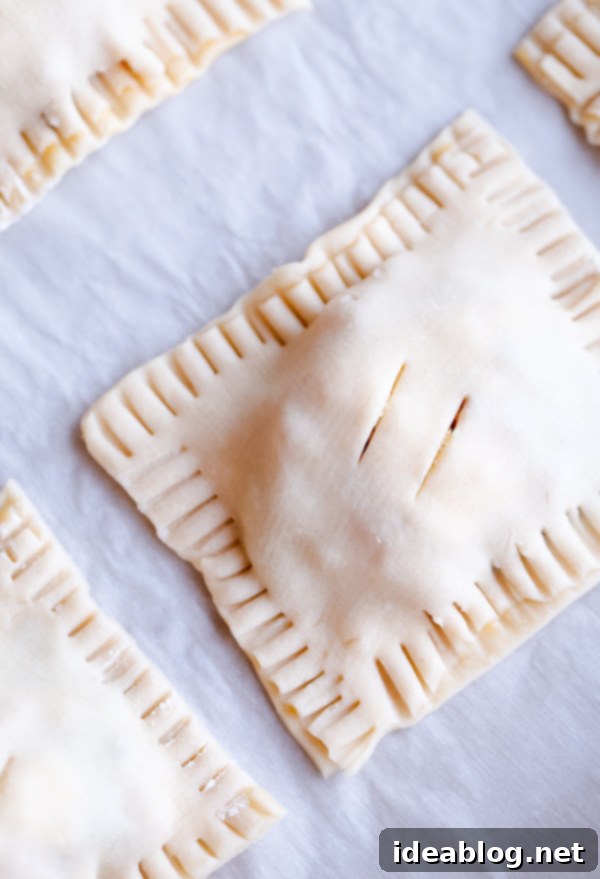
Using a pastry brush, brush the border lightly with the egg wash. Remove the remaining dough rectangles from the fridge. Using the lightly floured rolling pin, roll each top rectangle dough until they are slightly larger than the bottom rectangles of dough (this will help cover the filling). Place each rectangle on top of the filling-top rectangles. Use a fork to crimp the borders of the dough and seal the pies (dip the fork in flour to prevent it from sticking). Brush the tops of the pies lightly with the egg wash, then use a sharp knife to make two ½-inch slits into the tops of each pie. Chill the filled hand pies in the refrigerator for 10 minutes.
-
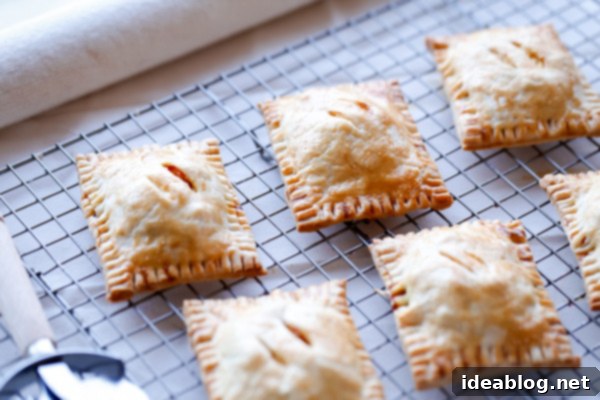
Bake for 25 to 30 minutes, or until golden brown. Place the pies on a cooling rack until cool enough to handle. Serve warm from the oven.

Tips for Success:
- Hand pies can be stored in the refrigerator for 4 to 5 days in an airtight container. To reheat, bake in a 325°F (165°C) oven for 10 to 15 minutes.
Pie dough adapted from here.
