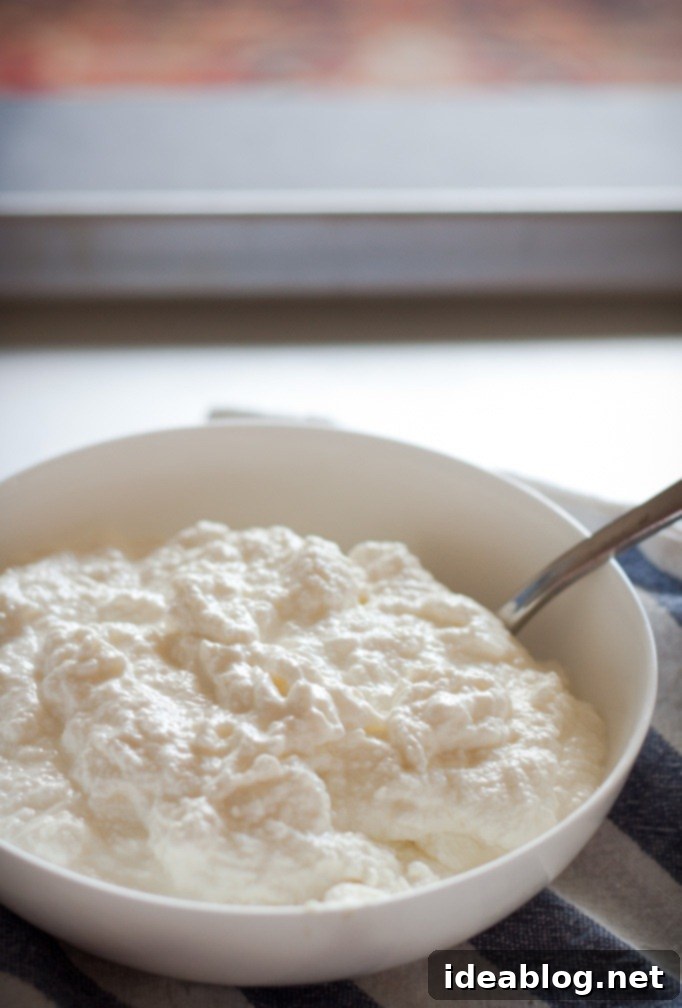
Mastering Homemade Ricotta Cheese: Your Easy Guide to Creamy Perfection
Learn how to make homemade ricotta cheese with this simple tutorial. Not only is it delicious, but the texture is superb. Use in your favorite Italian recipes! Be sure to save the whey from the cooking process and use it for cooking grains, such as in this Polenta Al Forno recipe.
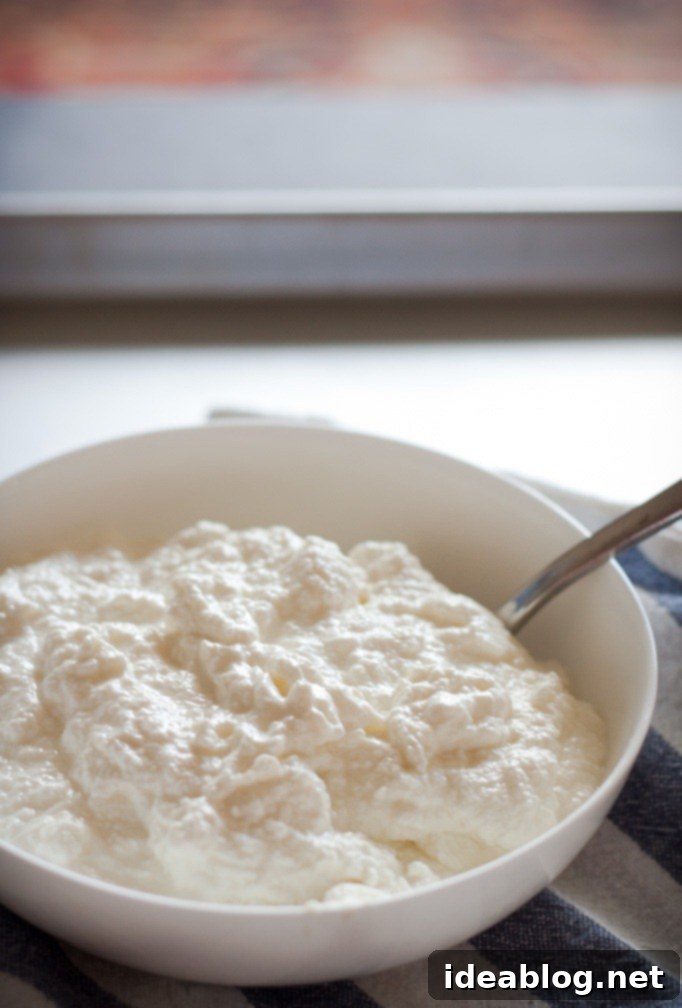
Remember that time I took a cheese making class during culinary school and promised to share the process with you? Well, today is that day! For years, I had forgotten just how incredibly easy it is to create fresh, homemade ricotta cheese. The resulting texture and flavor are truly fantastic, making it a culinary revelation you’ll want to revisit again and again.
While whipping up your own ricotta isn’t quite as quick as grabbing a tub from the grocery store, the minimal effort required yields immense rewards. In the expansive world of homemade cheeses, ricotta stands out as one of the simplest and most accessible options for home cooks. Its creamy, delicate consistency and subtly sweet flavor elevate any dish it graces, proving that sometimes, the best things are truly made from scratch.
Why Homemade Ricotta is a Game-Changer
Once you experience the sublime taste and silken texture of freshly made ricotta, you’ll understand why it’s worth the small investment of time and effort. Store-bought versions, while convenient, often contain stabilizers, gums, or fillers that can result in a grainy texture and a less vibrant, sometimes bland, flavor. Homemade ricotta, on the other hand, is pure, unadulterated goodness, bursting with fresh dairy notes.
- Superior Texture: Say goodbye to grainy ricotta! Our homemade recipe yields an incredibly smooth, airy, and luscious cheese that truly melts in your mouth. This finer, more delicate texture is ideal for both savory applications, like pasta fillings, and sweet treats, such as desserts.
- Unmatched Flavor: Fresh ricotta boasts a delicate, milky, and subtly sweet flavor that is simply unparalleled. It’s a clean taste that truly enhances dishes without overpowering them, allowing other ingredients to shine.
- Cost-Effective: Making ricotta at home is surprisingly affordable. You’re primarily using readily available and inexpensive ingredients such as whole milk, heavy cream, and lemon juice, making it a budget-friendly gourmet experience.
- No Additives: You control exactly what goes into your cheese. There are no preservatives, no artificial flavors, and no unnecessary additives – just wholesome, natural ingredients for a pure product.
- Impress Your Guests: Serving homemade ricotta adds a special, artisanal touch to any meal. Whether it’s a rustic Italian dinner party or a sophisticated brunch spread, your guests will undoubtedly be impressed by your homemade creation.

Traditional vs. “American” Ricotta: Understanding the Difference
How is Traditional Italian Ricotta Made?
Just one spoonful of this silky smooth homemade ricotta will convince you to make it more often. It’s important to note the technical distinction regarding traditional Italian ricotta cheese. The word ‘ricotta’ itself is Italian for ‘re-cooked’ or ‘twice-cooked.’ This name stems from its original method of production: traditional ricotta is made by reheating the leftover whey – the watery liquid byproduct – from other cheese-making processes, such as the production of mozzarella or provolone.
Historically, this method was a brilliant and resourceful way to extract every last bit of nutritional value from dairy. The residual proteins in the whey would coagulate upon reheating, forming the delicate, fine curds we recognize as ricotta. This traditional, whey-based ricotta is typically lower in fat and possesses a slightly different, often more subtle and tangy, flavor profile.
The “American” Style Ricotta We Know and Love
While the authentic Italian method of using whey is fascinating, it’s a process rarely replicated in home kitchens or even commercial settings outside of specialized cheese factories. Instead, nearly all ricotta produced and consumed in America, and indeed many home recipes worldwide, are made directly from fresh whole milk, often enriched with cream, and an acidic coagulant like lemon juice or vinegar. This “fresh milk ricotta” offers a richer, creamier texture and a slightly sweeter flavor profile compared to its traditional whey-based counterpart. This version is what most people are familiar with and what this recipe will guide you through – a wonderfully rich, smooth, and utterly delicious cheese that’s perfect for a wide array of dishes, from savory pasta fillings to sweet dessert toppings.
Essential Ingredients for Perfect Ricotta
Creating beautiful, luscious ricotta requires just a few basic ingredients, but the quality of these components makes a significant difference in the final product. Choosing the right milk, cream, and acid is key to achieving that desirable texture and flavor.
- Whole Milk: This is the absolute foundation of your ricotta. Opt for fresh, good quality whole milk from a reputable source. It is crucial to avoid ultra-pasteurized (UHT) milk for this recipe. Ultra-pasteurization denatures the milk proteins to such an extent that they often won’t curdle properly, resulting in a very low yield or, disappointingly, no curds at all. Regular pasteurized whole milk, ideally not homogenized, is perfectly suitable and will yield the best results with a rich, full-bodied flavor.
- Heavy Cream: Adding heavy cream is the secret to an extra rich, velvety, and decadent ricotta. It significantly boosts the fat content, contributing to that incredibly smooth and luxurious texture that sets homemade ricotta apart. While you can technically make ricotta with just milk, the cream truly elevates it to another level of indulgence.
- Kosher Salt: A touch of kosher salt is essential to enhance and balance the delicate flavor of your ricotta. It helps to bring out the natural sweetness of the milk and makes the cheese taste more complete and well-rounded. Start with the recommended amount and adjust to your personal preference after draining.
- Fresh Lemon Juice: This is your primary acid agent, responsible for acidifying the milk and causing the proteins to coagulate and form the curds. Freshly squeezed lemon juice offers the best flavor, providing a bright, clean tang that complements the milky richness. Other acids like white vinegar can also be used effectively, but lemon juice imparts a wonderful, subtle citrus note that many prefer. Roughly 2-3 juicy lemons should yield enough ¼ cup of juice.
Equipment You’ll Need
Good news! You don’t need a fancy, specialized cheese-making kit to create incredible homemade ricotta. Most of the necessary tools are likely already in your kitchen, making this an accessible project for any home cook.
- Large Non-Reactive Pot (Stainless Steel or Enameled Cast Iron): A generously sized pot is essential to prevent the milk from boiling over as it heats. Stainless steel or enameled cast iron are preferred because they won’t react with the acidic lemon juice, which could otherwise impart an off-flavor or metallic taste to your delicate cheese.
- Candy Thermometer: This is arguably the most crucial piece of equipment for consistent and successful results. Accurately reaching and maintaining the temperature of 190°F (88°C) is key to proper curd formation. A thermometer that clips conveniently to the side of the pot is highly recommended for ease of use and hands-free monitoring.
- Cheesecloth: You’ll need a double layer of good quality, unbleached cheesecloth to line your sieve. This finely woven fabric allows the whey to drain efficiently while effectively retaining the delicate ricotta curds. Avoid using kitchen towels, as they are typically too thick and will hinder proper drainage.
- Large Fine-Meshed Sieve: This sturdy sieve will securely hold your cheesecloth and the milk curds, allowing the liquid whey to drain away into a bowl placed beneath it.
- Large, Deep Bowl: Positioned directly under the sieve, this bowl collects the valuable whey as it drains. Remember, this nutrient-rich liquid is not waste and can be saved for various other culinary uses!
Homemade Ricotta Cheese Recipe
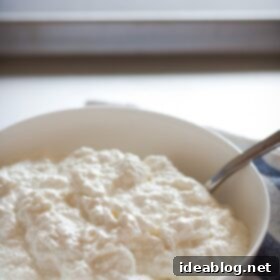
Homemade Ricotta Cheese
Pin
Review
SaveSaved!
Equipment
-
candy thermometer
-
cheesecloth
-
large fine-meshed sieve
Ingredients
- 8 cups (2 quarts; 1.9 L) whole milk do not use ultra-pasteurized for this recipe
- ½ cup (120 mL) heavy cream
- ½ teaspoon kosher salt
- ¼ cup (60 mL) fresh lemon juice roughly 2-3 juicy lemons
Instructions
-
Step 1: Combine Ingredients. Combine the whole milk, heavy cream, and kosher salt in a large non-reactive (stainless steel) pot. Place the pot over medium-high heat.
-
Step 2: Heat the Mixture. Attach a candy thermometer to the side of the pot. Slowly bring the milk mixture to a temperature of 190°F (88°C). Stir occasionally with a wooden spoon or spatula to prevent the milk from scorching or sticking to the bottom of the pot. This process usually takes about 15-20 minutes.
-
Step 3: Add Acid and Rest. Once the milk mixture has reached 190°F (88°C), immediately remove it from the heat. Pour in the fresh lemon juice. Stir gently once or twice to incorporate the juice, then stop stirring. Allow the mixture to sit undisturbed for an additional 10 minutes. During this resting period, you will notice the milk beginning to curdle and separate into solid curds and yellowish-greenish liquid (whey).
-
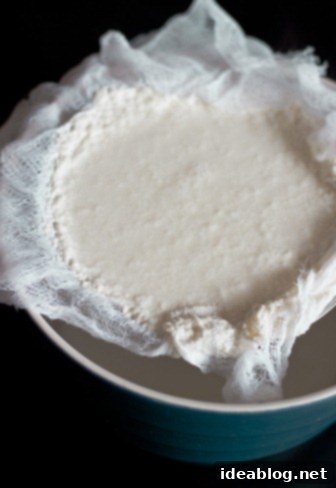
Step 4: Strain the Ricotta. While the milk mixture rests, prepare your straining setup. Line a large fine-meshed sieve with a double layer of cheesecloth, ensuring there’s enough overhang to gather later. Place this sieve over a large, deep bowl to collect the drained whey. Carefully and slowly pour the curdled ricotta mixture into the cheesecloth-lined sieve. Allow it to drain at room temperature for at least 90 minutes. For a firmer ricotta, you can let it drain longer, up to 2-3 hours.
-
Step 5: Store or Serve. Once the desired consistency is achieved, transfer the freshly made ricotta to an airtight container. Use immediately for the best flavor and texture, or refrigerate for up to 2 to 3 days.
Tips for Success:
- Do not throw out the whey (drained liquid)! This nutrient-rich liquid is excellent for cooking grains like rice or quinoa, making polenta (like this polenta al forno recipe), adding to smoothies, or using as a liquid in baking.
Inspired by my Cheese-Making Class. Method adapted from Smitten Kitchen’s Rich Homemade Ricotta.
Tips for Perfect Homemade Ricotta Every Time
Achieving consistently excellent homemade ricotta is easy if you pay attention to a few key details. Here are our top tips to ensure your cheese-making endeavor is a success:
- Use Quality Ingredients: As repeatedly emphasized, the quality of your milk and cream profoundly impacts the flavor and texture of your ricotta. Invest in the freshest, best-tasting dairy you can find for truly remarkable results.
- Avoid Ultra-Pasteurized Milk: This point is crucial and worth reiterating. Ultra-high temperature (UHT) pasteurization alters milk proteins in a way that makes them extremely difficult to curdle effectively. Always stick to regular pasteurized milk for reliable curd formation.
- Gentle and Gradual Heating: Do not rush the heating process. Slowly bringing the milk mixture to the target temperature ensures even heating throughout the pot and, most importantly, prevents scorching, which can impart an unpleasant, burnt taste to your delicate ricotta.
- Minimize Stirring Post-Acid: While heating, stir just enough to prevent the milk from sticking to the bottom of the pot. Once the lemon juice or other acid is added, stir only once or twice gently to incorporate it, then leave the mixture undisturbed. Excessive stirring at this stage can break up the delicate curds as they form, leading to a less cohesive and potentially less voluminous yield.
- Precise Temperature is Key: A reliable candy thermometer is your absolute best friend here. Hitting the precise target of 190°F (88°C) is critical for optimal curd separation. If the temperature is too low, you might not get enough curds; too high, and the curds can become tough or rubbery.
- Adjust Draining Time for Desired Consistency: The duration of the draining process directly dictates the final consistency of your ricotta. For a light, fluffy, and moist ricotta that’s wonderful for spreading, 90 minutes is usually sufficient. For a firmer, drier cheese suitable for baking, stuffing pasta, or making cannoli, you might want to drain it for 2-3 hours, or even longer in the refrigerator.
- Taste and Adjust Seasoning: After draining, always taste your fresh ricotta. You can easily stir in a little more salt if needed to enhance its savory applications, or even a tiny pinch of sugar for sweet preparations.
Creative Uses for Your Fresh Ricotta
The versatility of homemade ricotta is truly remarkable. Its delicate flavor and creamy texture make it a star ingredient in both sweet and savory dishes, transforming everyday meals into something special. Here are just a few ideas to inspire you and help you make the most of your freshly made cheese:
- Pasta Dishes: The classic and most beloved choice! Use your ricotta to make the most incredible lasagna, stuffed shells, manicotti, or mix it into creamy sauces for a velvety, rich finish. A simple dollop on top of fresh pasta with marinara or pesto is pure, unadulterated heaven. You can also use it in delightful ricotta beignets (a sweet treat!) or savory gnocchi.
- Spreads and Dips: Enjoy it simply by spreading it on crostini or slices of crusty bread. Drizzle with a good quality olive oil, sprinkle with fresh cracked black pepper and perhaps some fresh herbs like basil or chives. It also makes a fantastic, healthy base for savory dips when blended with roasted vegetables or a delicious sweet dip with honey and fresh berries.
- Breakfast and Brunch Delights: Stir it into your favorite pancake or waffle batter for an extra fluffy, moist texture. Serve it alongside fresh fruit, a drizzle of maple syrup, and granola for a wholesome breakfast. A generous smear on toast with jam, avocado, or a fried egg is also a delightful start to the day.
- Decadent Desserts: Ricotta is a traditional and essential ingredient in many classic Italian desserts. Think homemade cannoli filling, creamy cheesecakes, delicate tarts, or simply served with fresh berries, a drizzle of honey, and a sprinkle of chopped pistachios or almonds for an elegant, light dessert.
- Savory Fillings and Binding: Utilize its binding and moisturizing properties in savory preparations. Incorporate it into quiches, frittatas, savory tarts, or use it as a binding agent in meatballs, fritters, or even burgers for added moisture and richness.
- Polenta and Grains: As mentioned, it’s wonderful stirred into warm polenta, adding a creamy, rich dimension that makes it incredibly comforting. You can also mix it into other warm grains like farro, couscous, or risotto for a more substantial and flavorful meal.
Don’t Waste the Whey: It’s Liquid Gold!
One of the fantastic and often overlooked bonuses of making homemade ricotta is the leftover whey. This greenish-yellow liquid isn’t waste; it’s a nutrient-rich byproduct packed with flavor and beneficial properties! It’s a culinary asset that absolutely deserves a second life in your kitchen.
- Cooking Grains: Substitute whey for water or broth when cooking grains like rice, quinoa, couscous, or even pasta. It imparts a subtle tang and adds an extra layer of nutritional value. This is especially fantastic for making a creamy Polenta Al Forno, as it enhances the authentic flavor.
- Baking: Replace water or milk with whey in your bread doughs, pancake batters, muffins, or other baked goods. The acidity and remaining milk solids can contribute to a softer texture, improved rise, and a more complex, nuanced flavor profile.
- Smoothies: Add a splash of whey to your morning smoothie for a protein and nutrient boost without significantly altering the taste. It’s a great way to add hydration and beneficial compounds.
- Soup Base: Use it as a flavorful and healthy base for light vegetable or chicken soups. Its subtle acidity can brighten the overall taste of your broth.
- Fermentation: Whey can even be used as a natural starter for fermenting vegetables, adding beneficial bacteria and a tangy kick to your pickles and lacto-fermented foods.
To store leftover whey, simply transfer it to an airtight container and refrigerate for up to a week. You can also freeze it in ice cube trays for longer storage and easy portioning.
Storage of Homemade Ricotta
Fresh homemade ricotta is at its peak flavor and texture when enjoyed as soon as possible, ideally within 2-3 days of making it. Its delicate freshness is truly part of its charm. Store it in an airtight container in the refrigerator to maintain its quality. While it might last a bit longer under optimal conditions, we highly recommend consuming it within this timeframe for the best culinary experience. We do not generally recommend freezing fresh ricotta, as the freezing and thawing process can significantly alter its delicate texture, often making it watery, grainy, and less appealing than its fresh counterpart.
Frequently Asked Questions About Homemade Ricotta
Can I use low-fat milk or skim milk for homemade ricotta?
While you technically *can* use lower-fat milk, the results will not be as rich, creamy, or flavorful. Whole milk is highly recommended for the best flavor and a luscious texture. Lower-fat milk yields fewer curds and a drier, less satisfying ricotta. If you’re looking for a healthier option, you might consider reducing the heavy cream slightly rather than using skim milk.
What if my milk doesn’t curdle after adding the lemon juice?
The most common reasons for milk not curdling are:
- Not reaching the correct temperature: Ensure your milk reaches a full 190°F (88°C). A reliable candy thermometer is essential for accuracy.
- Using ultra-pasteurized (UHT) milk: As discussed, UHT milk is very difficult to curdle due to the processing it undergoes. Always use regular pasteurized whole milk.
- Not enough acid or weak acid: Ensure your lemon juice is fresh and potent. If you’ve used the specified amount and still see no distinct curds after the 10-minute resting period, add another tablespoon or two of lemon juice and let it rest for another 5-10 minutes. Sometimes, the acidity of lemons can vary.
Can I use vinegar instead of lemon juice to make ricotta?
Yes, white vinegar is a common and effective substitute for lemon juice. Use the same quantity (¼ cup white vinegar for 2 quarts milk). The flavor profile might be slightly different – vinegar can impart a sharper, less subtle tang compared to lemon juice, but it will still effectively curdle the milk and produce good ricotta.
What’s the difference between ricotta and cottage cheese?
Although both are fresh, unripened cheeses, they are quite distinct. Ricotta is traditionally made from whey (or whole milk in many modern recipes) and typically has very fine, delicate, creamy curds. Cottage cheese, on the other hand, is made from milk curds that are cut, cooked, and then washed to remove excess lactic acid, often mixed with a “dressing” of cream or milk. Its curds are generally larger, firmer, and it has a distinctly tangier flavor compared to the milder, sweeter ricotta.
Can I make a larger batch of homemade ricotta?
Yes, you can easily double or triple this recipe if you need a larger quantity. Just ensure you use a much larger pot to comfortably accommodate the increased volume of milk and allow for adequate boiling space. Also, make sure you have enough cheesecloth and a large enough sieve and bowl for the straining process.
How long does the ricotta take to drain for the best consistency?
The draining time is a personal preference and dictates the final consistency of your ricotta. For a light, fluffy, and moist ricotta that’s ideal for spreading or stirring into sauces, drain for approximately 90 minutes at room temperature. For a firmer ricotta suitable for baking, stuffing ravioli, or making cannoli, drain for 2-3 hours. For a very firm, almost dry texture, you can even place it in the refrigerator to drain overnight, just be sure to cover it lightly to prevent it from absorbing refrigerator odors.
Making homemade ricotta is a simple yet incredibly rewarding culinary adventure. With minimal effort and just a few basic ingredients, you can consistently produce a fresh, flavorful, and wonderfully creamy cheese that far surpasses anything you can buy at the store. Enjoy the hands-on process and savor the delicious, versatile results!
