Easy Homemade Peppermint Bark: The Ultimate Holiday Treat & Gifting Guide
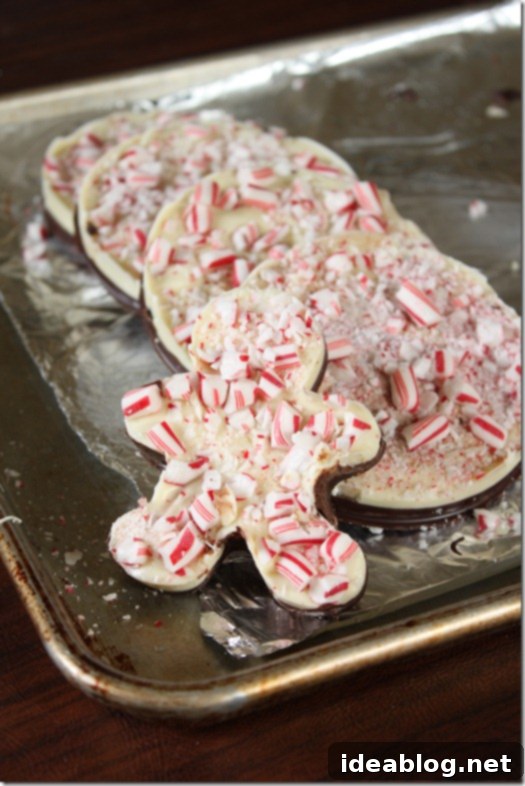
There’s a special kind of magic that fills the air during the holiday season, and nothing embodies that festive spirit quite like the sweet, minty crunch of homemade peppermint bark. This classic holiday confectionery is not only incredibly simple to make, but it also serves as a delightful treat for your family and an exquisite edible gift for friends, neighbors, and colleagues. Forget the store-bought versions; our recipe guides you through creating layers of rich, velvety dark chocolate and creamy white chocolate, generously topped with vibrant crushed candy canes, making for an unforgettable homemade experience.
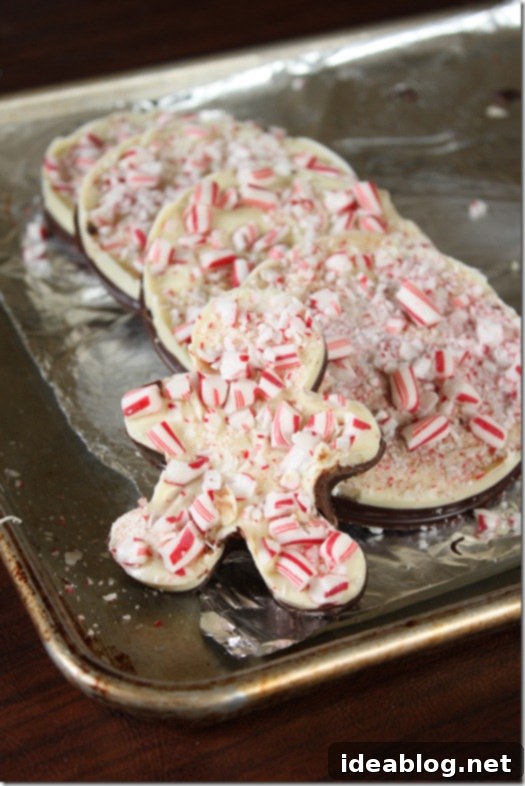
Our easy-to-follow recipe utilizes both high-quality semisweet and white chocolate chips to construct the traditional layered bark that everyone loves. The contrast between the deep, slightly bitter dark chocolate and the sweet, milky white chocolate, perfectly complemented by the refreshing burst of peppermint, creates a symphony of flavors and textures in every bite. It’s a truly iconic holiday indulgence, perfect for sharing, dessert tables, or simply enjoying with a warm cup of cocoa.
Topped with a generous sprinkle of crushed candy canes, this bark isn’t just a treat; it’s a visual delight, adding a festive splash of red and white to your holiday spread. Whether you’re a seasoned baker or a beginner in the kitchen, this peppermint bark recipe is designed for success, promising a delicious outcome that will impress everyone.
Why Homemade Peppermint Bark is a Holiday Must-Have
While store shelves abound with various holiday sweets, there’s an unparalleled charm and superior quality to homemade treats. Peppermint bark, in particular, shines when crafted in your own kitchen. Here’s why it’s worth making from scratch:
- Unmatched Flavor: You control the quality of ingredients. Using premium chocolate chips makes a significant difference in the final taste and texture, resulting in a richer, smoother bark than mass-produced alternatives.
- Customization: Love extra peppermint? Prefer a thicker layer of dark chocolate? Homemade allows you to adjust ingredients and ratios to your exact preference. You can even experiment with different types of chocolate or additional toppings.
- Perfect for Gifting: Edible gifts are always appreciated, and peppermint bark is a universally loved holiday offering. Packaging it beautifully in tins, jars, or cellophane bags makes for a thoughtful and personal present.
- Festive Activity: Making peppermint bark, especially with family or friends, can be a wonderful holiday tradition. The aroma of melting chocolate and peppermint fills the kitchen, creating lasting memories.
- Cost-Effective: Buying gourmet peppermint bark can be surprisingly expensive. Making it yourself, especially in larger batches, is much more economical and yields a greater quantity for sharing and enjoying.
Understanding the Peppermint Bark Layers
The beauty of traditional peppermint bark lies in its distinct, contrasting layers. Each layer plays a crucial role in creating the perfect balance of flavors and textures.
- The Dark Chocolate Base: We start with a foundation of semisweet chocolate. This provides a rich, intense chocolate flavor that cuts through the sweetness of the white chocolate and candy canes. Semisweet chocolate typically contains 35-60% cocoa solids, offering a balanced taste that’s not too bitter, yet deeply satisfying. High-quality chocolate melts more smoothly and sets with a better snap.
- The White Chocolate Top Layer: Layered on top is creamy white chocolate. While technically not “chocolate” (as it contains no cocoa solids, only cocoa butter), its sweet, milky profile beautifully complements the dark chocolate and provides a bright canvas for the crushed peppermint. Ensure you choose good quality white chocolate chips or bars, as inferior quality can be overly waxy or sweet.
- The Peppermint Crunch: The final flourish comes from the crushed candy canes. Their refreshing minty flavor and delightful crunch are what truly define peppermint bark. Sprinkled generously over the still-wet white chocolate, they adhere perfectly, ensuring every bite delivers that signature burst of cool peppermint.
Key Ingredients You’ll Need
Creating exquisite peppermint bark starts with selecting the right ingredients. Here’s a closer look at what goes into this festive confection:
- Classic Candy Canes: These are essential for both flavor and visual appeal. Opt for traditional red and white striped candy canes for that iconic holiday look. You’ll want to crush them into varying sizes, from fine dust to small shards, for textural interest.
- High-Quality White Chocolate Chips: The quality of your white chocolate directly impacts the taste and texture of your bark. Look for brands that list cocoa butter as a primary ingredient, not just vegetable oil. This ensures a smoother melt and a more luxurious mouthfeel.
- High-Quality Semisweet Chocolate Chips: Similarly, choose a good brand of semisweet chocolate. While not as sweet as milk chocolate, it provides a robust chocolate flavor that pairs wonderfully with peppermint. Couverture chocolate, which has a higher cocoa butter content, is ideal for melting and setting smoothly, but high-quality baking chips work perfectly well for this recipe.
- Vegetable Oil: A small amount of vegetable oil (or another neutral oil like coconut oil, refined sunflower oil, or canola oil) is added to both chocolate layers. This helps thin the melted chocolate slightly, making it easier to spread into an even, thin layer, and contributes to a smoother finish. It also helps prevent the chocolate from seizing and aids in achieving that satisfying “snap” when the bark hardens.
Essential Equipment for Peppermint Bark Success
Having the right tools makes the process even smoother:
- Half Sheet Pan: A standard 13×18-inch baking sheet is perfect for spreading the chocolate layers.
- Aluminum Foil or Parchment Paper: Crucial for lining the sheet pan. This prevents the chocolate from sticking and makes for easy removal and cleanup. Parchment paper is often preferred as it’s less likely to wrinkle and stick to the chocolate.
- Ziplock Freezer Bag: Ideal for crushing candy canes cleanly and efficiently. The thick plastic resists tearing.
- Rolling Pin: Your best friend for pulverizing those candy canes into festive shards.
- Double Boiler Setup: This is the gentlest and most recommended method for melting chocolate. It consists of a heatproof bowl (glass or stainless steel) set over a saucepan of simmering water. The steam provides indirect, even heat, preventing the chocolate from scorching. If you don’t have a specific double boiler, a metal bowl fitting snugly over a saucepan works well.
- Rubber Spatula: For stirring the melting chocolate until smooth and scraping it out of the bowl.
- Offset Spatula (or Butter Knife/Back of a Spoon): Essential for spreading the melted chocolate evenly across the sheet pan. An offset spatula provides better control.
How to Make Homemade Peppermint Bark: Step-by-Step Instructions
- Prepare Your Workspace: Begin by lining a half sheet pan (approximately 13×18 inches) with aluminum foil or parchment paper. Ensure the lining extends slightly over the edges, creating a small lip, which will make it easier to lift the finished bark. Set this prepared pan aside. Next, unwrap all your candy canes and place them into a sturdy Ziplock freezer bag. Using a rolling pin, gently but firmly crush the candy canes into very small pieces. Aim for a mix of fine dust and small, irregular shards for the best texture and visual appeal. Be careful not to over-crush into a fine powder, as some crunch is desirable. Set the crushed candy canes aside.
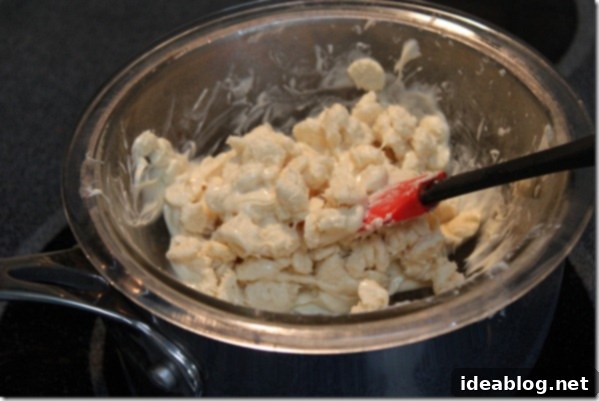
- Melt the Semisweet Chocolate: Set up your double boiler. Fill a saucepan with about 1-2 inches of water and bring it to a gentle simmer over medium-low heat. Place a heatproof bowl (make sure it fits snugly over the saucepan without touching the water) over the simmering water. Add the semisweet chocolate chips to this bowl along with one teaspoon of vegetable oil. Stir the mixture continuously with a rubber spatula, allowing the gentle steam to gradually melt the chocolate. Continue stirring until the chocolate is completely melted, smooth, and glossy, with no lumps remaining. This slow melting process is key to preventing the chocolate from seizing or scorching.
- Create the Dark Chocolate Layer: Carefully remove the bowl of melted semisweet chocolate from the double boiler. Pour the smooth, melted chocolate onto the lined sheet pan. Using an offset spatula (or the back of a spoon), quickly and evenly spread the chocolate across the entire surface of the pan, aiming for a layer that is roughly ¼-inch thick. Work efficiently as the chocolate will begin to set. Once spread, immediately transfer the sheet pan to the refrigerator and chill for a minimum of 30 minutes, or until the dark chocolate layer is completely hard and firm to the touch. This ensures the layers won’t mix when the white chocolate is added.
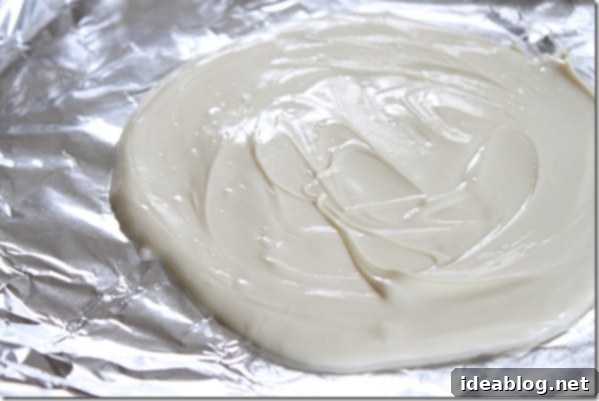
- Melt and Layer the White Chocolate: Using the same double boiler setup (you can wipe out the bowl or use a new one), melt the white chocolate chips. Place the white chocolate chips into the heatproof bowl and add the remaining 1 teaspoon of vegetable oil. Stir continuously over the simmering water until the white chocolate is completely melted and perfectly smooth. Once melted, remove the chilled semisweet chocolate layer from the refrigerator. Pour the warm, melted white chocolate evenly on top of the hardened dark chocolate layer. Use your offset spatula to spread the white chocolate gently and quickly over the dark chocolate, creating another even layer that is also roughly ¼-inch thick. Speed is important here so the white chocolate doesn’t start to set prematurely. Immediately and generously sprinkle the crushed candy canes over the entire surface of the wet white chocolate. Press down very gently if needed to help them adhere.
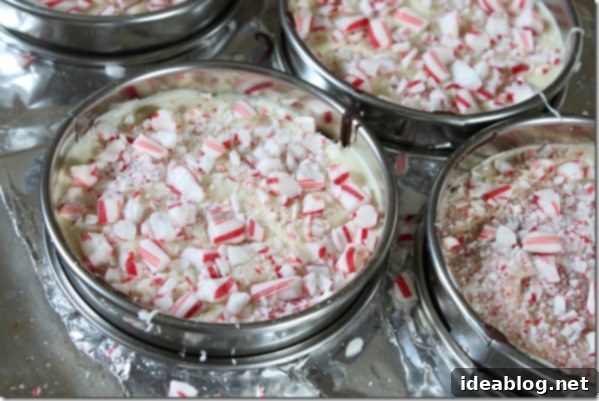
- Final Chill and Breaking: Once the candy canes are sprinkled, carefully transfer the sheet pan back to the refrigerator. Chill for another 30 minutes, or until both chocolate layers are completely hard and set. You’ll know it’s ready when it feels firm and cold. Remove the hardened peppermint bark from the refrigerator. Gently lift the bark from the pan using the parchment paper or foil edges. Place it on a clean, flat surface. Using a large, sharp knife or your hands, break the peppermint bark into medium-sized, irregular shards. For neat edges, you can score the chocolate with a knife before breaking, or for a more rustic look, simply break it by hand. Layer the peppermint bark shards between sheets of wax paper in an airtight container. Store in a cool, dry place or in the refrigerator for up to 2 weeks for optimal freshness and texture.

Tips for Perfect Peppermint Bark Every Time
Achieving bakery-quality peppermint bark at home is easy with a few simple tricks:
- Quality Chocolate Matters: This cannot be stressed enough. High-quality chocolate chips or baking bars melt more smoothly, have a better flavor, and set with a satisfying snap. Avoid “melting wafers” or “compound chocolate” if you want the best taste and texture.
- Gentle Melting is Key: Always use a double boiler or microwave on low power, stirring frequently. Overheating chocolate, especially white chocolate, can cause it to seize (become clumpy and unworkable) or burn.
- Avoid Water Contact: Even a tiny drop of water can cause chocolate to seize. Ensure your bowl and spatula are completely dry before you start, and make sure no steam or condensation from the double boiler gets into your chocolate.
- Even Layers: Spreading the chocolate layers evenly ensures a balanced flavor profile and consistent texture throughout the bark. An offset spatula is invaluable for this.
- Chill Thoroughly: Don’t rush the chilling process. Each layer needs to be fully set before the next is added, and the final bark needs to be completely firm before breaking. This prevents cracking and ensures a clean break.
- Crush Candy Canes Just Right: A mix of fine dust and small pieces provides both intense peppermint flavor and delightful crunch. Avoid crushing them into a fine powder completely.
- Timing for Topping: Sprinkle the crushed candy canes immediately after spreading the white chocolate. If the white chocolate starts to set, the candy canes won’t adhere properly.
Creative Variations and Customizations
Once you’ve mastered the classic peppermint bark, feel free to experiment with these delicious variations:
- Different Chocolates:
- Milk Chocolate: Use milk chocolate for the bottom layer instead of semisweet for a sweeter, creamier bark.
- Dark Chocolate Only: Create a single layer of rich dark chocolate with peppermint, or use two different percentages of dark chocolate for a subtle contrast.
- Ruby Chocolate: For a visually stunning and slightly fruity twist, use ruby chocolate for the top layer.
- Flavor Boosts:
- Peppermint Extract: For an even more intense minty flavor, add ¼ to ½ teaspoon of pure peppermint extract to the melted white chocolate before spreading.
- Other Extracts: Experiment with almond, orange, or even a hint of rum extract in the white chocolate.
- Additional Toppings:
- Sprinkles: Add festive sprinkles along with or in place of candy canes.
- Nuts: Chopped toasted pecans, walnuts, or almonds can add another layer of crunch.
- Pretzels: Crushed pretzels offer a salty-sweet dimension and a unique texture.
- Cocoa Nibs: For a deeper chocolate flavor and added crunch.
- Flaky Sea Salt: A tiny sprinkle of sea salt over the dark chocolate layer before it sets can enhance the chocolate flavor.
- Shaped Bark: While traditional bark is broken into shards, you can also use metal cookie cutters as molds. Place them on the lined sheet pan, pour chocolate into the molds, and chill.
Gifting Homemade Peppermint Bark
Homemade peppermint bark makes for an exquisite and thoughtful holiday gift. Here are some ideas for presentation:
- Decorative Tins: Layer the bark shards between wax paper in festive tins.
- Cellophane Bags: Fill clear cellophane bags with bark, tie with a festive ribbon, and add a handmade gift tag.
- Glass Jars: Neatly stack bark pieces in clear Mason jars or other attractive glass containers for a rustic yet elegant presentation.
- Gift Boxes: Use small candy boxes lined with parchment paper for a more formal gift.
No matter how you package it, the effort and love put into homemade peppermint bark will surely be appreciated by the recipient.
Storage and Shelf Life
Proper storage ensures your homemade peppermint bark stays fresh and delicious for longer. Once the bark is completely set and broken into pieces, layer it between sheets of wax paper in an airtight container. Store it in a cool, dry place at room temperature for up to 2 weeks. If your home is particularly warm, or for extended freshness, you can store it in the refrigerator. Just be aware that chocolate can sometimes develop a slight “bloom” (a white film) from temperature fluctuations, which is harmless but can alter the appearance. Peppermint bark can also be frozen for up to 1-2 months. Thaw it in the refrigerator before bringing it to room temperature.

Homemade Peppermint Bark
Pin
Review
SaveSaved!
Ingredients
- 1 box classic candy canes (about 10-12 medium canes)
- 1 (10-ounce) bag high-quality white chocolate chips (or chopped white chocolate bar)
- 1 (10-ounce) bag high-quality semisweet chocolate chips (or chopped dark chocolate bar)
- 2 teaspoons vegetable oil divided, or other neutral oil
Instructions
-
Line a half sheet pan (approx. 13×18 inches) with aluminum foil or parchment paper, ensuring the lining extends slightly over the edges for easy lifting. Set aside. Unwrap all the candy canes and place them into a heavy-duty Ziplock freezer bag. Using a rolling pin, gently but firmly crush the candy canes into very small pieces, aiming for a mix of fine dust and small, irregular shards for varied texture. Set the crushed candy canes aside, ready for sprinkling.
-
To melt the semisweet chocolate, set up a double boiler: place a heatproof bowl (glass or stainless steel) over a saucepan containing 1-2 inches of simmering water. Ensure the bottom of the bowl does not touch the water. Add the semisweet chocolate chips and 1 teaspoon of vegetable oil to the bowl. Stir the mixture with a rubber spatula continuously over the gentle heat until the chocolate is completely melted, smooth, and free of any lumps. Remove the bowl from the heat.
-
Pour the melted semisweet chocolate onto the lined sheet pan. Using an offset spatula or the back of a spoon, quickly and evenly spread the chocolate into a layer that is roughly ¼-inch thick across the entire pan. This forms your base layer. Immediately place the sheet pan into the refrigerator and chill for at least 30 minutes, or until the dark chocolate layer is completely hard and firm to the touch. This step is crucial for creating distinct layers.
-
While the dark chocolate chills, melt the white chocolate using the same double boiler method. Place the white chocolate chips and the remaining 1 teaspoon of vegetable oil into a clean heatproof bowl over simmering water. Stir with a clean rubber spatula until the white chocolate is completely melted and perfectly smooth. Remove the chilled semisweet chocolate from the refrigerator. Pour the melted white chocolate evenly on top of the hardened dark chocolate layer. Quickly spread it with an offset spatula to create another ¼-inch thick layer. Immediately and generously sprinkle the crushed candy canes over the entire surface of the wet white chocolate layer. Press down very gently to help the pieces adhere.
-
Transfer the peppermint bark back to the refrigerator and chill for another 30 minutes, or until both chocolate layers are hard and fully set. Once firm, remove the bark from the refrigerator. Gently lift the entire sheet of bark off the pan using the parchment paper or foil. Place it on a clean cutting board or countertop. Using a large, sharp knife or simply your hands, break the peppermint bark into medium-sized, irregular shards. For storage, layer the peppermint bark shards between sheets of wax paper in an airtight container. Store in a cool, dry place or the refrigerator for up to 2 weeks for best quality.
Conclusion
Homemade peppermint bark is more than just a simple confection; it’s a quintessential holiday experience that brings warmth, joy, and a burst of festive flavor to any celebration. This recipe offers a straightforward path to creating beautiful, delicious bark that rivals any gourmet store-bought version. With its classic layered look and irresistible combination of rich dark chocolate, creamy white chocolate, and refreshing peppermint crunch, it’s bound to become a cherished part of your holiday traditions. Whether you’re making it to share as a thoughtful gift or to savor with your loved ones, this easy recipe ensures perfect results every time. Embrace the holiday spirit and get ready to enjoy the delightful magic of homemade peppermint bark!
