Irresistible Pistachio Thumbprint Cookies with Raspberry Jam: A Festive Holiday Recipe
The enchanting spirit of the holidays has truly arrived, and I’m embracing every moment of it. Our home feels utterly festive after decorating the tree a few weekends ago, stirring up wonderful memories as each cherished ornament was carefully unpacked and placed. It’s a truly magical time of year!
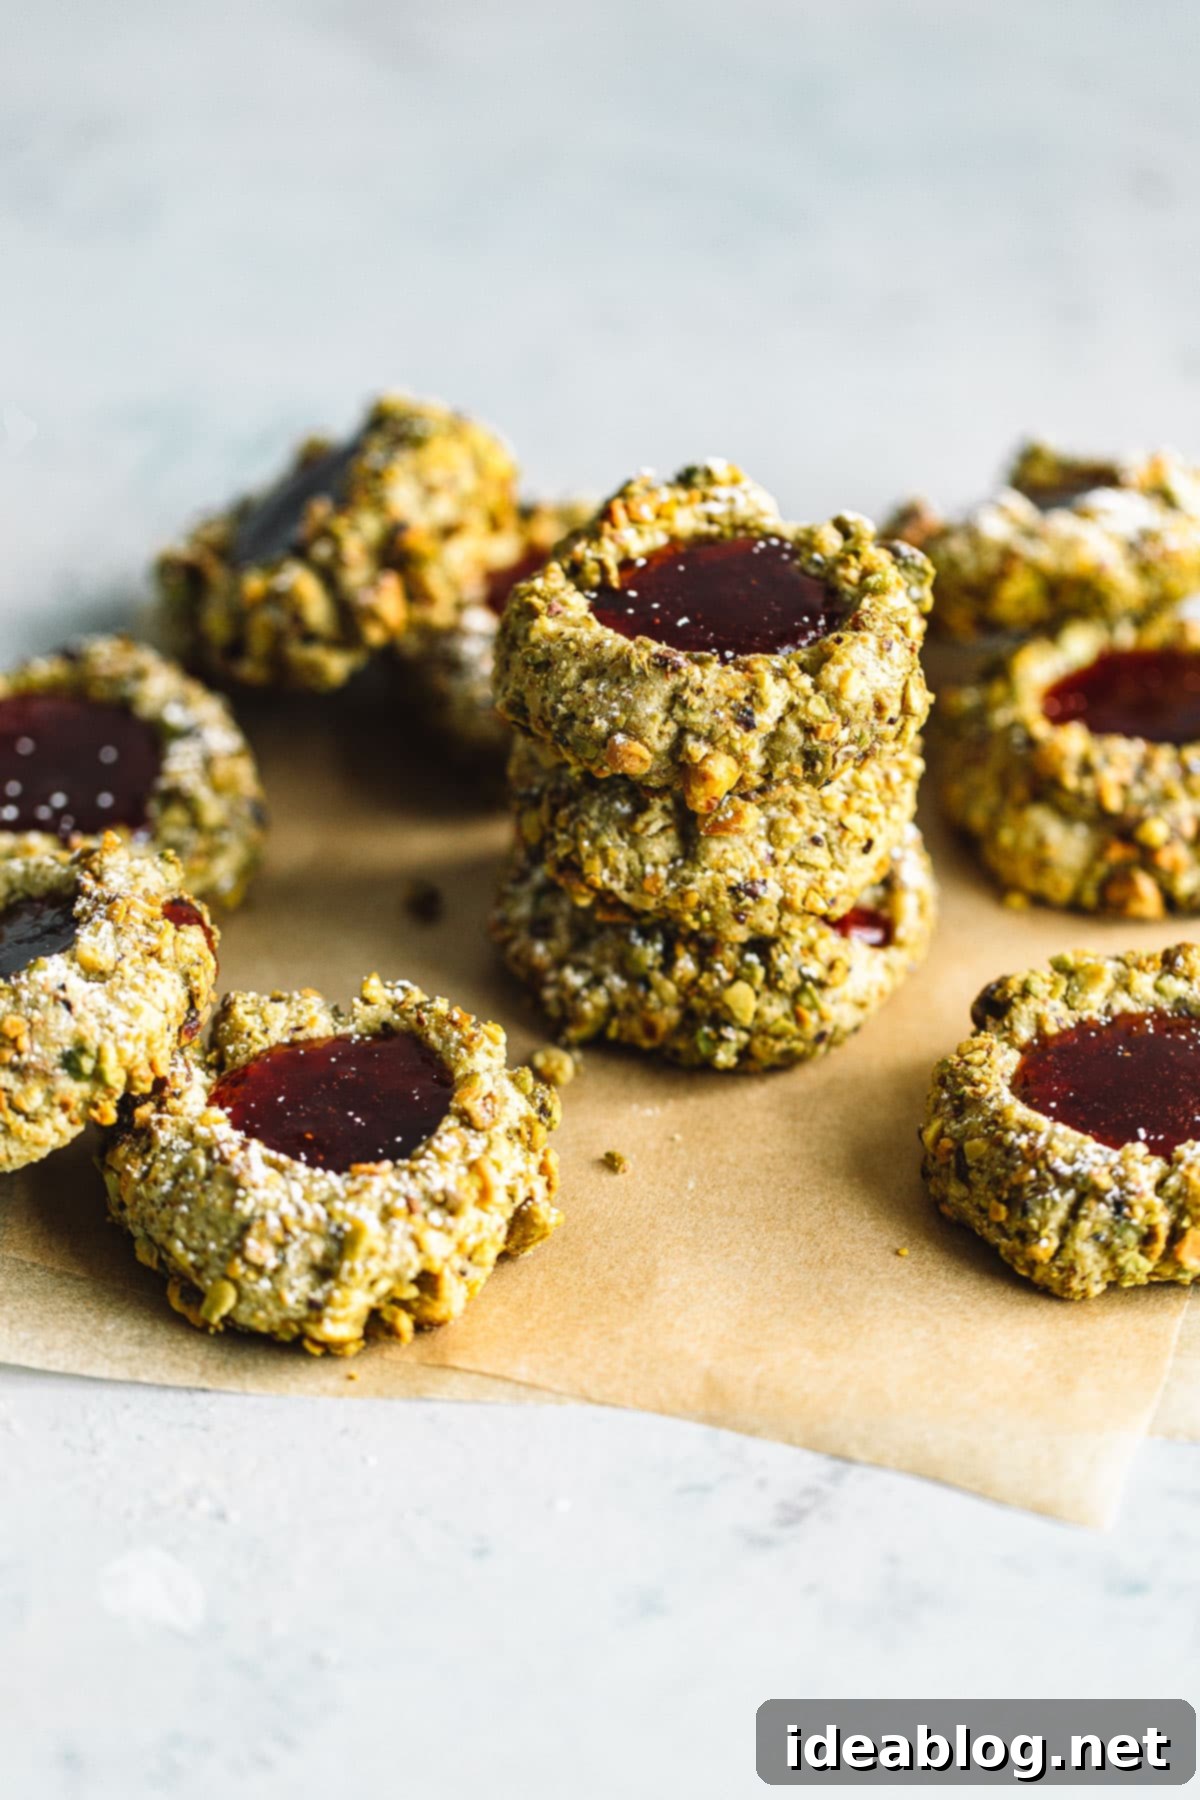
Beyond the twinkling lights and nostalgic carols, this season has also inspired a flurry of baking in my kitchen. From classic fruit cake to a vibrant orange bundt cake and decadent triple chocolate cookies, the aroma of freshly baked goods has been constant. And today, I’m thrilled to share a recipe that perfectly captures the festive essence: these delightful Pistachio Thumbprint Cookies with Raspberry Jam.
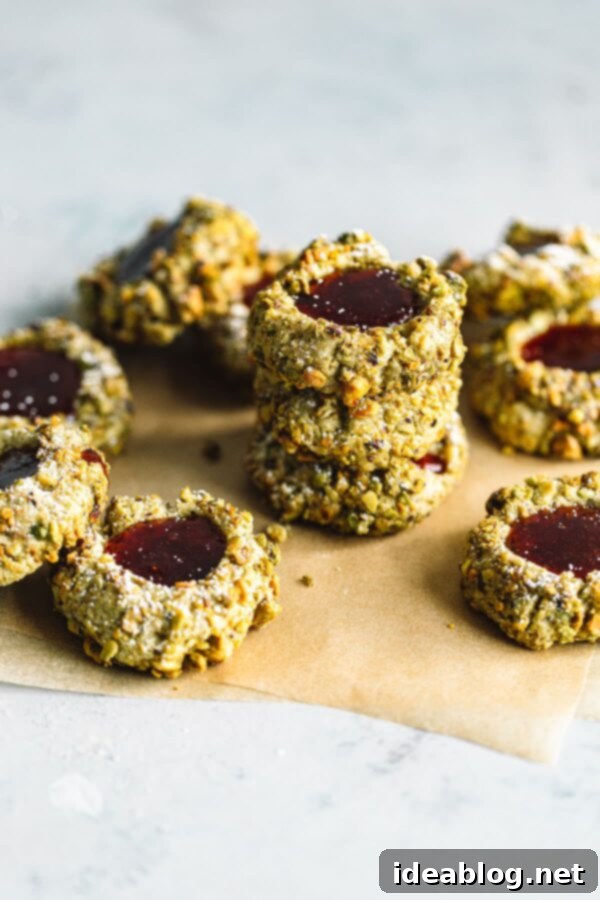
This recipe is an updated take on a beloved classic I first shared over five years ago, which originally featured a tart blackcurrant jam filling. While I still adore that variation (and have included it as an option in the recipe card below), blackcurrant jam can sometimes be a little challenging to find. For this enhanced version, I’ve opted for easy-to-source raspberry jam, which not only provides a wonderfully sweet and tangy counterpoint to the rich pistachios but also creates a stunning visual contrast. The vibrant red of the raspberry jam against the festive green of the pistachios makes these cookies particularly appealing for holiday gatherings, adding a pop of color to any dessert spread.
What Are Thumbprint Cookies? The Beloved Hallongrotta
Thumbprint cookies, known as “Hallongrotta” in their native Sweden, are a cherished classic, especially during the Christmas season. The name “Hallongrotta” literally translates to “raspberry cave,” a charming nod to their signature jam-filled center. These delightful treats are traditionally crafted from a rich, buttery, shortbread-like dough, which provides a tender, melt-in-your-mouth texture that perfectly complements the fruit filling.
The characteristic “thumbprint” comes from the unique way they are shaped. After the dough is rolled into small, uniform rounds, an indentation is made in the center. While a thumb is the traditional tool—hence the name—I often find that the rounded end of a wooden spoon creates a neater, more consistent well for the jam. This simple act of creating a hollow transforms the cookie, preparing it to hold its jewel-toned filling.
Once baked to golden perfection, these “caves” are filled with jam. For this recipe, we focus on raspberry or blackcurrant, but the beauty of thumbprints lies in their versatility. When selecting your jam, I always recommend choosing one that is more fruit-forward and lower in sugar content. This ensures that the natural sweetness and tang of the fruit truly shine through, balancing the richness of the cookie dough without being overly sweet. The quality of your jam can truly elevate the entire cookie experience, making each bite a harmonious blend of buttery goodness and bright fruit flavor.
Why You’ll Absolutely Love These Pistachio Thumbprint Cookies
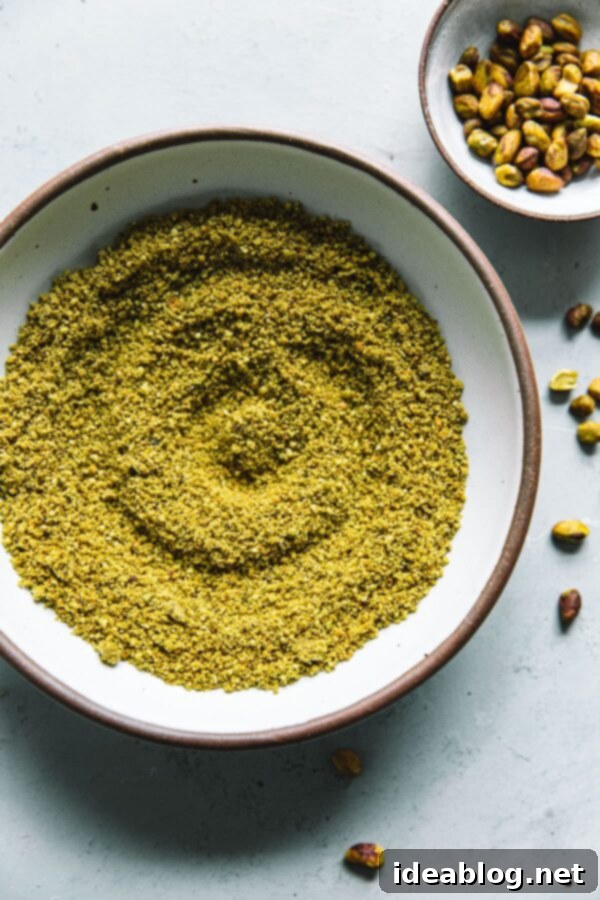
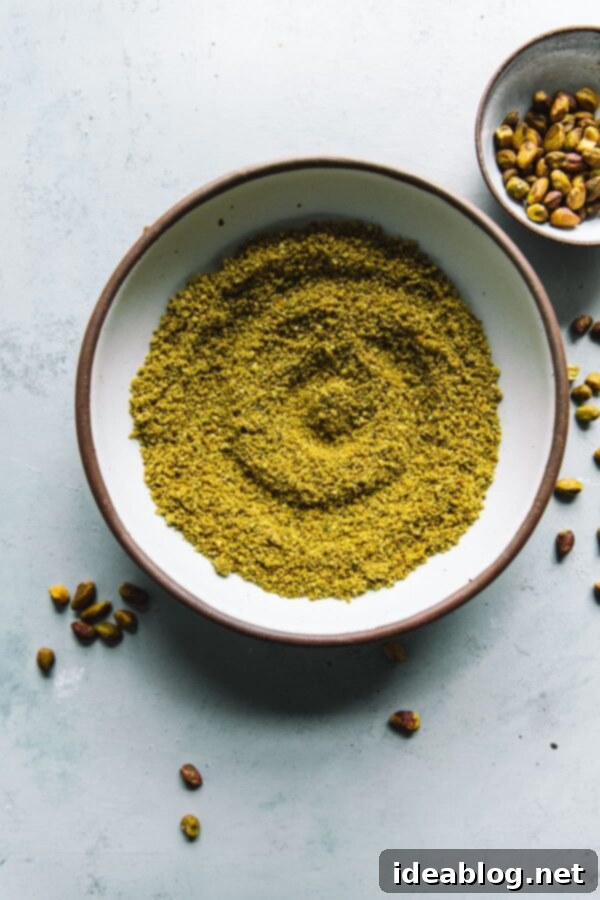
Much like last year’s popular Hazelnut Thumbprint Cookies, these pistachio versions offer an elevated twist on a classic. What makes them truly special is the inclusion of homemade pistachio flour, which comes together in mere seconds in your food processor. This fine, fragrant flour infuses the cookie dough with an incredible depth of nutty pistachio flavor, making these cookies feel truly gourmet and unique – exactly what the holiday season calls for!
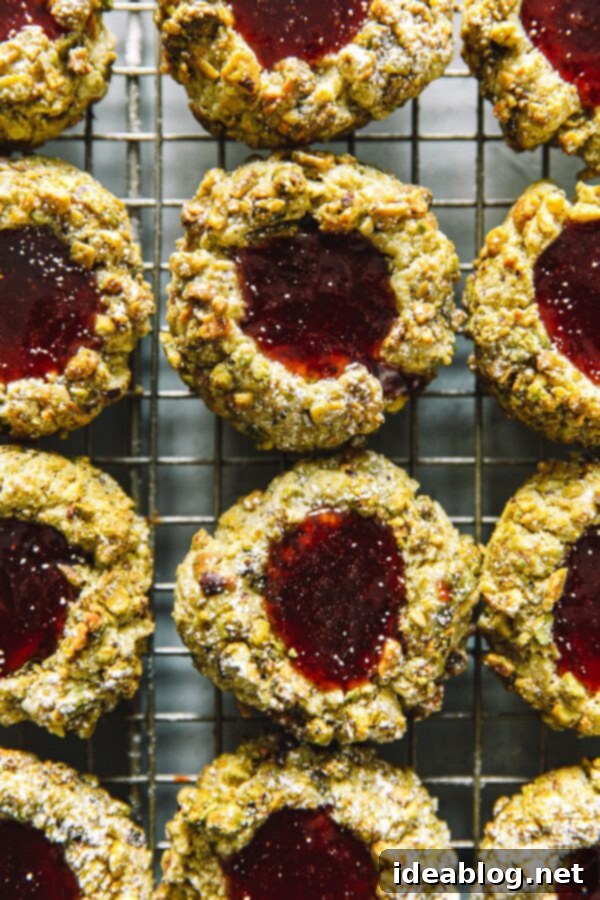
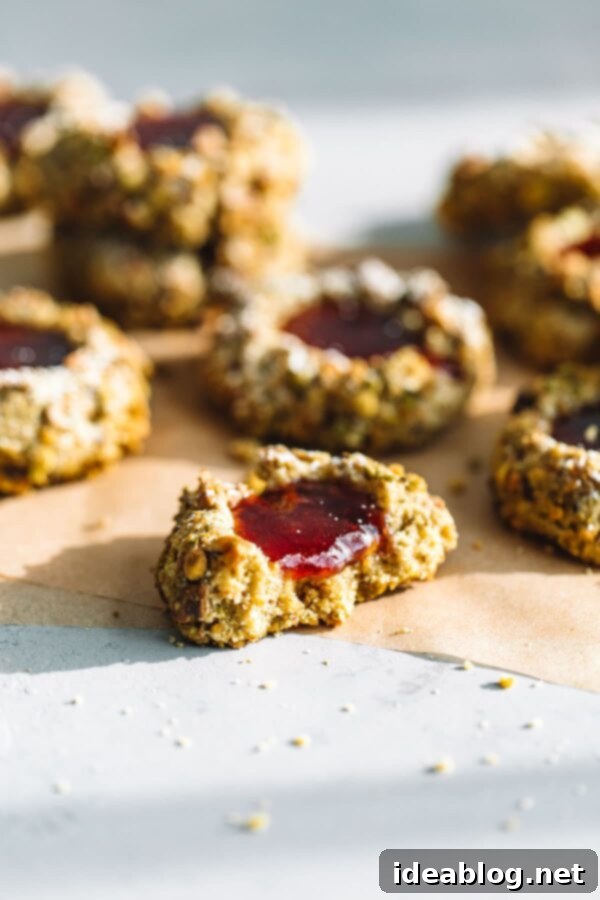
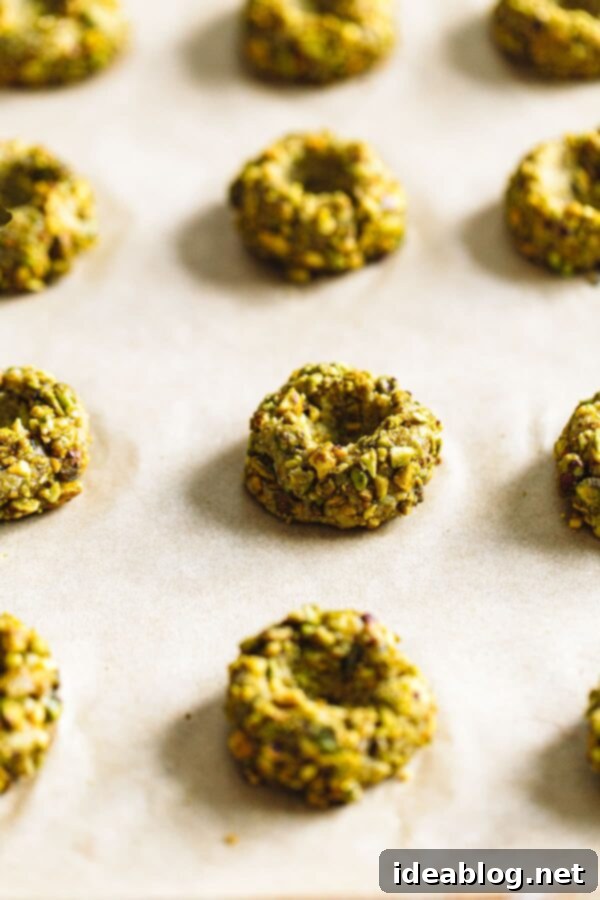
Beyond the rich flavor within, these cookies boast a delightful texture. Each cookie dough ball is first lightly dipped in frothy egg whites, then generously rolled in coarsely chopped pistachios. This extra step is well worth the effort, as it creates a beautiful, crunchy exterior that contrasts wonderfully with the tender, buttery interior. It adds not only an appealing texture but also enhances the overall pistachio flavor and provides a stunning visual appeal. Despite this artisanal touch, these pistachio cookies are surprisingly quick to make, taking less than an hour from start to finish.
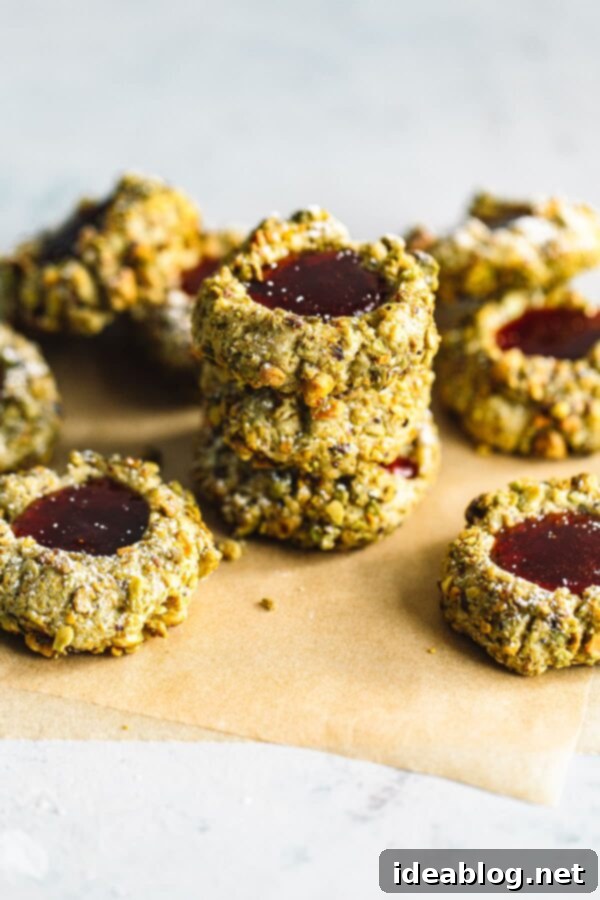
The result is a perfectly buttery, crisp-edged cookie with an intensely rich pistachio flavor, all crowned with that vibrant, sweet, and tangy jammy center. The combination of textures and flavors is simply divine, making them an instant favorite for anyone who tries them. These cookies aren’t just a treat; they’re a celebration of holiday flavors and craftsmanship, sure to become a cherished part of your festive baking repertoire.
Key Ingredients for Perfect Pistachio Thumbprint Cookies
Achieving the perfect Pistachio Thumbprint Cookie relies on a few key ingredients and how they are handled. Let’s dive into what makes this recipe shine:
- Pistachios: We use shelled pistachios in two forms: finely ground to create a vibrant pistachio flour for the dough, and coarsely chopped for rolling the cookie balls. This dual application ensures a pronounced pistachio flavor throughout, along with a delightful textural contrast. You can use raw or dry roasted pistachios; just ensure they are unsalted.
- All-Purpose Flour: Essential for the structure of our shortbread-like dough. I cannot stress enough the importance of measuring flour correctly. Over-measuring can lead to a dry, crumbly dough. For the most consistent and best results, I strongly recommend using a kitchen scale and the metric measurements provided in the recipe. If you don’t have a scale, please refer to my guide on how to properly measure flour to avoid a dense cookie.
- Unsalted Butter: Provides the rich, tender crumb characteristic of thumbprint cookies. Ensure your butter is at room temperature so it creams easily with the sugar, creating a light and fluffy base for the dough.
- Granulated Sugar: Sweetens the dough and contributes to its crisp texture.
- Vanilla Extract: A touch of vanilla complements the pistachio flavor beautifully, adding a warm, aromatic note.
- Large Egg White: Used as a binder to help the chopped pistachios adhere to the outside of the cookie dough balls, creating that gorgeous, crunchy coating.
- Raspberry (or Blackcurrant) Jam: The heart of the thumbprint! Raspberry jam offers a fantastic balance of sweetness and tartness, and its bright red color is perfect for festive occasions. As mentioned, opt for a fruit-forward jam with less added sugar for the best flavor.
- Powdered Sugar: For a delicate dusting at the end, adding a touch of elegance and extra sweetness.
How to Make Pistachio Thumbprint Cookies: A Detailed Step-by-Step Guide
Crafting these exquisite Pistachio Thumbprint Cookies is a straightforward process, but paying attention to each step will ensure perfect results every time. Here’s how to do it:
1. Prepare the Oven and Baking Sheets: First, preheat your oven to 350°F (175°C) and position oven racks in the upper and lower thirds. Line two half sheet pans with parchment paper or silicone baking mats. This prevents sticking and makes for easy cleanup.
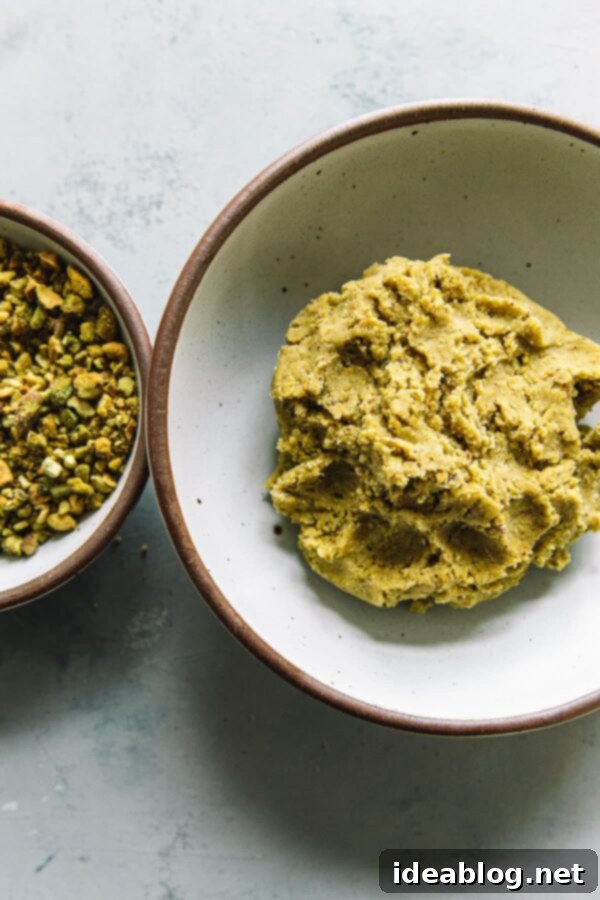
2. Coarsely Chop Pistachios for Coating: Take half of the shelled pistachios (about ⅔ cup) and place them in a small to medium food processor. Pulse a few times until they are coarsely chopped. You want distinct pieces, not a fine powder, for that satisfying crunch on the outside of the cookies. Transfer these to a shallow bowl and set aside.
3. Make Homemade Pistachio Flour: In the same (now empty) food processor bowl, combine the remaining ⅔ cup of shelled pistachios with two teaspoons (6 grams) of all-purpose flour. The flour is crucial here as it helps absorb some of the pistachios’ natural oils, preventing them from clumping into butter and ensuring a fine, flour-like texture. Pulse continuously until the pistachios are finely ground, resembling almond meal or flour.
4. Combine Dry Ingredients: In a medium bowl, whisk together the homemade pistachio flour, the remaining 1 cup (120 grams) of all-purpose flour, and the kosher salt. Whisking ensures these ingredients are evenly distributed, contributing to a uniform cookie texture. Set this mixture aside.
5. Cream Butter and Sugar: In the bowl of a stand mixer fitted with a paddle attachment, combine the softened unsalted butter and granulated sugar. Beat on medium-high speed for 3 to 4 minutes until the mixture is light, fluffy, and pale in color. This creaming process incorporates air, which contributes to the cookies’ tender texture. Add the vanilla extract and mix until just combined.
6. Form the Dough: Reduce the mixer speed to low and gradually add the whisked dry flour mixture to the butter mixture. Mix slowly until the dough just comes together. Be careful not to overmix, as this can develop the gluten in the flour and lead to tough cookies. If the dough appears dry and crumbly, don’t worry! A small splash (about ½ to 1 teaspoon) of milk or water can help it come together. Mix until no dry streaks remain.
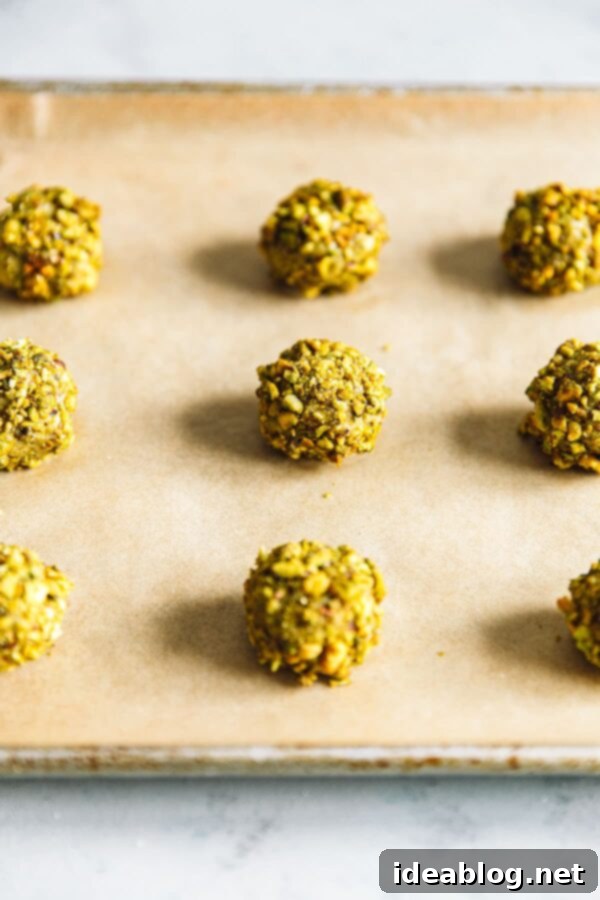
7. Prepare Egg White and Shape Cookies: In a separate small bowl, whisk the large egg white until it becomes light and frothy. Using your fingertips or a small cookie scoop (about 1 tablespoon), roll the dough into uniform 1-inch diameter balls. Consistent sizing ensures even baking. If you prefer slightly larger cookies, aim for about 16-18 cookies in total.
8. Coat Cookies with Pistachios: Working one at a time, lightly dip each dough ball into the frothy egg white mixture, then roll it in the coarsely chopped pistachios. Ensure each ball is evenly coated for maximum flavor and crunch. Place the coated balls onto your prepared baking sheets, spacing them about two inches apart.
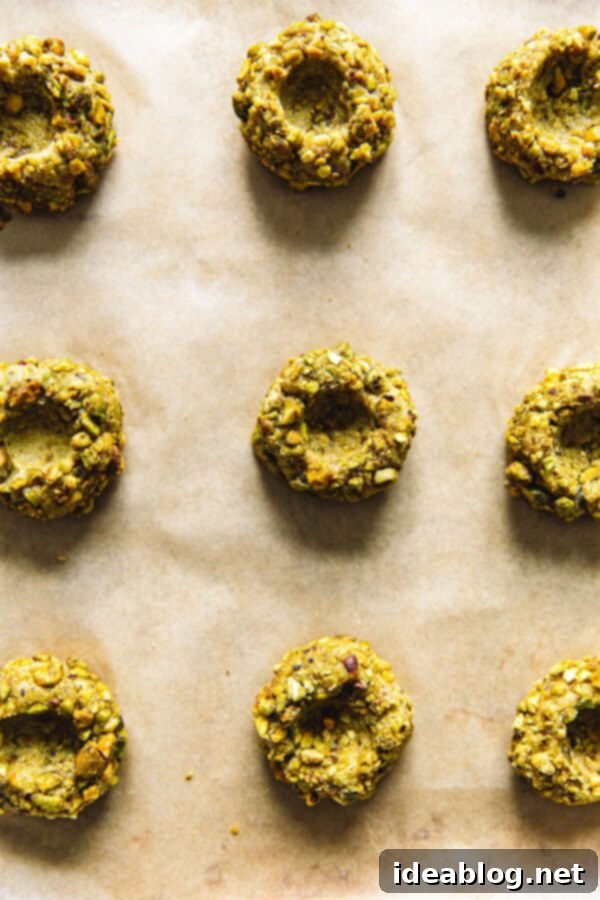
9. Create the Indentations: Gently hold each cookie ball steady with one hand. Using the handle end of a wooden spoon (or your thumb, if you prefer), create a shallow indent in the center of each cookie. Push down until you are just before reaching the baking sheet, creating a clear well for the jam. If any cookies lose their perfect circular shape during this process, gently reshape them with your fingertips.
10. Bake to Perfection: Bake the cookies for 15-18 minutes, rotating the baking sheets halfway through the baking time for even cooking. The cookies are done when the bottoms are lightly golden. Keep an eye on them, as baking times can vary slightly. If the indentations puff up during baking, gently press them back down and deflate them using the end of your wooden spoon or your fingertips immediately after removing them from the oven.
11. Cool and Dust: Allow the baked cookies to cool on the baking sheets for 3 to 4 minutes. This brief resting period helps them set and prevents them from breaking when transferred. Then, carefully transfer them to a wire cooling rack to cool completely. Once cool, use a fine-meshed sieve to lightly dust the cookies with powdered sugar for an elegant finish.
12. Fill with Jam: In a small saucepan, gently heat your raspberry jam (or blackcurrant preserves, if using) until it comes to a boil. Heating the jam makes it smoother and easier to spoon, and it will set better as it cools. Remove the jam from the heat and carefully spoon ½ to 1 teaspoon of warm jam into the center of each cookie indentation. Allow the jam to cool and set completely before serving or storing. This step is crucial for the jam to firm up and prevent messiness.
Recipe Notes & Tips for Success
These Pistachio Thumbprint Cookies are wonderfully forgiving and allow for a good amount of creativity. Here are some extra tips to ensure your baking success and inspire some delicious variations:
- Jam Substitutions: While raspberry and blackcurrant are fantastic, feel free to experiment with your favorite jam! Apricot, strawberry, cherry, or even a citrus marmalade could offer delightful new flavor profiles. Just remember the advice to choose a fruit-forward, lower-sugar option.
- Nutty Variations: If pistachios aren’t your preference, these cookies are incredibly adaptable. You could easily substitute the pistachio flour and chopped pistachios with almond flour and finely chopped almonds, hazelnuts, or even walnuts for a completely different yet equally delicious cookie.
- Chocolate Filling: For the ultimate indulgence, consider filling the cooled cookies with a rich chocolate ganache instead of jam. Simply melt good quality chocolate with a touch of cream, let it cool slightly, then spoon into the indentations.
- Adding Zest: For an extra layer of flavor, you can grate a teaspoon of lemon or orange zest into the cookie dough mixture when creaming the butter and sugar. Citrus notes pair beautifully with both pistachios and berries.
- Storage: To keep these thumbprint cookies fresh and delicious, store them in an airtight container at room temperature for up to 1 week. If stacking, place layers of parchment or wax paper between the cookies to prevent them from sticking together or the jam from smudging.
- Make-Ahead & Freezing Tips:
- Dough: You can prepare the cookie dough up to 2-3 days in advance. Wrap it tightly in plastic wrap and store it in the refrigerator. Before rolling, let it come to room temperature for about 15-20 minutes to make it more pliable.
- Unbaked Cookies: Shaped and coated cookie balls (before indenting or filling) can be frozen. Place them on a baking sheet and freeze until solid, then transfer to a freezer-safe bag for up to 1 month. Bake directly from frozen, adding a few extra minutes to the baking time.
- Baked & Unfilled Cookies: Fully baked and cooled cookies (before dusting or filling with jam) can also be frozen for up to 3 months. Thaw at room temperature, then proceed with dusting and filling.
- Measuring Flour: As reiterated in the recipe, the most accurate way to measure flour is by weight using a kitchen scale. If you’re using cup measurements, spoon the flour into the measuring cup and level it off with a straight edge rather than scooping directly from the bag, which can compact the flour and lead to excess.
Pistachio Thumbprint Cookies with Jam
Pin
Review
SaveSaved!
Equipment
-
Half Sheet Pan
-
Natural Parchment Paper
-
Cooling Rack, Fits Half Sheet Pan
Ingredients
- 1⅓ cups (200 grams) shelled pistachios, raw or dry roasted divided
- 1 cup (120 grams) plus 2 teaspoons (6 grams) unbleached all-purpose flour divided
- ½ teaspoon kosher salt
- 4 ounces (8 tablespoons; 115g) unsalted butter room temperature
- ¼ cup (50 grams) granulated sugar
- ¾ teaspoon vanilla extract
- 1 large egg white
- powdered sugar for dusting
- ⅔ cup (210 grams) raspberry or blackcurrant preserves
Instructions
-
Note: It can be very easy to over-measure flour, resulting in a drier, crumblier dough, if you use volume measurements for thumbprint cookies. I strongly recommend using a scale and the metric measurements provided below for this recipe. If you don’t have a scale, be sure to read my guide on how to properly measure flour before starting.
-
Preheat the oven to 350°F (175°C) with racks in the upper and lower thirds of the oven. Line two half sheet pans with parchment paper (or a silicone baking sheet) and set aside.
-
Place ⅔ cup shelled pistachios in the bowl of small to medium food processor bowl, and pulse until coarsely chopped. Set aside in a bowl. Combine the remaining ⅔ cup shelled pistachios and the 2 teaspoons of all-purpose flour in the empty food processor bowl, and pulse repeatedly until finely ground.
-
Whisk together the pistachio flour, remaining 1 cup all-purpose flour and salt in a medium bowl and set aside.
-
Combine the softened butter and granulated sugar in the bowl of a stand mixer fitted with a paddle attachment. Beat the butter and sugar on medium-high speed until light and fluffy, 3 to 4 minutes. Add the vanilla extract and mix thoroughly. Reduce the speed to low and slowly add the flour mixture, scraping down the sides of the bowl once or twice until the dough comes together. Note: If the dough still appears crumbly or too dry, you can add a small splash of milk or water to help bring it together.
-
In a separate bowl, whisk the egg white until lightly frothy. Using your fingertips, roll the cookie dough into roughly 1-inch diameter balls (about 1 tablespoonful). If you make them slightly larger, the yield will be closer to 16-18 cookies. Dip each ball lightly into the egg white, and then roll in the crushed pistachios until evenly coated. Place the balls 2 inches apart on the baking sheets (roughly 12 cookies per sheet). Holding the cookie balls steady with one hand, create an indent in the center of each cookie with the end of a wooden spoon, pushing down until just before you reach the baking sheet. Re-shape each cookie into a circle with your fingertips as necessary.
-
Bake the cookies, rotating the sheets halfway through the baking time, until the bottoms of the cookies are lightly golden, about 15 to 18 minutes. Allow the cookies to cool on the baking sheets for 3 to 4 minutes before transferring them to a cooling rack to cool. Using a fine-meshed sieve, dust the cookies very lightly with powdered sugar.
-
In a small saucepan, heat the raspberry jam (or blackcurrant, if using) until it reaches a boil. Remove the jam from the heat and spoon ½ to 1 teaspoon of jam into the center of each cookie. Allow the jam to cool and set completely before serving or storing.
-
Leftover thumbprint cookies can be stored in an airtight container, layered between sheets of parchment or wax paper, at room temperature for up to 1 week.
Tips for Success:
- Feel free to mix these cookies up with your favorite jam, nut, or even go as far as to add a chocolate filling.
- Leftover thumbprint cookies can be stored in an airtight container, between layers of parchment, at room temperature for up to 1 week.
- Make-Ahead & Freezing: You can prepare the dough 2-3 days in advance (refrigerate). Unbaked, coated cookie balls can be frozen for up to 1 month. Baked, unfilled cookies can be frozen for up to 3 months.
- Flour Measurement: For best results, use a kitchen scale and metric measurements for flour. If using cups, spoon and level to avoid a dry dough.
