Mexican Hash Brown Stack: Your Ultimate Crispy Potato & Egg Brunch Delight
Embark on a culinary journey with this incredible Mexican Hash Brown Stack – a dish that masterfully combines crispy, golden potato with perfectly cooked sunny-side eggs, creamy sliced avocado, vibrant homemade pico de gallo, and savory crumbled queso fresco. This isn’t just a meal; it’s an experience, transforming your breakfast or brunch into a flavorful fiesta that will delight your senses and satisfy your cravings. Prepare to discover your new favorite way to enjoy hash browns!

The Naming Journey: Finding the Perfect Fit for a Phenomenal Dish
Confession time: I had an unexpectedly challenging time naming this recipe. I found myself staring at my computer screen for what felt like an eternity, even consulting several family members, yet the perfect name remained elusive. In fact, I actually changed the name yet again just before publishing this post, settling on “Mexican Hash Brown Stack.” It sounds strange, but sometimes the most straightforward dishes are the hardest to title in a way that truly captures their essence and makes immediate sense to everyone.
While “stack” isn’t my absolute favorite word, it ultimately does the best job of describing this incredible creation. It paints a clear picture: a robust, crispy hash brown serving as a foundation, generously topped with perfectly runny sunny-side eggs, our fresh homemade pico de gallo, creamy slices of avocado, and a generous sprinkle of crumbled queso fresco. It’s a combination that screams comfort, flavor, and satisfaction, making it ideal for a leisurely breakfast, a hearty brunch, or even a delightful breakfast-for-dinner.

The Heart of the Dish: Mastering the Crispy Potato Base
The inspiration for this Mexican Hash Brown Stack was loosely drawn from a smoked salmon potato tartine recipe I shared nearly two years ago (please, don’t judge the old photos!). While that salmon tartine offers its own unique deliciousness, the two recipes share a crucial, irresistible element: a perfectly crispy potato base. In my culinary school days, we referred to this as a pommes darphin, which, in essence, is a sophisticated, large, and wonderfully crispy hash brown.
Who doesn’t love a good crispy hash brown? Seriously, I’m yet to meet anyone (or anyone worth trusting, for that matter) who can resist their golden, crunchy charm. Achieving that ideal hash brown base for this dish requires a few key tricks, but trust me, the effort is incredibly rewarding. A truly spectacular hash brown isn’t just about frying potatoes; it’s about technique, patience, and understanding the potato itself. Get this right, and the rest of your Mexican Hash Brown Stack will shine.
Essential Tips for Achieving Perfectly Crispy Hash Browns:
- Grate Quickly and Efficiently: Potatoes oxidize rapidly once grated, turning a rather unappetizing grayish color. To prevent this, work swiftly. Peel and grate one potato at a time, immediately moving on to the next step. This ensures your hash browns retain their beautiful, golden hue.
- Prioritize Moisture Removal, Not Starch Removal: Unlike some potato preparations where you might soak potatoes in water to remove starch, for hash browns, you want to remove excess moisture without stripping away all the starch. The starch acts as a natural binder, allowing you to form a cohesive, pancake-like hash brown that holds together beautifully while cooking. After grating, place the potato in a clean kitchen towel and squeeze out as much liquid as possible. You’ll be surprised how much water comes out!
- Choose the Right Oil: For that perfect crisp, a neutral, high-smoke point oil is essential. Options like grapeseed, safflower, or canola oil are excellent choices. For an even richer flavor and superior crispness, consider using clarified butter (ghee). Its high smoke point and delightful nutty aroma elevate the hash browns to another level.
- Master the Heat and Flip with Care: Pay close attention to your pan. Start with medium-high heat, but be prepared to adjust it throughout the cooking process. You want a steady sizzle, not a frantic burn. Cook gently until the bottom is deeply golden and crisp, then, with confidence and a broad spatula, flip it carefully. Avoid constantly prodding; let the potato cook undisturbed to form that irresistible crust.
- Keep Them Warm and Crisp: No one enjoys a cold, soggy hash brown. As you prepare multiple hash browns, eggs, and other toppings, keep the finished hash browns warm and crispy in a 275°F (135°C) oven. Place them on a wire rack set over a baking sheet to allow air circulation, preventing them from steaming and losing their crunch. This ensures every component of your stack is served at its best.

The Freshness Factor: Homemade Pico de Gallo
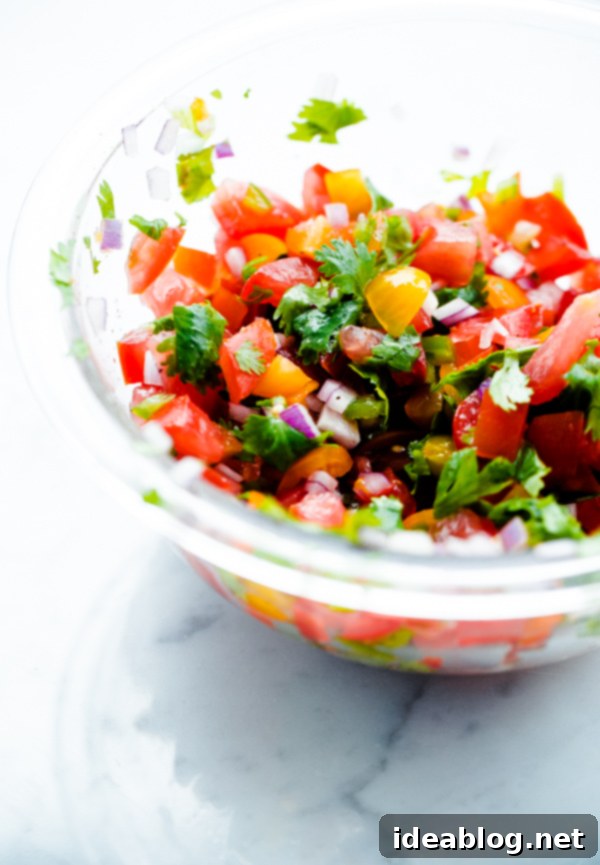
While the hash brown base might be the most technical element of this recipe, the rest of the components come together with remarkable speed and simplicity. And when it comes to flavor, nothing quite compares to fresh ingredients. You might be tempted to grab a store-bought pico de gallo, but I urge you to reconsider. Making it from scratch is surprisingly easy and takes only about 10 minutes. The difference in taste is simply incomparable – it’s infinitely brighter, fresher, and more vibrant.
Especially during the summer months, if you’re anything like me, you probably have an abundance of ripe, juicy tomatoes gracing your kitchen countertop. This recipe is the perfect opportunity to put them to good use. My only firm request for this dish is to use fresh pico de gallo, not jarred salsa. The textural contrast and the burst of fresh flavors from diced tomatoes, onions, cilantro, and a hint of lime are absolutely crucial to the overall harmony of the Mexican Hash Brown Stack. It’s truly a non-negotiable component for an authentic and delicious experience.

Perfect Eggs and Luscious Toppings
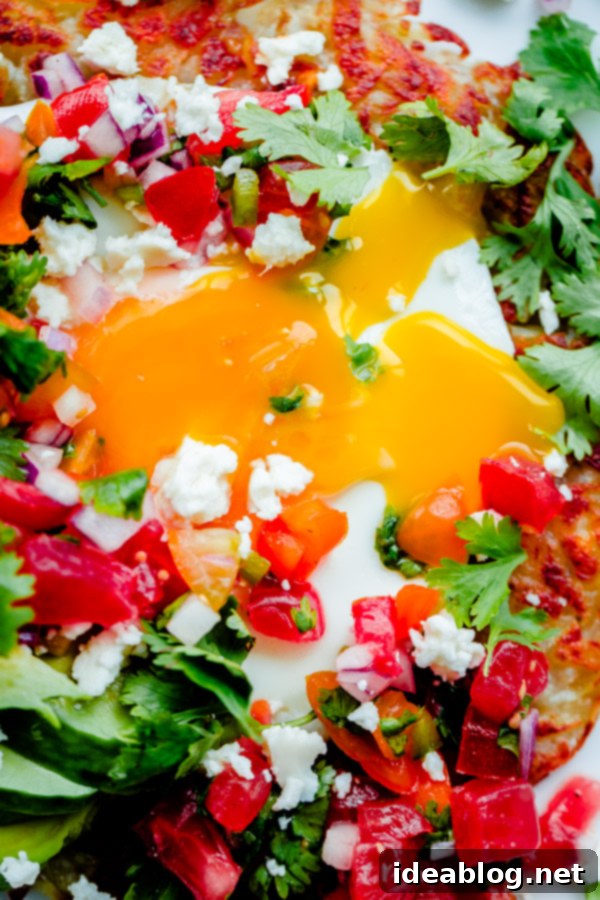
Once your crispy hash browns are ready and your pico de gallo is mingling beautifully, the next step is to prepare your eggs. I personally love topping these stacks with glorious sunny-side eggs, where the whites are just set and the yolks remain wonderfully runny, creating a rich sauce that cascades over the other toppings. However, feel free to customize them to your liking. Eggs cooked over easy, fried, or even delicately poached would work just as wonderfully, offering different textures and runny yolk experiences.
Beyond the eggs and pico, the final touches bring everything together. Thinly sliced ripe avocado adds a creamy, rich counterpoint to the crispy potato and tangy salsa. A sprinkle of crumbled queso fresco (or cotija cheese, if you prefer) introduces a delightful salty, milky flavor that balances the entire dish. A final garnish of fresh cilantro leaves not only adds a pop of color but also a fresh, herbaceous aroma. The beauty of this dish lies in its simple assembly and the joyous act of devouring it. So go ahead: assemble, devour, and repeat!
Customizing Your Stack: Beyond the Basics
While the core ingredients create a perfect harmony, don’t hesitate to personalize your Mexican Hash Brown Stack. A drizzle of your favorite hot sauce can add a spicy kick, or a dollop of sour cream or crema Mexicana can introduce another layer of creaminess. For those who enjoy more protein, a sprinkle of seasoned ground beef, shredded chicken, or even black beans could be excellent additions. Don’t be afraid to experiment with different types of cheese too – a mild cheddar or Monterey Jack could melt beautifully over a freshly cooked egg. This dish is incredibly versatile and can be adapted to suit any palate or occasion.

Serving Suggestions & Occasions
The Mexican Hash Brown Stack is a truly versatile dish that fits beautifully into a variety of meal times and gatherings. It’s an obvious choice for a weekend breakfast or a leisurely Sunday brunch, offering a gourmet twist on classic comfort food. But don’t limit it to just mornings! It shines as a “breakfast-for-dinner” option, providing a satisfying and flavorful meal that’s both comforting and exciting. Imagine serving these at a casual dinner party or a family gathering – they’re sure to impress with their vibrant presentation and incredible taste. Pair it with a side of fresh fruit or a simple green salad to complete the meal, or simply let the stack be the star of the show.

Mexican Hash Brown Stack
Pin
Review
SaveSaved!
Ingredients
For the Fresh Pico de Gallo:
- 2-3 medium vine-ripened tomatoes (approximately 8 oz), cored, de-seeded and finely diced
- ¼ cup finely chopped red onion (about ¼ of a medium onion, for a sharp, fresh bite)
- ¼ cup packed fresh cilantro leaves (roughly chopped for vibrant flavor)
- 1 tablespoon finely diced jalapeno pepper (remove seeds for less heat, if desired)
- 1 tablespoon fresh lime juice (to brighten all the flavors)
- kosher salt (season to your taste)
- freshly ground black pepper (to taste)
For the Crispy Potato Hash Brown Stacks:
- 1¼ lbs russet potatoes (roughly 1 small russet potato per serving, for optimal crispness)
- kosher salt (for seasoning)
- freshly ground pepper (to enhance flavor)
- canola or avocado oil (or clarified butter, for frying the potatoes)
For the Delicious Toppings:
- 2-4 large eggs (sunny-side up recommended, but any style works!)
- ½ ripe avocado (thinly sliced, for creamy texture)
- 2 ounces queso fresco or cotija cheese (crumbled, for a salty, tangy finish)
- fresh cilantro leaves (for garnishing and a burst of freshness)
Instructions
-
1. Prepare the Pico de Gallo: In a small mixing bowl, combine the diced tomatoes, finely chopped red onion, roughly chopped cilantro, diced jalapeno pepper, and fresh lime juice. Stir all ingredients gently until well combined. Season generously with kosher salt and freshly ground black pepper to taste. Allow the pico de gallo to sit at room temperature while you prepare the remaining ingredients; this allows the flavors to meld beautifully.
-
2. Prepare the Potato Hash Brown Base: Begin by preheating your oven to a low 300°F (150°C). To minimize potato oxidization, peel, grate, and cook one russet potato (or one hash brown portion) at a time. Using a large box grater, swiftly grate the potato lengthwise into a large bowl. Gather the grated potato into the center of a clean, sturdy kitchen towel. Tightly twist the towel into a ball and squeeze firmly over the sink to remove any excess moisture and starch. Repeat this squeezing process a few times until very little liquid comes out – this step is crucial for crispiness. Transfer the dried grated potato to a clean, dry bowl and season lightly with salt and pepper.
-
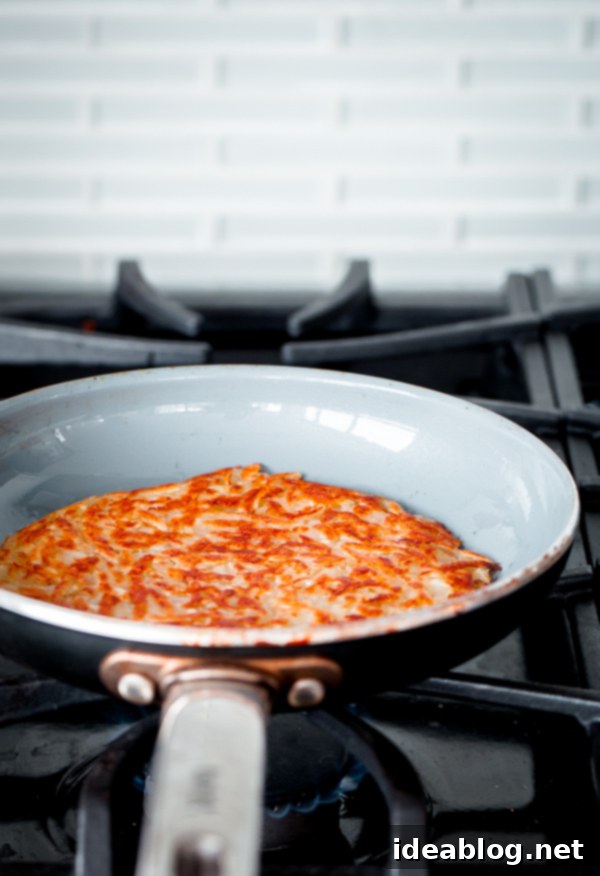
3. Cook the Hash Browns: Heat about a tablespoon of canola, avocado oil, or clarified butter in an 8-inch non-stick skillet over medium-high heat. Once the oil is shimmering and hot, add the seasoned grated potato to the skillet. Use a spatula to gently shape it into a large, even circle. Press down on the potato mixture with the back of your spatula to compact it, which helps create a solid hash brown. Cook undisturbed for 8 to 10 minutes, or until the bottom is a beautiful golden brown and wonderfully crisp. Resist the urge to peek or move it too often!
-
4. Finish Cooking Hash Browns: Carefully flip the potato using your spatula. Add a little more oil to the pan if necessary, then cook for another 8-10 minutes on the second side, or until both sides are evenly golden and crisp. Once cooked, transfer the crispy hash brown to a cooling rack set on a half sheet pan. Place it in the preheated 300°F (150°C) oven to keep warm while you prepare any remaining hash browns, cook the eggs, and get your other toppings ready. This method ensures your hash browns stay crisp and hot until serving.
-
5. Cook the Eggs: In a separate small non-stick skillet, heat a tiny amount of butter or oil over low heat. Carefully crack 1 or 2 eggs into the pan, making sure the yolk remains intact. Cook the eggs to your desired doneness. For sunny-side eggs, cook until the whites are firm and opaque, but the yolk is still deliciously runny. For over easy or medium, flip gently and cook briefly on the other side. Remove from heat immediately once cooked.
-
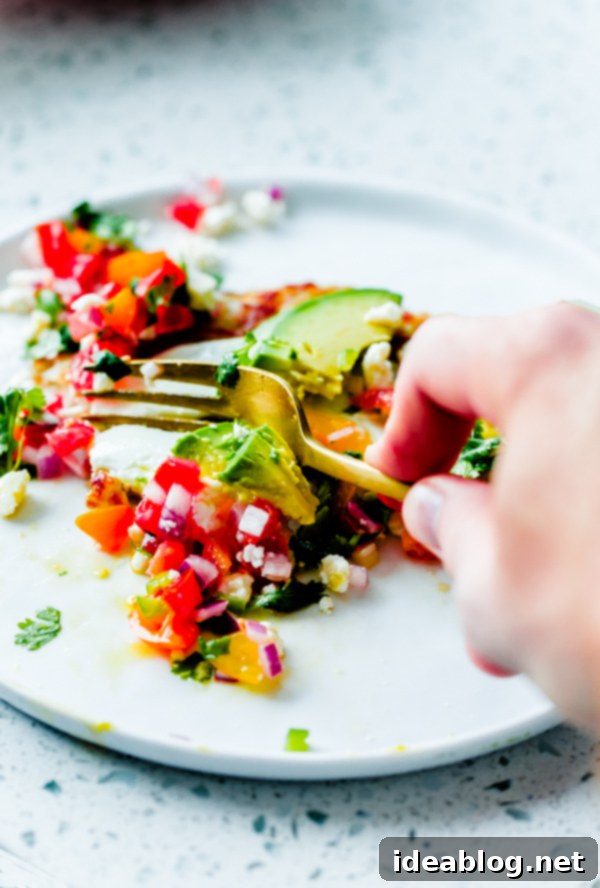
6. Assemble and Serve: Carefully remove the warm potato hash browns from the oven. Place one or two crispy hash browns on each serving plate. Top each hash brown with one or two perfectly cooked eggs. Spoon a generous amount of your fresh homemade pico de gallo over the eggs. Arrange several slices of ripe avocado beside or over the pico. Finally, crumble the queso fresco cheese generously over the entire stack and garnish with fresh cilantro leaves. Serve immediately and enjoy every delicious bite!
Conclusion: A Brunch Masterpiece Awaiting Your Table
This Mexican Hash Brown Stack is more than just a recipe; it’s a celebration of textures and flavors. From the satisfying crunch of the perfectly cooked hash brown to the creamy indulgence of avocado and the vibrant zest of homemade pico de gallo, each component plays a vital role in creating a truly memorable dish. Whether you’re whipping it up for a quick and impressive breakfast, a relaxed brunch, or a fun breakfast-for-dinner, this stack promises a delightful culinary experience. Give it a try, experiment with your favorite toppings, and prepare to be amazed by how easily you can bring this restaurant-worthy meal into your own home. Enjoy the process, and savor every single bite!
