The Ultimate Holiday Treat: Decadent Peppermint Chocolate Candy Cane Crunch Cake
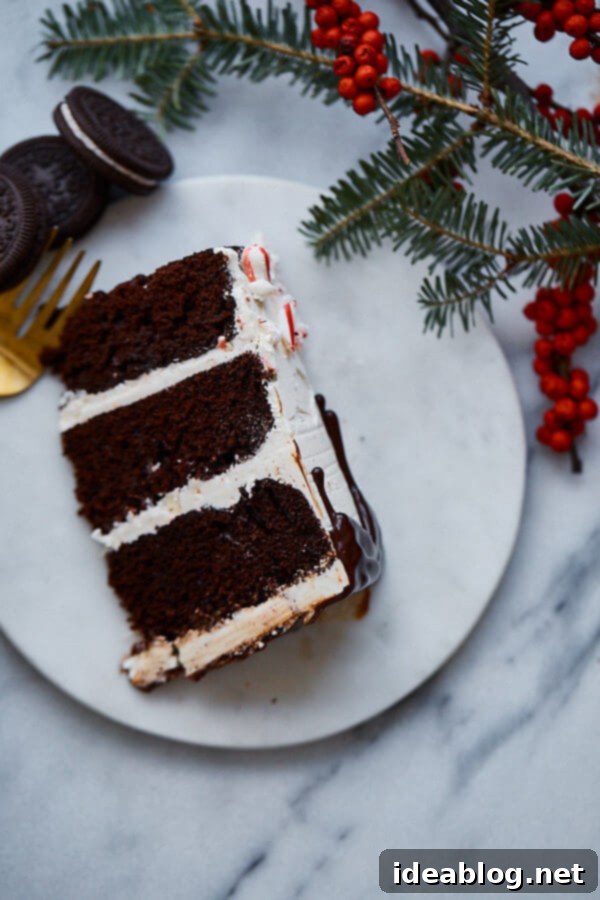
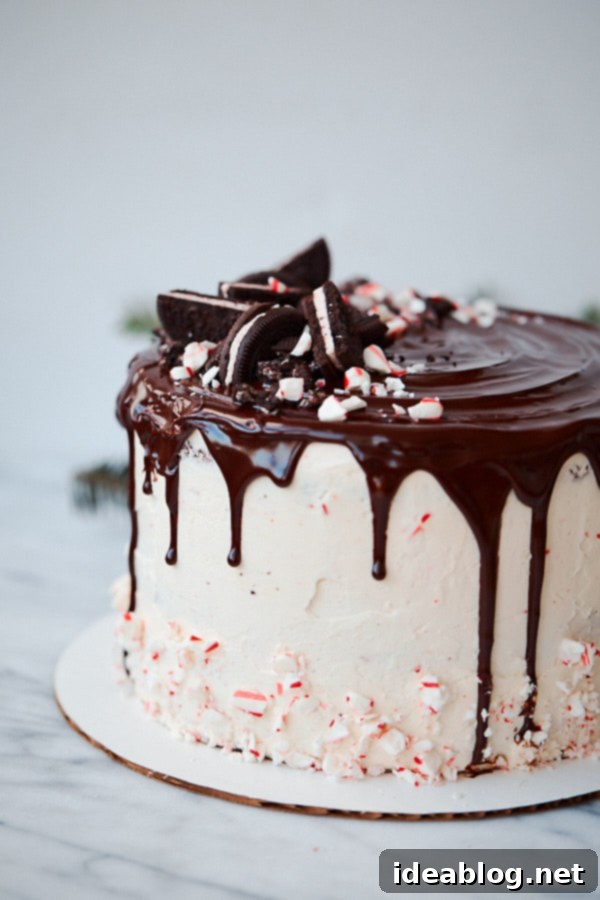
Imagine a wonderfully moist peppermint chocolate cake, generously filled with a velvety candy cane Swiss meringue buttercream and elegantly crowned with a rich, dark chocolate peppermint glaze. This whimsical Candy Cane Crunch Cake is more than just a dessert; it’s a festive centerpiece, a delicious celebration of the holiday season, and the perfect sweet ending to any gathering. Prepare to impress your guests with this stunning creation!
This recipe was lovingly created in partnership with Bob’s Red Mill, a brand we trust for exceptional baking ingredients.
The holiday season holds a special kind of magic for me. Despite the inevitable hustle and bustle, and the occasional stress that comes with large family gatherings (anyone else have a wonderfully boisterous family?), I eagerly anticipate this brief, cherished window of time each year. It’s a period of warmth, connection, and joy.
Even though my sisters, brothers-in-law, and nephew are now spread across the country, we all make the journey home to Washington D.C. to celebrate the holidays with my parents. Our house transforms into a vibrant hub of activity, filled with laughter, lively conversations, and endless memorable moments. It’s a time to truly disconnect from the daily grind, immerse ourselves in the spirit of the season, and uphold our cherished family traditions – some wonderfully old, some excitingly new, and a few that are delightfully silly.
Unsurprisingly, in a family as food-obsessed as ours, the heart of these traditions invariably revolves around the kitchen and the dining table. The kitchen is a constant symphony of sounds: the cheerful whirring of stand mixers, the gentle simmering of pots, the insistent beeping of kitchen timers, the steady hum of the dishwasher, and, of course, the (lovingly) bossy directives of the cooks (I sheepishly raise my hand here). It’s a place where recipes are shared, new dishes are invented, and everyone contributes to the culinary magic.
Today’s showstopper, the Candy Cane Crunch Cake, is my latest, highly anticipated addition to our evolving holiday menu. I am absolutely certain that you will fall in love with it just as much as my family and I have! It embodies everything festive and is utterly delicious, offering as much joy in the making as it does in every single bite. While its multi-layered structure might seem a little intimidating at first glance, I promise to guide you through each step of the process, ensuring a smooth and delightful baking experience.
The Inspiration Behind the Holiday Candy Cane Crunch Cake
The delightful inspiration for this Candy Cane Crunch Cake emerged from those irresistible candy cane sandwich cookies that have mysteriously found their way into my grocery cart on more than one occasion this holiday season. So simple, yet undeniably addictive! I managed to pry my hands away from the latest box just long enough to brainstorm this festive cake. And since absolutely nothing screams ‘happy holidays’ quite like the iconic trio of candy canes, peppermint, and rich chocolate, it’s no surprise that this show-stopping cake masterfully incorporates all three of these beloved seasonal flavors!
Like all truly exceptional desserts, this candy cane cake begins with a selection of fundamental, high-quality ingredients: flour, cocoa powder, sugar, milk, and eggs. While these might seem basic, small deviations in quality can make an enormous difference in the final flavor and consistency of your cake. Therefore, I highly recommend sourcing the best ingredients you can find. As the holiday baking frenzy approaches, I always make sure to fully stock my pantry with baking essentials, including several bags of reliable all-purpose flour and other pantry staples. The holiday season is full of wonderful distractions, and there’s nothing worse than realizing you’ve run out of flour or having to make last-minute, frantic trips to the grocery store when you should be enjoying the festivities!
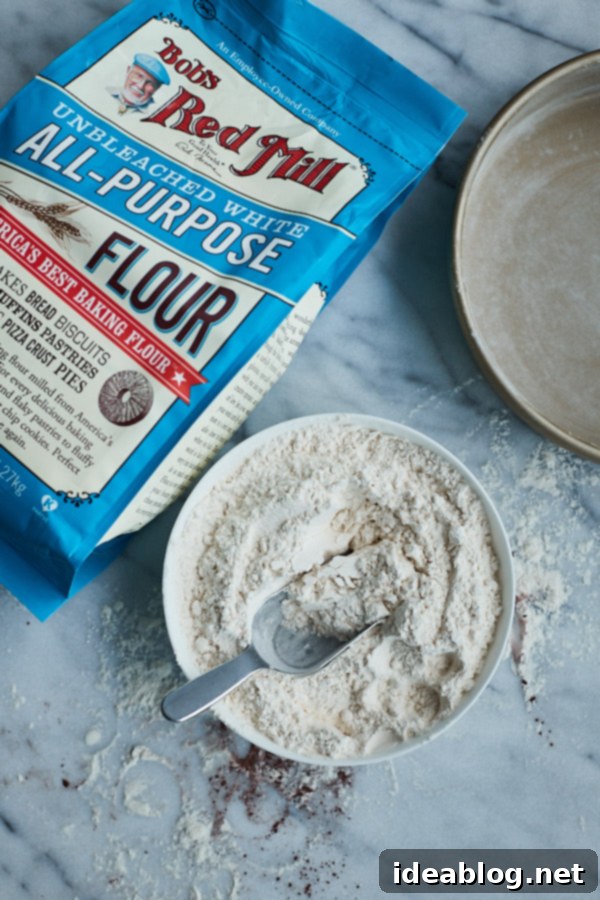
My absolute go-to for consistent baking results is Bob’s Red Mill Unbleached All-Purpose White Flour. It’s incredibly versatile and reliably delivers excellent results every time. Unlike many other all-purpose flours, it contains a subtle touch of malted barley flour, which is a secret weapon for improving both the rise and browning of yeast breads, and contributes to a beautifully tender crumb in cakes. My family and I use it for a vast array of our holiday baking projects, from classic sugar cookies to our much-requested pumpkin muffins (these are an annual tradition!), to our surprisingly delicious fruitcake (don’t knock it ’til you try it!), and even more elaborate creations like Bûche de Noël. It truly is the workhorse of our holiday kitchen.
Crafting the Perfect Peppermint Chocolate Cake Layers
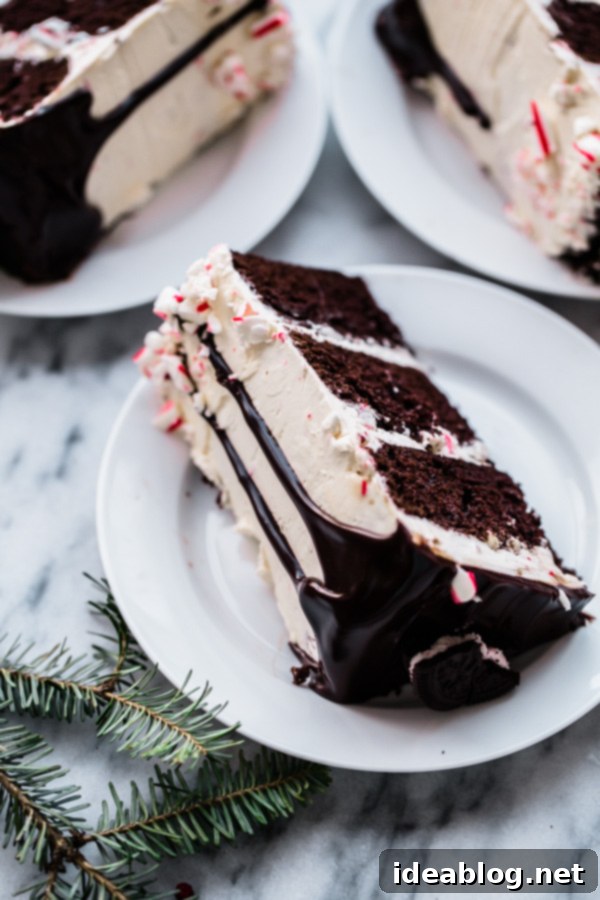
The foundation of this stunning dessert is built upon three glorious 8-inch layers of incredibly moist peppermint chocolate cake. This chocolate cake batter is a variation of my beloved London Fog cake recipe, featuring a unique combination of both oil and strongly-brewed coffee. Don’t worry if you’re not a coffee aficionado; you won’t actually taste the coffee in the finished cake! Instead, it works wonders to enhance the chocolate flavor and produces an exceptionally moist crumb that remains tender and delicious, holding up beautifully in the refrigerator for days.
The Dreamy Candy Cane Swiss Meringue Buttercream
Each decadent layer of chocolate cake is generously filled with layers of our spectacular Candy Cane Swiss Meringue Buttercream. This isn’t just any frosting; it’s a luscious Swiss meringue buttercream meticulously infused with finely crushed candy canes and a delicate touch of pure peppermint extract. The result is as dreamy as it sounds, offering a wonderfully smooth texture punctuated by a delightful crunch that adds an exciting textural dimension to every single bite.
If you’ve never had the pleasure of making Swiss meringue buttercream before, you are truly in for an extraordinary treat. Unlike traditional American buttercreams, which can often be overly sweet, Swiss meringue buttercream stands in a league of its own. It’s often hailed as the ultimate frosting for those who typically shy away from frosting. Its elegance and sophisticated flavor profile are unmatched.
The basic procedure involves gently heating egg whites and granulated sugar over a double-boiler until the mixture is hot to the touch and the sugar has fully dissolved. This warm mixture is then whisked at high speed until it transforms into glossy, stiff peaks – hence the ‘meringue’ in its name. Finally, slightly softened butter is slowly added, piece by piece, until the mixture becomes wonderfully shiny, impeccably smooth, and incredibly airy. While it requires a bit more effort and attention to detail than a simple powdered sugar frosting, the luxurious results are absolutely worth it. It’s significantly less sweet and remarkably easier to work with, allowing for a perfectly smooth and elegant finish on your cake.

The Perfect Finishing Touch: Dark Chocolate Peppermint Glaze
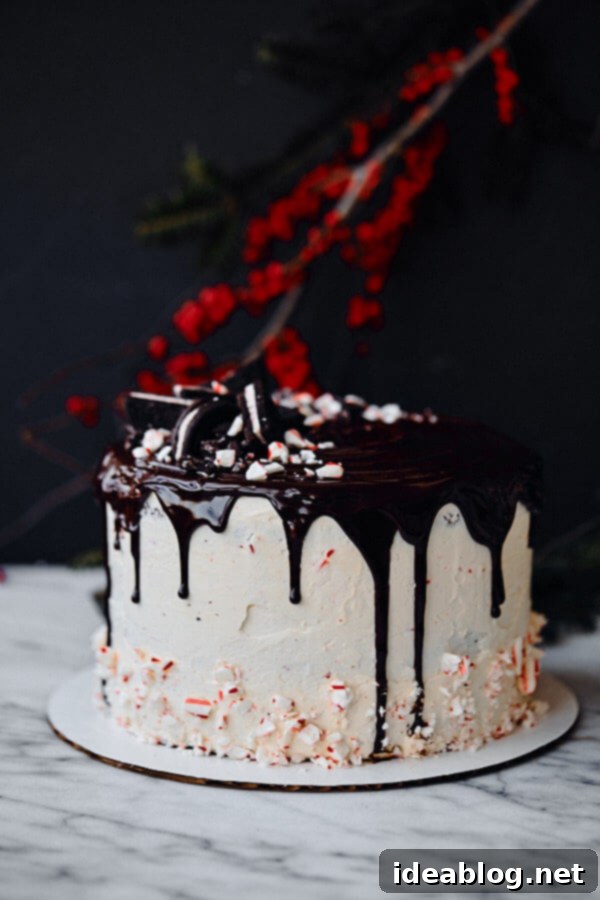
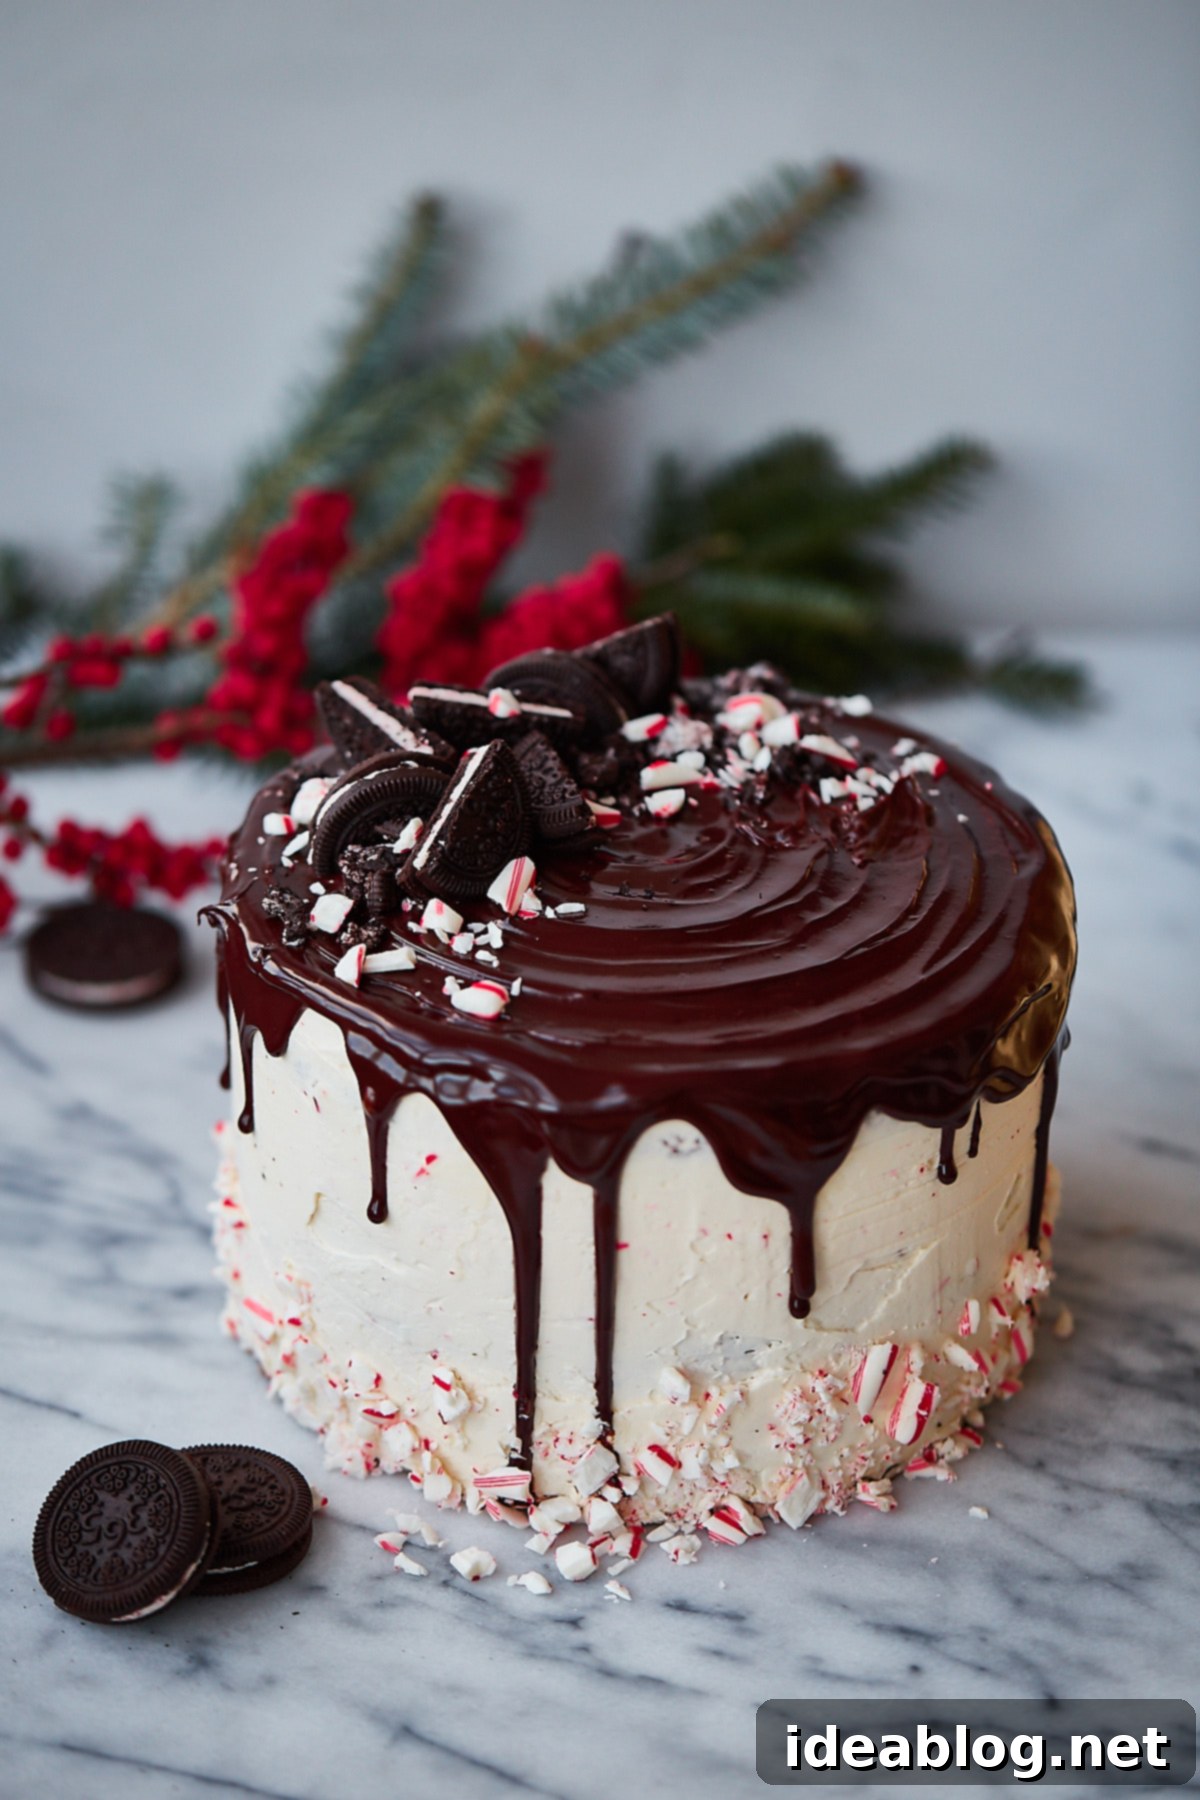
Once the cake has been beautifully frosted with the creamy Swiss meringue buttercream and chilled to perfection, the final, dazzling touch is the addition of a luxurious dark chocolate peppermint glaze. This exquisite glaze, slightly adapted from the brilliant cake inspiration guru, my friend Tessa Huff, elevates the entire cake to a new level. I absolutely adore the striking contrast it creates: the deep, rich sheen of the dark chocolate drips against the pristine white, candy cane-flecked buttercream. Beyond its visual appeal, it delivers an intense burst of additional chocolate flavor that beautifully complements the peppermint. It’s this detail that truly gives the cake that extra ‘wow’ factor, making it an unforgettable dessert.
The glaze itself is a relatively simple ganache, prepared with finely chopped bittersweet chocolate, rich heavy cream, a hint of pure peppermint extract, and a touch of light corn syrup. The corn syrup is key here, helping to thin the glaze just enough to achieve those perfect, elegant drips down the sides of the cake. For optimal results, it is crucial to allow the ganache to cool for approximately 5 to 10 minutes after preparation before you begin glazing the chilled frosted cake. It should still be warm enough to be easily drizzled from a spoon, but not so hot that it melts your carefully applied buttercream. Achieving this ideal temperature ensures beautiful, controlled drips and a flawless finish.
Elevate Your Presentation: Decoration Ideas
Before presenting and serving your magnificent Candy Cane Crunch Cake, unleash your creativity with the decorations! A classic approach is to top the cake with halved candy cane sandwich cookies and an additional sprinkling of crushed candy canes. However, feel free to go wild with your imagination! Consider adding a festive border of crushed candy canes gently pressed into the buttercream around the base of the cake. Small, delicate peppermint meringues or even store-bought peppermint bark, roughly chopped, would also make fantastic and visually appealing options. Each addition further enhances the festive appeal and the delightful textural contrasts of this holiday masterpiece.
Behold: a winter wonderland in cake form. Let’s make this holiday season unforgettable with this incredible dessert!
Candy Cane Crunch Cake
Pin
Review
SaveSaved!
Equipment
-
KitchenAid 5 Qt. Artisan Stand Mixer
-
Williams Sonoma Goldtouch® 8-Inch Nonstick Round Cake Pan
-
Cake Decorating Stand
-
Cake Strips
Ingredients
For the Cake Pans:
- butter or nonstick cooking spray for greasing
- unbleached all-purpose flour for dusting
Chocolate Cake:
- 2½ cups (315 g) Bob’s Red Mill unbleached all-purpose flour
- 1 cup (95 g) unsweetened non-alkalized cocoa powder
- 2½ teaspoon baking powder
- ¾ teaspoon baking soda
- 1 teaspoon kosher salt
- ½ cup + 2 tablespoons (150 mL) canola or vegetable oil
- 2 cups (400 g) granulated sugar
- 2 large eggs room temperature
- 1 large egg yolk room temperature
- 2 teaspoons pure vanilla extract
- 1¼ teaspoon pure peppermint extract
- 1½ cups (360 mL) whole milk room temperature
- 1 cup (240 mL) hot strong-brewed coffee
Candy Cane Swiss Meringue Buttercream:
- 6 standard peppermint candy canes crushed
- ½ cup + 2 tablespoons (150 mL) large egg whites
- 1¼ cups (250 g) granulated sugar
- 2 cups (16 oz; 450 g) unsalted butter room temperature
- 1 teaspoon pure vanilla extract
- ½ teaspoon pure peppermint extract
Dark Chocolate Peppermint Glaze:
- 3 ounces (85 g) bittersweet chocolate finely chopped
- ⅓ cup + 1 tablespoon (135 mL) heavy cream
- 3 tablespoons (45 mL) light corn syrup
- ½ teaspoon pure peppermint extract
- ¼ teaspoon pure vanilla extract
Decorations:
- 2-3 peppermint candy canes crushed
- 4-5 candy canes or peppermint sandwich cookies cut in half (*I used Whole Foods brand!), meringues, or peppermint bark
Instructions
Prepare the Cake:
-
Preheat the oven to 350°F (175°C) with a rack in the center position. Grease and flour three 8-inch (20-cm) cake pans and set aside (*see the note section for tips if you do not own three pans).
-
In a medium bowl, sift together the flour, cocoa powder, baking powder, baking soda, and salt and set aside.
-
In a bowl of a stand mixer fitted with a paddle attachment, beat together the oil and sugar on medium speed for 2 minutes. Over medium speed, add the eggs, egg yolk, vanilla, and peppermint extract. Stop the mixer and scrape down the bowl.
-
Turn the mixer to low and add the flour mixture in three batches, alternating with the milk, beginning and ending with the flour mixture. Stop the mixer and scrape down the bowl. With the mixer on low, slowly pour in the hot coffee. Mix on medium-low for no more than 30 seconds, or until combined. Scrape down the bowl to ensure it is incorporated evenly.
-
Evenly divide the batter (*see the note section on how to do this!) among the prepared cake pans. Bake for 23 to 25 minutes, or until a toothpick inserted into the center of the cake comes out clean. Let them cool on a wire rack for 10 to 15 minutes before removing the cakes from their pans. Allow the cake layers to cool completely before decorating. *If you are preparing this cake in advance, double-wrap the cooled cake layers in plastic wrap before refrigerating or freezing.
Prepare the Swiss Meringue Buttercream:
-
Place the candy canes in a large resealable freezer bag and squeeze out any excess air. Using a rolling pin, crush the candy canes into very small pieces (*you don’t want any of the pieces to be too large or they will be chewy, rather than crunchy). Set aside.
-
Place the egg whites and sugar in the bowl of a stand mixer. Whisk them by hand to combine. Fill a medium saucepan with a few inches of water and place it over medium heat until lightly simmering. Place the bowl on top of the saucepan to create a double-broiler, making sure the bottom of the bowl doesn’t touch the water. Whisking intermittently, heat the egg mixture until it reaches 160°F (70°C) on a candy thermometer or is hot to the touch.
-
Using the stand mixer, beat the hot egg white mixture over high speed for 8 to 10 minutes or until it reaches stiff peaks. Over low speed, slowly add the chunks of butter (a tablespoon or two at a time). Once incorporated, turn the mixer to medium high and beat until the buttercream is silky smooth, 3 to 5 minutes. Add the vanilla and peppermint extract and beat for an additional 30 seconds. Using a spatula, fold in the crushed candy canes.
Cake Assembly:
-
Level the cooled cake layers with a long serrated knife and choose which layer will be the bottom (tip: pick the sturdiest layer). Place it on a cake plate, turning table, or serving dish. Spread on roughly ¾ cup (180 ml) of the buttercream with an offset spatula. Top with the next layer of cake and repeat, ending with the third layer (tip: pick the most level, attractive layer for the top).
-
Frost the sides and top of the cake with the remaining buttercream (*if time permits, frost a thin crumb coat, refrigerate for 15 to 20 minutes, and finish with the remaining buttercream). A straight-sided frosting spatula and bench scraper are great for producing smooth sides. Refrigerate the cake, uncovered, for 20 to 25 minute before glazing.
For the Glaze:
-
In a small saucepan, combine the chopped bittersweet chocolate, cream, and corn syrup. Place over medium-low heat and stir continuously until the chocolate has melted. Remove from the heat and whisk gently until smooth and shiny. Stir in the peppermint and vanilla extract. Allow the glaze to cool until it is thick, yet can still drizzle from a spoon – about 10 minutes. (*If the glaze is too hot, it will drip too quickly and potentially melt the frosting. If the glaze is too cool, it will set too thickly and won’t drip over the sides).
-
Gently spoon the chocolate glaze over the edges of the cake, letting it drip over the edges. Spoon the remainder of the glaze in the center of the top of the cake, spreading and smoothing it into a thin even layer with a small offset spatula. Allow the glaze to set at room temperature before topping with garnishes.
For the Decoration:
-
Using your hands, decorate the cake by gently pressing crushed candy canes into the buttercream on the bottom of the cake. Top the cake with peppermint sandwich cookie halves and additional candy cane pieces. *Important Storage Note: The exposed candy cane pieces and cookies will gain moisture and become chewier (and less crunchy), so it is best to do this just before serving if possible.
-
Serve the cake slightly chilled or at room temperature. For clean slicing, run a long thin knife under very hot water for several seconds, dry the knife well, and proceed to slice the cake into wedges. Repeat for each slice.
Equipment Note:
- If you do not own three cake pan (I only own two), you can bake two layers at a time – and finish with one final layer. The batter will hold. Wash and cool the cake pan before using again with the remaining batter. The cake will keep in the fridge, covered with plastic wrap, for up to 4 days; it may also be frozen.
Tips for Success:
- To make very even, flat cake layers, I like to use these cake strips, which prevent most doming.
- To Ensure Even Cake Layers: I recommend weighing your empty stand mixer bowl in grams before you start baking this cake. Note the weight on a piece of paper. Weigh the final, prepared cake batter (in the bowl) and subtract the weight of the empty stand mixer bowl. This is the total batter weight. Divide this number by three. This final number is the weight of batter you want in each cake pan before it goes into the oven.

