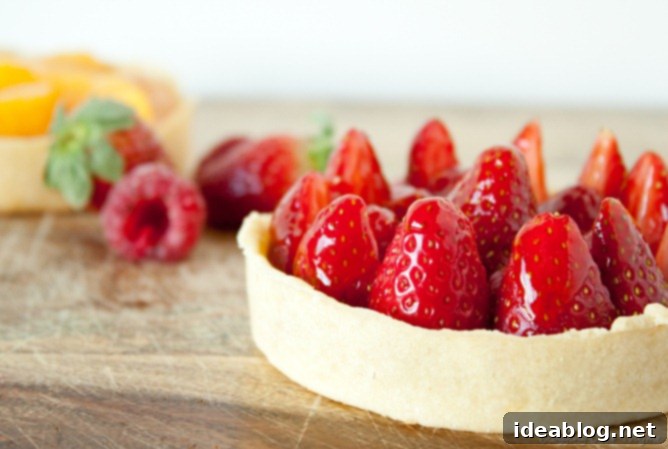
Elegant Homemade Citrus & Berry Tartlets: A Journey to Perfect French Pastry
Indulge in the exquisite charm of homemade Citrus and Berry Tartlets, featuring delicate, buttery pâte sucrée shells filled with velvety pastry cream, adorned with vibrant seasonal fruits, and finished with a luminous apricot glaze. These individual desserts are perfect for any occasion, showcasing a blend of classic French technique and delightful fresh flavors.
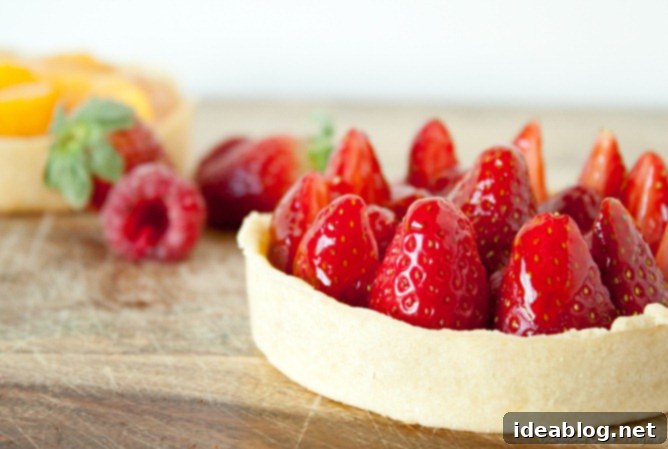
My journey into the world of delicate French pastries took a significant leap during my second week of culinary school. It was then that we delved into the art of making pâte sucrée, a foundational sweet pastry dough essential for classic tarts. Despite the bustling kitchen environment and the intensity of new techniques, I found immense satisfaction in learning to craft a timeless dessert, complete with homemade pastry cream and a colorful array of fresh fruit. This lesson ignited a passion for elegant baking that I’ve been eager to share.
Before culinary school, my baking repertoire, while extensive and certainly rich in cupcakes, lacked significant experience with homemade tarts. I admit, their perceived complexity had always been a bit intimidating. The idea of creating such an elegant and perfectly structured dessert from scratch felt like a challenge reserved for professional patissiers. However, the beauty and timeless appeal of a well-made tart captivated me, making the desire to master them irresistible. There’s something truly special about a dessert that looks as good as it tastes, offering a blend of delicate crust, smooth cream, and the bright burst of fresh fruit.
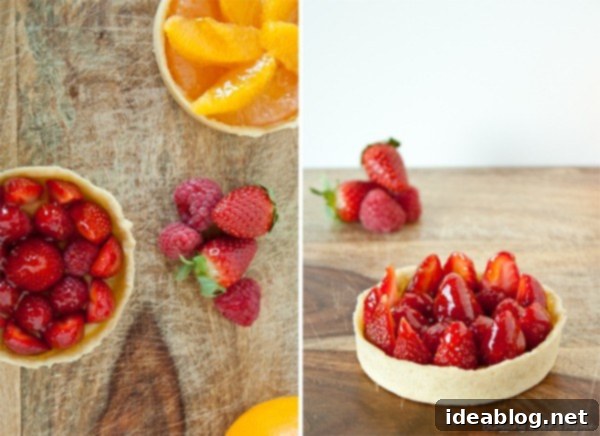
Driven by a desire to practice my newly acquired skills and to bring a touch of gourmet pastry into the home kitchen, I dedicated a recent weekend to developing these exquisite citrus and berry tartlets. My goal was to adapt the professional culinary school techniques to a standard apartment kitchen, proving that anyone can create these stunning desserts. I found the process to be incredibly rewarding, transforming simple ingredients into something truly spectacular.
To add my unique touch, I crafted two delightful variations, celebrating the best of seasonal produce. One version featured a vibrant medley of fresh raspberries and strawberries, creating a classic berry tartlet bursting with sweet and slightly tart notes. For the other, I embraced the brightness of winter citrus, using freshly segmented grapefruit and oranges. The combination of the crisp pastry, creamy filling, and the juicy, tangy fruit makes for an unforgettable dessert experience. If you appreciate these delicate flavors, you’ll also adore these refreshing Meyer Lemon Tarts.
The beauty of these homemade fruit tartlets lies in their versatility. While I’ve offered specific suggestions, feel free to experiment with any fruit you have on hand. Peaches, blueberries, kiwi, or even a mix of tropical fruits can create equally stunning and delicious results. The key is to choose fresh, high-quality ingredients that truly shine when paired with the rich pastry cream and buttery crust. Adjusting the fruit to match the season ensures the freshest flavors and keeps your desserts exciting throughout the year.
Mastering Homemade Tartlets: Tips for Success
While crafting homemade tartlets may appear more time-intensive than many other desserts, the process is surprisingly straightforward once you become familiar with the steps. Think of it as a rewarding culinary project rather than a daunting task. One of the biggest advantages is that both the tart dough (pâte sucrée) and the pastry cream can be prepared in advance, significantly streamlining your dessert assembly on the day of serving. This allows for a more relaxed baking experience and ensures you have all components ready for a stress-free finish.
Essential Equipment and Pan Options
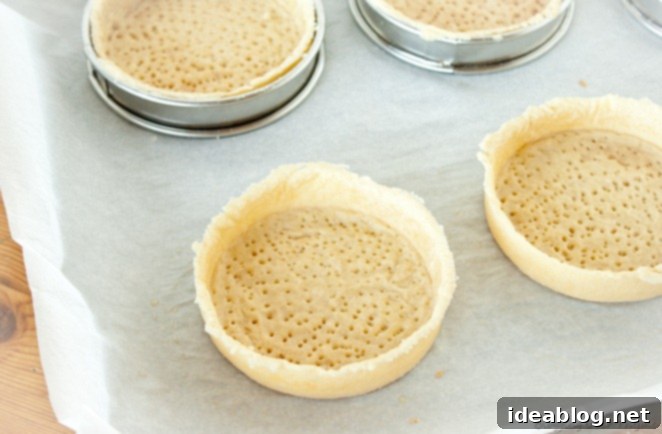
For shaping the tart shells, tart rings are ideal for their crisp edges and professional appearance, but don’t let a lack of specialized equipment deter you. Regular tartlet pans with removable bottoms work wonderfully and are widely available. You can even scale this recipe to fit a standard 9-inch or 10-inch tart pan, making it adaptable to whatever bakeware you possess. It’s important to note that this recipe calls for fully blind baking the tart shells, ensuring a perfectly crisp and stable foundation for your creamy filling and fresh fruit topping. This crucial step prevents a soggy bottom and provides the structural integrity necessary for an elegant tartlet.
The Philosophy: Fruit is the Star
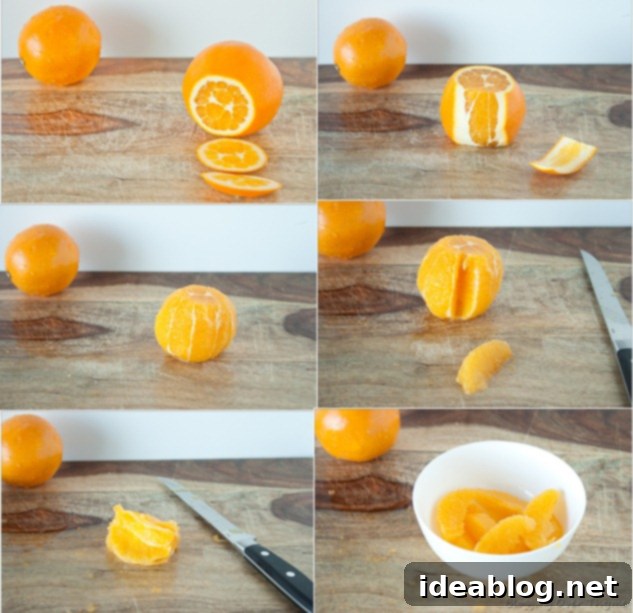
A core principle emphasized in culinary school for fruit tarts is that the fruit should always be the undisputed star of the show. The tart shell and pastry cream, while vital, serve as supporting characters, enhancing rather than overshadowing the natural sweetness and vibrant acidity of the fruit. To achieve this harmonious balance, there are two key techniques:
- **Roll the tart dough thinly:** Aim for approximately 1/8-inch thickness. A delicate crust offers a satisfying crunch without overpowering the filling.
- **Fill the shell less than halfway with pastry cream:** This strategic filling ensures that the vibrant fruit topping remains prominent, both visually and in terms of flavor.
By following these guidelines, you guarantee that each bite delivers a refreshing burst of fruit, perfectly complemented by the subtle richness of the cream and the tender crispness of the crust. This thoughtful approach elevates a simple dessert into a truly gourmet experience.
Step-by-Step Guide to Perfect Tartlets
Crafting the Pâte Sucrée: A Foundation of Flavor
The journey to an exceptional tartlet begins with a perfectly executed pâte sucrée. This sweet shortcrust pastry is known for its delicate, sandy texture and rich buttery flavor, making it the ideal base for fruit tarts. The “fraisage” method, where you smear the dough with the heel of your hand, is key to developing its tenderness and ensuring all ingredients are evenly incorporated without overworking the gluten. This results in a dough that is both pliable and resistant to shrinkage during baking. Don’t be afraid to handle the dough; it’s quite forgiving, and any cracks can be easily pressed back together. Chilling the dough thoroughly is paramount for easy handling and crisp shells.
The Silky Pastry Cream: A Custard Dream
Homemade pastry cream, or crème pâtissière, is a revelation compared to store-bought versions. Its rich, velvety texture and pure vanilla flavor are incomparable. The key to a smooth, lump-free cream is tempering the egg yolks with warm milk, whisking continuously, and then straining it through a fine-mesh sieve. This ensures a luxurious consistency that perfectly cradles the fresh fruit. Allowing it to cool over an ice bath quickly and covering it with plastic wrap directly on the surface prevents a skin from forming, maintaining its pristine texture. This component can be made a day or two in advance, making your tartlet assembly even smoother.
Assembling Your Edible Art
Once your blind-baked tart shells are cool and your pastry cream is chilled and smooth, the assembly process is pure joy. Gently remove the tart shells from their molds, admiring their golden-brown perfection. Re-whisk the pastry cream to restore its silky texture, then pipe or spoon it into the tart shells, remembering the “less is more” philosophy to highlight the fruit. Arrange your chosen citrus segments, strawberries, or raspberries in an artful display. The visual appeal is almost as important as the taste!
The Final Garnish: Apricot Glaze
The apricot glaze is more than just a decorative touch; it adds a professional sheen, enhances the fruit’s natural colors, and creates a protective layer that helps keep the fruit fresh. A simple mixture of apricot jam and water, warmed until smooth, it provides a subtle sweetness and a beautiful finish. Brush it lightly over the arranged fruit for that signature bakery-quality sparkle. Serve these beauties at room temperature to fully appreciate the interplay of textures and flavors. These tartlets are not just desserts; they are miniature works of art, perfect for entertaining, special occasions, or simply to elevate an ordinary day.
Here’s a quick video tutorial to walk you through the process, bringing these delicious instructions to life:

Citrus and Berry Tartlets
Pin
Review
SaveSaved!
Equipment
-
4 (4-Inch) Tart Rings or Mini Tart Pans with Removable Bottoms
Ingredients
Pate Sucree Dough:
- 12 ounces (340g) unbleached all-purpose flour
- 1½ teaspoons kosher salt
- 8 ounces (230g) cold unsalted butter cubed
- 4 ounces (115g) granulated sugar
- 1 large egg
- 1 teaspoon pure vanilla extract
- ½ teaspoon fresh lemon zest
Pastry Cream:
- 3 large egg yolks
- 5 ounces (140g) granulated sugar plus more for sprinkling
- ¾ ounce (22g) cornstarch
- 1 cup (240 mL) whole milk
- 1 teaspoon pure vanilla extract
Fruit Topping (Of Your Choosing):
- 3-4 oranges or 1 grapefruit segmented
- fresh strawberries or raspberries
Apricot Glaze:
- ½ cup apricot jam
- ½ cup water
Instructions
-
Prepare Pâte Sucrée Tart Dough: Place the flour and salt in a pile on a clean working surface. Using a metal bench scraper, chop the cold, unsalted butter into the flour mixture until the butter is finely distributed in small pieces. Pour the sugar over the flour and butter mixture and incorporate thoroughly. Create a well in the center of the mixture.
-
Pour the sugar over the flour mixture and incorporate thoroughly. Create a well in center of mixture and add the whole egg, vanilla, and zest. Using your hands and the bench scraper, incorporate the wet ingredients into the dry ingredients by pressing the mixture together as you combine.
-
Knead the dough using the “fraisage” method: Use the heel of your hand to press down and smear the dough onto the countertop. Push the dough back together and repeat until the dough is smooth and all ingredients are well incorporated. The dough will have a slight sheen.
-
Place the dough between two pieces of parchment or wax paper. Using a rolling pin, roll the dough into a disc roughly ½-inch to ¾-inch thick. This initial rolling out step will help make the final assembly process much easier. Set the dough on a sheet pan and refrigerate for 45 to 60 minutes or until very firm. Freeze any remaining dough for up to 3 months; press into a round disc and wrap tightly in plastic wrap (thaw in the refrigerator overnight before using).
-
Shape Tart Shells and Blind Bake: Preheat the oven to 325°F (165°C) with a rack in the center position. Line a half sheet pan with parchment paper and set aside.
-
Remove the chilled tart dough from the fridge. You may want to work with half the dough at at time. Using a lightly floured rolling pin and starting from the center of dough and working outward, roll the dough until it is ⅛-inch thick. Throughout the process, lift and move the dough repeatedly on the countertop to ensure it is not sticking. Note: If dough cracks, gently press the pieces back together with your hands and continue to roll. This type of dough is very forgiving.
-
Set a tart ring mold (or tart shell pan with removable botom) on top of the rolled dough to use as a guide. Using a sharp knife, trace and cut out a circle of dough that is 1-inch larger in diameter than the tart pan. Repeat with the remaining tart dough. Set the tart rings or pans on the lined sheet pan and gently transfer the dough pieces on top of each respective tart pan. Using your fingers, press the dough into the edges of the rings or pans to shape each tart shell. Be sure to press the dough tightly inside the corners and sides. Repeat until all tarts are assembled. Note: Leftover scraps of dough can be pressed together and rolled out again to use as needed.
-
Dock the bottom of each tart shell with a fork. Line each tart shell with a small square of aluminum foil, ensuring that it reaches into the corners. Fill with dried beans (or pie weights) so that they reach to the top of each tart shell. This will ensure that the tart retains its shape during the blind-baking process.
-
Bake the tart shells for roughly 15 minutes. Remove from the oven and carefully lift out the foil with the beans. Place the uncovered tart shells back in oven and bake for an additional 5 to 7 minutes or until the tart dough is cooked all the way through and looks dry. Set the tart pans on a wire rack to cool completely.
-
Prepare the Pastry Cream: In a large mixing bowl, combine the egg yolks, sugar, and cornstarch with a stiff whisk until smooth. Set aside.
-
Heat the whole milk in a medium saucepan over medium-low heat until warm. Remove from the heat. Slowly whisk half the warmed milk into the egg mixture until tempered (this ensures that the eggs do not scramble from the heat). Whisk in the remaining warm milk.
-
Return the mixture to the saucepan and place over medium-low heat, whisking continuously. It will be very foamy at first, and then the foam will dissipate and the mixture will begin to thicken. Continue to cook, whisking aggressively, until the pastry cream becomes very shiny and slowly bubbles. Remove from heat and using a spatula, press the pastry cream through a fine-meshed sieve. Set bowl over an ice bath and stir every few minutes until it reaches room temperature.
-
Remove the bowl from the ice bath and whisk in the vanilla extract. Sprinkle hte surface of the pastry cream with granulated sugar and cover the surface with plastic wrap. Set aside. If prepping ahead, transfer to the refrigerator until ready to use. Pastry cream can be made 1-2 days in advance of assembly.
-
Assemble the Tarts: Carefully remove the tart shells from the tart pans.
-
Remove the plastic wrap from the pastry cream and use a whisk to reincorporate it until smooth. Using a pastry bag fitted with a round tip, fill each tart shell halfway or less with pastry cream. Spread into a smooth layer and top with fruit (citrus segments, strawberries, or raspberries).
-
Brush with Glaze and Serve: Heat the apricot jam and water over medium heat until it begins to simmer. Whisk until smooth. Using a pastry brush, brush the fruit with apricot glaze. This adds shine and makes for a nicer presentation. Serve the tarts at room temperature.
