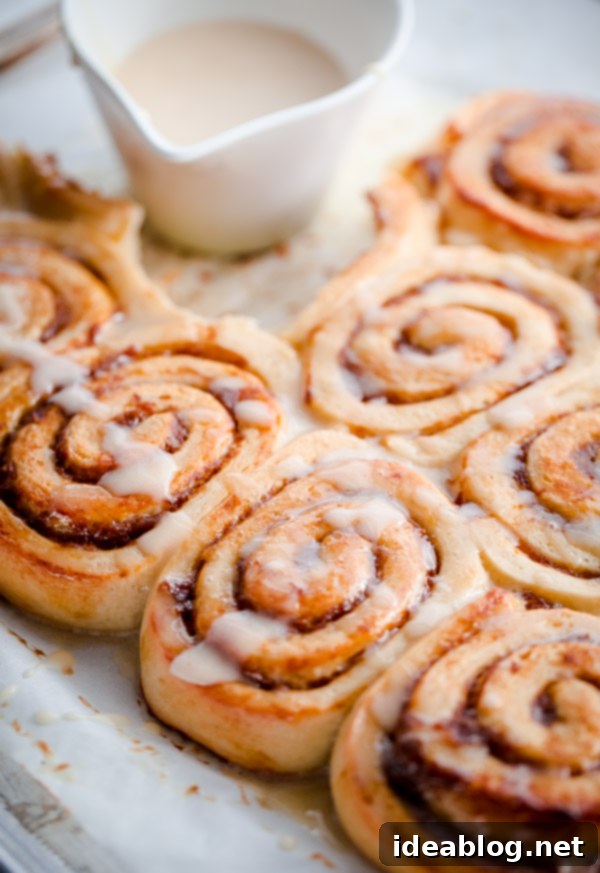
Homemade Pumpkin Butter Rolls with Tangy Creme Fraiche Frosting: A Fall Favorite & Recipe for a Cause
Prepare to be enchanted by these utterly delightful Pumpkin Butter Rolls with Creme Fraiche Frosting. Imagine soft, fluffy breakfast rolls, generously filled with luscious homemade pumpkin butter, and then crowned with a sweet, subtly tart frosting that perfectly balances every bite. This isn’t just a recipe; it’s a celebration of cozy fall flavors, the joy of home baking, and a wonderful opportunity to contribute to a fantastic cause.
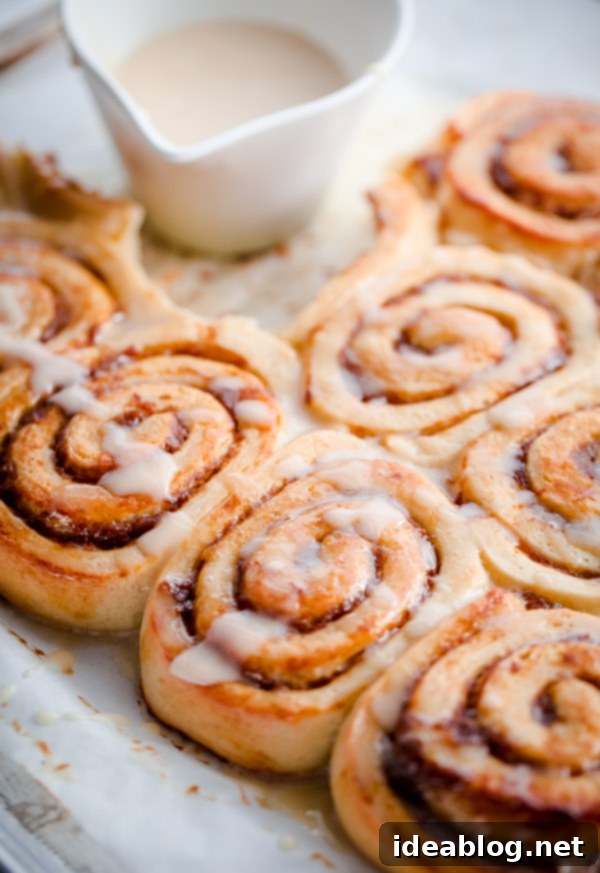
Every element of these rolls screams comfort and indulgence. From the tender, yeast-risen dough that practically melts in your mouth, to the rich, spiced pumpkin butter bursting with autumnal essence, and finally, the bright, creamy creme fraiche frosting – it’s a symphony of textures and tastes. Beyond their irresistible flavor, these rolls hold a special significance as they are inspired by Julia Turshen’s exceptional cookbook, Small Victories, a true gem that has quickly become one of my absolute favorites this season. The book itself is a masterpiece of design, boasting stunning photography and a collection of recipes that are both approachable for the home cook and elegantly elevated in flavor. From adventurous homemade merguez sausage with herby yogurt to comforting potluck quinoa and berry buttermilk cobbler, Julia’s recipes resonate deeply, feeling like they were written by a kindred cooking spirit.
Embracing “Small Victories” in the Kitchen and Beyond
The overarching philosophy of Small Victories is truly inspiring. It’s about finding joy and accomplishment in the everyday moments of cooking – whether it’s conquering a fear of working with yeast, achieving perfectly light and tender meatballs, or simply mastering the art of making homemade biscuits with your own hands. Julia’s book transforms cooking from a daunting task into a series of rewarding triumphs, encouraging us to celebrate the creative process and, most importantly, the power of giving back to our community. This core message resonated profoundly with me, highlighting that the satisfaction derived from creating something delicious can extend beyond our own kitchens.
As Julia eloquently shares within her book, “This cookbook, like most cookbooks, assumes that whoever is reading it has access to food and not only the desire, but also the time, energy, and means to cook. How great would it be if that were the case for everyone? I firmly believe that if you have the privilege of eating however much you want whenever you want, you should spend some time ensuring that others have the same opportunity.” This powerful sentiment underscores the broader mission that these pumpkin rolls represent.
Supporting No Kid Hungry: Every Meal is a Small Victory
A few weeks ago, I was incredibly honored to be invited to participate in Julia Turshen’s cookbook tour, specifically to help raise vital awareness for childhood hunger in collaboration with No Kid Hungry. My answer was an immediate and resounding “YES!” The idea of giving back has been particularly prominent in my thoughts recently, especially with the holiday season approaching, and I feel immense gratitude for the opportunity to leverage this blog as a platform to champion such an important cause. Childhood hunger is a solvable problem, and organizations like No Kid Hungry are making a tangible difference by ensuring children have access to the meals they need to thrive.
If you find yourself in a position to give, even if it’s just a dollar or two, your contribution can make a significant impact. You can easily donate to No Kid Hungry’s fundraiser here. Each donation helps provide a meal, representing a small victory in the fight against hunger, and demonstrating just how far a little generosity can go. Just as a single ingredient contributes to a delicious dish, every contribution adds up to create a brighter future for children in need.
Crafting Your Perfect Pumpkin Butter Rolls: A Seasonal Twist
Now, let’s dive back into the star of today’s post: these incredible pumpkin butter rolls! The original recipe in Small Victories featured enticing raspberry jam rolls, a picture that instantly captivated my attention. However, with the holiday season in full swing, I decided to infuse these delightful rolls with a quintessential autumn and Thanksgiving twist, opting for a rich, homemade pumpkin butter filling instead. Think of them as an elevated, seasonal take on classic cinnamon rolls, but with the warm, comforting embrace of pumpkin and spices.
For those who recall, these rolls bear a delightful resemblance to the pumpkin butter pecan scones I shared a few years back. The combination of sweet, spiced pumpkin with a tender baked good is simply irresistible, and these rolls capture that magic beautifully, making them an ideal breakfast or brunch item for special occasions or just a cozy weekend morning.
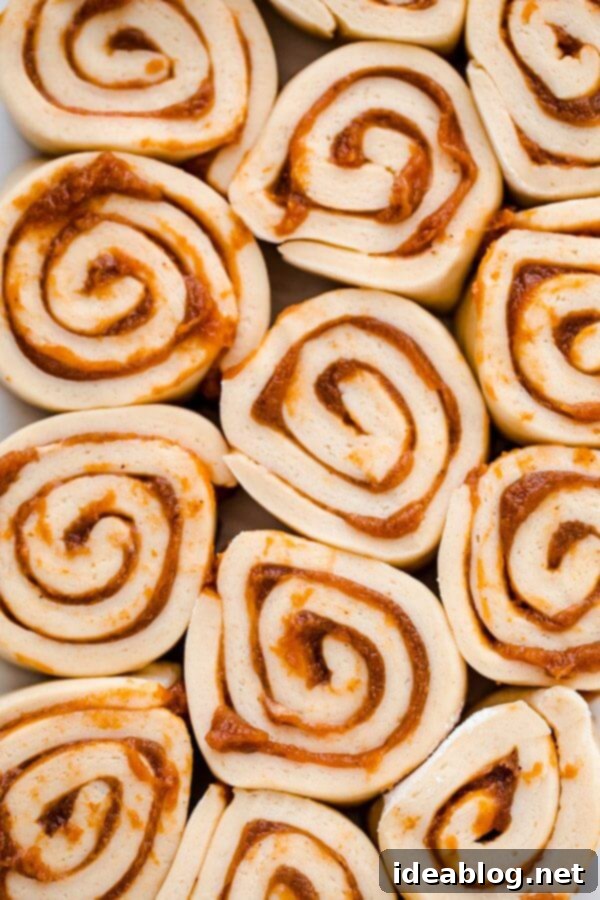
The Magic of Homemade Pumpkin Butter (and What to Do with Leftovers!)
One of the fantastic benefits of making these rolls is that you’ll likely find yourself with some glorious leftover pumpkin butter. And that, my friends, is a “small victory” in itself! If you’re going to the effort of preparing homemade pumpkin butter for these rolls, it’s only right to savor its versatility. This spiced, smooth pumpkin spread is incredibly versatile. You can generously slather it on your morning toast, swirl it into plain yogurt for an instant flavor boost (absolutely delicious!), or dollop it onto pancakes, waffles, or even oatmeal. Feeling adventurous? I’m quite certain it would make a fantastic, autumnal addition to a cocktail or two – imagine a pumpkin butter old-fashioned or a spiced pumpkin martini!
To ensure the pumpkin butter preparation is as straightforward as possible, this recipe utilizes one full 15-ounce can of pumpkin puree, eliminating any awkward leftovers. Of course, if you have access to or prefer fresh roasted pumpkin puree, that would also be an excellent choice, adding another layer of homemade goodness. For added convenience, you can prepare the pumpkin butter several days in advance and store it in the fridge, making the roll assembly process quicker and smoother. Alternatively, it can be easily made while your dough is coming together.
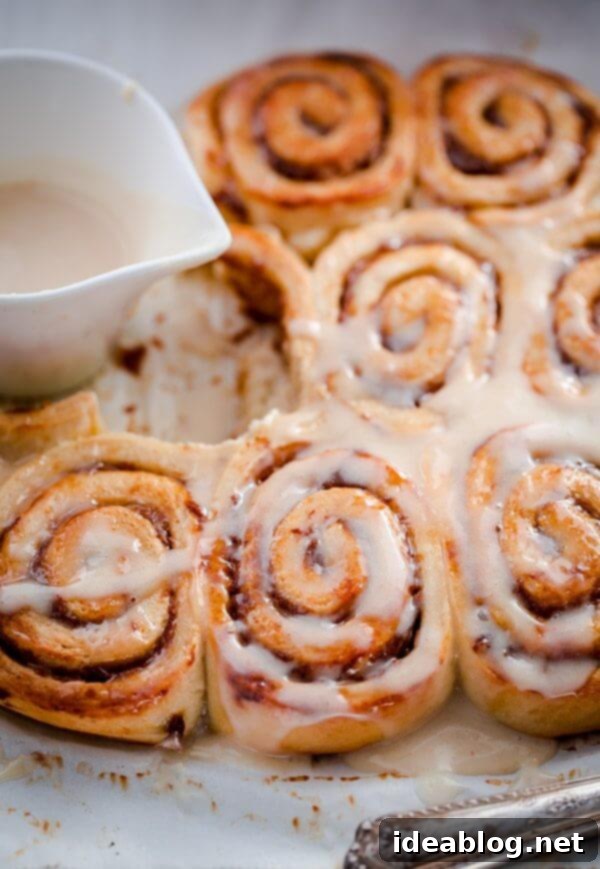
The Perfect Topping: Sweet, Tart, and Drippable Creme Fraiche Frosting
The creme fraiche frosting truly elevates these pumpkin rolls, making them an unforgettable treat. It strikes a perfect balance, offering a delightful tartness that beautifully cuts through the sweetness of the rolls and pumpkin butter. Its consistency is wonderfully drippable, allowing it to cascade over the warm rolls and seep into every nook and cranny. While I adore traditional cream cheese frosting, this creme fraiche version presents a lighter (in texture, not necessarily calories) and more delicate alternative, providing a sophisticated finish. One of the many brilliant aspects of the Small Victories cookbook is that each recipe comes with a plethora of “spin-off” ideas. For instance, if you prefer the classic taste of cream cheese, Julia provides the guidance to easily substitute it for the creme fraiche in the frosting.
The versatility extends beyond the frosting. The base dough recipe is incredibly adaptable, with Julia offering six distinct spin-off recipes! In the notes section below, I’ve included four of these fantastic variations, demonstrating how effortlessly you can transform these into the original raspberry rolls, classic cinnamon rolls, savory garlic buns, or even wholesome buttery dinner rolls. This adaptability means you can use this single dough recipe for a multitude of occasions, from sweet morning treats to savory dinner accompaniments, making it an invaluable addition to your baking repertoire.

Pumpkin Butter Rolls with Creme Fraiche Frosting
Pin
Review
SaveSaved!
Ingredients
Homemade Pumpkin Butter
- 1 (15-ounce) can pure pumpkin puree
- ½ cup (120 mL) apple cider or juice
- ½ cup (100 g) granulated sugar
- 2 tablespoons (30 mL) pure maple syrup
- 1 teaspoon ground cinnamon
- 1 teaspoon ground ginger
- ½ teaspoon ground cloves
- ½ teaspoon ground nutmeg
Pumpkin Butter Rolls:
- ¾ cup (180 mL) whole milk
- 2¼ teaspoons active dry yeast
- 2 large eggs
- 3¼ cups (390 g) unbleached all-purpose flour
- 2 tablespoons (24 g) granulated sugar
- 1 teaspoon kosher salt
- 4 tablespoons (2 oz; 60 g) unsalted butter room temperature
- ⅔ cup homemade pumpkin butter see recipe above
Creme Fraiche Frosting:
- ½ cup (60 g) powdered sugar sifted
- 1 tablespoon (15 mL) pure maple syrup
- ½ cup (115 g) creme fraiche
- ½ tsp pure vanilla extract
Instructions
-
1. Prepare the Pumpkin Butter: In a medium saucepan, combine all the ingredients for the homemade pumpkin butter: pure pumpkin puree, apple cider or juice, granulated sugar, pure maple syrup, ground cinnamon, ground ginger, ground cloves, and ground nutmeg. Whisk everything together thoroughly until well combined. The mixture will appear relatively thick at this stage. Bring the mixture to a low simmer over medium heat and continue to cook for 20 to 25 minutes, stirring consistently every few minutes to prevent sticking and ensure even reduction. The goal is for the mixture to visibly reduce in volume and thicken considerably. Once it reaches a rich, spreadable consistency, remove from heat and set aside to cool completely before using it in the rolls. Any leftover pumpkin butter can be stored in an airtight container in the fridge for up to 1 to 2 weeks.
-
2. Prepare the Dough: While your pumpkin butter is cooking and cooling, begin preparing the dough for your rolls. In a small saucepan over medium heat, gently warm the whole milk until it reaches body temperature, around 105-115°F (40-46°C). Be careful not to overheat it, as excessively hot milk can kill the yeast. Alternatively, you can warm the milk in a microwave in short 20-second increments. Transfer the warm milk to a large mixing bowl and sprinkle the active dry yeast over the surface. Stir gently to combine. Allow this mixture to sit undisturbed for about 5 minutes, giving the yeast time to dissolve and become active. You’ll notice it transform into a cloudy appearance, almost like miso soup, and a few small bubbles forming on the surface are a positive indication that your yeast is thriving and ready.
-
3. Mix the Dough: Crack one of the large eggs into a small separate bowl and lightly beat it with a fork. Add this beaten egg to the milk-yeast mixture in the large bowl, along with the unbleached all-purpose flour, granulated sugar, kosher salt, and the room-temperature unsalted butter. Use a sturdy wooden spoon or a dough whisk to mix all the ingredients together. Continue mixing until the dough starts to come together and visibly pulls away from the sides of the bowl. If, after a minute or two of mixing, the dough remains too sticky and doesn’t pull away, add a little more flour, 1 tablespoon at a time, until it achieves the desired consistency. Conversely, if the dough appears excessively dry and challenging to mix, incorporate a little more milk, 1 tablespoon (15 mL) at a time, until it becomes more pliable and manageable. The exact amount of flour or milk needed can vary based on the humidity in your kitchen, so trust your instincts and adjust as necessary.
-
4. Knead the Dough: Lightly flour a clean work surface, such as a countertop or large cutting board. Transfer the dough from the bowl onto this prepared surface. Gently shape the dough into a large ball. Now, it’s time to knead! To knead, press the dough with the heel of your hand, pushing it away from you, and then immediately pull it back, folding the top of the dough back onto itself. This push-and-pull motion is the essence of kneading. Rotate the dough clockwise slightly each time you repeat the push-and-pull action to ensure that the dough is evenly worked. Continue kneading diligently for a solid 5 minutes, or until the surface of the dough becomes completely smooth, and the entire mass feels both solid and soft to the touch, often compared to the texture of a baby’s bottom. Proper kneading develops the gluten, which is essential for fluffy rolls.
-
5. First Rise: Return the kneaded dough to the large mixing bowl. Cover the bowl securely with plastic wrap to prevent the dough from drying out. Place the covered bowl in the warmest spot in your kitchen – this encourages the yeast to work efficiently. Let the dough sit and rise until it becomes noticeably soft and puffy, roughly doubling in volume. This typically takes about 1 hour, but rising times can vary depending on your kitchen’s temperature.
-
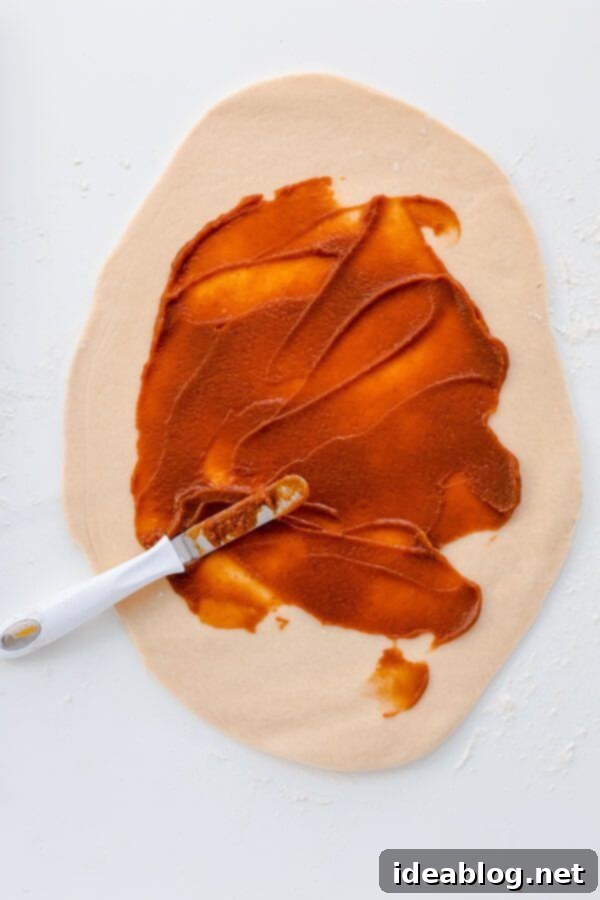
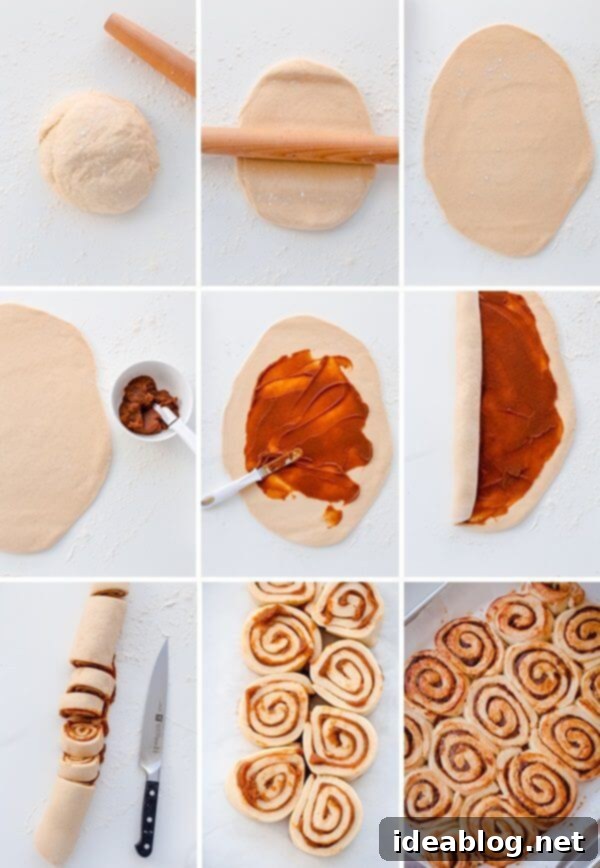
6. Shape the Rolls: Return the risen dough to your lightly floured work surface. Using a floured rolling pin, roll the dough into a large, roughly ovalish rectangle measuring approximately 18 inches (46 cm) long and 12 inches (30.5 cm) wide. If the dough seems to resist rolling or springs back too much, simply cover it loosely with plastic wrap and let it rest for 5-10 minutes; dough often responds well to a little patience. Once rolled, spread the surface of the dough evenly with the cooled ⅔ cup of homemade pumpkin butter, making sure to leave a ½-inch (12-mm) border clear around the edges. Starting from one of the long sides, carefully and tightly roll the dough up, creating an 18-inch (46-cm) rope. To get even slices, I recommend cutting the rope in half, then cutting each half in half, and so forth, until you have a dozen uniform pieces. The very ends of the rope might have less pumpkin butter, but you can still add them to the baking sheet to enjoy a “baker’s dozen.”
-
7. Second Rise: Line a half sheet pan with parchment paper. Arrange the cut buns, with their beautiful spiraled-butter-side facing up, onto the prepared baking sheet in relatively even rows. The buns should be touching each other, creating a cozy “huddle,” but not overly compressed. Ensure the seams on the rolls are facing inward towards the center of the huddle to prevent them from unraveling during baking. Loosely cover the buns with plastic wrap and let them rise at room temperature until they have risen further, appearing soft and puffy. This second rise typically takes about 1 hour. How to Make Ahead: For convenience, you can let the rolls rise at room temperature for just 30 minutes, then cover them tightly with plastic wrap and refrigerate them overnight. The next morning, remove them from the fridge and allow them to return to room temperature for approximately 1 hour before proceeding with baking.
-
8. Prepare for Baking: Meanwhile, preheat your oven to 350°F (180°C), ensuring a rack is positioned in the center of the oven. Crack the remaining large egg into a small bowl and whisk it vigorously with 1 tablespoon (15 mL) of water to create an egg wash. Gently uncover the risen buns and carefully brush them with the egg mixture. For the most gentle application and even coverage, I often use my hands for this step, which also saves washing a brush later! Discard any leftover egg mixture, or save it for another quick use, such as a tiny omelet.
-
9. Bake the Rolls: Place the prepared baking sheet with the buns into the preheated oven. Bake the buns until they achieve a beautifully golden-brown color on top and the exposed pumpkin butter filling appears wonderfully caramelized and bubbly. This usually takes about 25 to 30 minutes. Keep an eye on them towards the end to prevent over-browning.
-
10. Prepare and Apply the Frosting: While the buns are baking and still warm, prepare the irresistible creme fraiche frosting. In a small bowl, whisk together the sifted powdered sugar, pure maple syrup, creme fraiche, and pure vanilla extract until the mixture is completely smooth and free of lumps. Once the buns are out of the oven and still hot, generously drizzle the smooth creme fraiche mixture over them. This should be a wonderfully messy and decadent moment! Serve the rolls immediately, as these buns are truly at their absolute best when enjoyed warm, fresh out of the oven.
-
11. Storage and Reheating: If you anticipate having extra buns, it’s best not to top them with the creme fraiche frosting immediately. Store the unfrosted buns in an airtight container at room temperature for a couple of days. For longer storage, wrap them tightly in plastic wrap and freeze for up to 1 month. To thaw, simply leave them at room temperature. When ready to serve, warm the unfrosted buns in a 350°F (180°C) oven for about 10 minutes, then prepare the creme fraiche mixture and drizzle it over the warmed buns just before serving.
Tips for Success & Delightful Variations:
- FOR RASPBERRY ROLLS: To recreate the original inspiration, simply replace the homemade pumpkin butter filling with 2/3 cup of your favorite high-quality raspberry jam. The tartness of the raspberry jam will be a wonderful contrast to the sweet dough and creme fraiche frosting.
- FOR CLASSIC CINNAMON ROLLS: Instead of spreading the dough with fruit jam or pumpkin butter, prepare a simple cinnamon sugar filling. Brush the rolled-out dough generously with 1/4 cup (55g) melted unsalted butter, then sprinkle the entire surface evenly with a thin layer of light brown sugar (about 1/2 cup, 100g) and a very thin dusting of ground cinnamon (1-2 teaspoons). Roll it up tightly and proceed with the recipe instructions as written. For the frosting, substitute traditional cream cheese (softened) for the crème fraîche in the frosting mixture, adding a touch more powdered sugar if needed for desired consistency.
- FOR TERRIFIC GARLIC BUNS: For a savory twist, transform these into delectable garlic buns. Instead of spreading the dough with a sweet filling, brush it with ½ cup (110 g) of melted butter. Then, generously sprinkle over six finely minced garlic cloves, a good sprinkle of kosher salt to taste, and a handful of freshly chopped parsley. Roll up the dough and continue with the instructions for shaping and baking. Skip the frosting entirely for these savory delights. They make a wonderful accompaniment to any meal!
- FOR BUTTERY DINNER ROLLS: This versatile dough can also make excellent dinner rolls. After the first rise, divide the dough into a dozen evenly sized pieces. Form each piece into a neat little ball by rolling it gently between your hands. Transfer these balls to a parchment paper–lined baking sheet, arranging them so they are just touching each other, which helps them rise evenly and stay moist. Cover with plastic wrap and let them rest and rise for 1 hour. Uncover, brush with the egg wash (as instructed in step 7), and bake in a 350°F (180°C) oven until beautifully golden brown, typically around 20 minutes. Immediately after baking, brush them with a little extra melted butter instead of frosting for a rich, savory finish.
Rolls adapted slightly and printed with permission from Small Victories by Julia Turshen. Pumpkin butter adapted heavily from AllRecipes.com.
