Fluffy Cranberry Orange Scones with Zesty Glaze: Your Essential Fall & Holiday Baking Recipe
Imagine a bite of pure autumnal bliss: light, tender scones bursting with tart cranberries, bright orange zest, and a hint of warm cinnamon. These Cranberry Orange Scones are not just a seasonal treat; they’re an irresistible indulgence, consistently topping my list of favorite baked goods. If you’re looking for the perfect addition to your breakfast, brunch, or afternoon tea spread, look no further.

If I had to sum up these extraordinary Cranberry Orange Scones in a single sentence, it would be: you absolutely won’t be able to stop at just one! While some might view an inability to stop eating something as a minor predicament, for me, it’s the highest compliment I can bestow upon any baked good. It signifies a perfect balance of flavor, texture, and pure delight.
For those who have been disappointed by scones in the past – and let’s be honest, there are some truly subpar scones out there that give the entire category a bad rap – I implore you to reconsider. Do yourself a tremendous favor and bake a batch of these glorious Cranberry Orange Scones as soon as the opportunity arises. Gather your loved ones, brew a robust pot of coffee or a fragrant tea, and share these warm, buttery delights. You can extend your gratitude later, once the last crumb has been savored!

It’s my strong personal belief that scones are severely underrated in the vast and wonderful world of baked goods. They possess a unique charm and versatility that often goes overlooked, frequently overshadowed by their more flamboyant cousins like muffins or cookies. Over the years, I’ve made it my mission to champion the humble scone, sharing a variety of beloved recipes:
- Chocolate Orange Scones
- Irish Soda Bread Scones
- Raspberry Pistachio Scones
- Brown Butter Chocolate Chip Scones
- Carrot Cake Scones
Each recipe aims to celebrate the scone’s potential for flaky tenderness and rich flavor. Baking scones happens to be one of my absolute favorite culinary endeavors! And let’s just say, after countless batches and years of perfecting techniques, I have very high scone standards. These Cranberry Orange Scones meet, and perhaps even exceed, those expectations.
Why You’ll Fall in Love with This Cranberry Orange Scone Recipe
These Cranberry Orange Scones are more than just a recipe; they are a delightful fall-inspired evolution of my tried-and-true, go-to scone base. This foundation has been perfected over years to consistently deliver scones with an exceptional texture and flavor profile. Here’s what makes this particular variation so special:
- Perfectly Balanced Sweetness: They are lightly sweetened, allowing the natural flavors of the cranberries and orange to shine without being overwhelmed by sugar.
- Rich & Buttery Texture: Crafted with a luxurious combination of heavy cream and ultra-cold unsalted butter (or for an even more decadent touch, consider using homemade cultured butter!), these scones boast a crisp, golden-brown, buttery exterior that gives way to an incredibly moist, tender, and flaky interior.
- Vibrant Flavor Duo: The inclusion of plump, fresh cranberries introduces a wonderful burst of tartness with every bite, creating a delightful contrast to the sweet dough. This tartness is beautifully complemented by the bright, aromatic essence of fresh orange zest, which infuses the entire scone with a sunny, citrusy perfume.
- Harmonious Spice: A touch of ground cinnamon is added to the mix. This warm spice acts as a bridge, pulling all the individual flavors together into a cohesive and inviting autumnal symphony.
- Optional Decadent Glaze: While absolutely delicious served plain, these scones reach a new level of indulgence when drizzled with a simple yet exquisite orange glaze. Made effortlessly from confectioner’s sugar, freshly squeezed orange juice, and a hint of extra zest, this glaze adds a touch of sweetness and a beautiful sheen. Whether you enjoy them glazed or unglazed, their deliciousness is undeniable.

Ingredient Spotlight: The Secrets to Perfect Scones
The magic of these scones begins with carefully selected ingredients. Here’s a closer look at what goes into making them truly exceptional:
- Flour Power: Unbleached All-Purpose & Whole Wheat Pastry Flour
These scones are uniquely crafted with an equal blend of unbleached all-purpose flour and whole wheat pastry flour. This combination isn’t just for flavor; it’s a strategic choice for texture.
Understanding the Flour Blend: Whole wheat pastry flour contains a lower protein content compared to standard all-purpose flour. This lower protein ensures that your scones develop an incredibly tender crumb, preventing them from becoming tough or overly dense. Beyond texture, it also imparts a subtle, nutty flavor that beautifully complements the cranberries and orange. For a deeper dive into the science of different flours and their roles in baking, you can read more here.
- Substitution Tip: Don’t have whole wheat pastry flour on hand? No worries! You can easily substitute it with an equal amount of unbleached all-purpose flour. While the texture might be slightly different, your scones will still be absolutely delicious.
- Fresh Cranberries: Don’t opt for dried if you can help it! The fresh berries are crucial for that vibrant, tart burst.
- Fresh Orange Zest: The zest provides essential oils that give these scones their bright, authentic orange flavor, far superior to any extract.
- Very Cold Unsalted Butter: This is a non-negotiable! Cold butter creates pockets of steam during baking, leading to those coveted flaky layers.
- Chilled Heavy Cream: Like the butter, cold cream helps keep the dough cool and moist without overdeveloping gluten.
- Ground Cinnamon: A touch of spice adds warmth and depth, tying all the flavors together harmoniously.
- Baking Powder & Salt: Essential leavening and flavor enhancers.
- Granulated Sugar: Just enough to sweeten without overpowering the fruit.
Crafting Perfection: How to Make Cranberry Orange Scones
Making delicious scones isn’t difficult, but it benefits from a few key techniques and a little patience. Follow these steps for an unforgettable batch:
- Combine Dry Ingredients: In a spacious mixing bowl, thoroughly whisk together the unbleached all-purpose flour, whole wheat pastry flour, granulated sugar, baking powder, salt, ground cinnamon, and the aromatic fresh orange zest. This ensures all leavening and flavoring agents are evenly distributed.
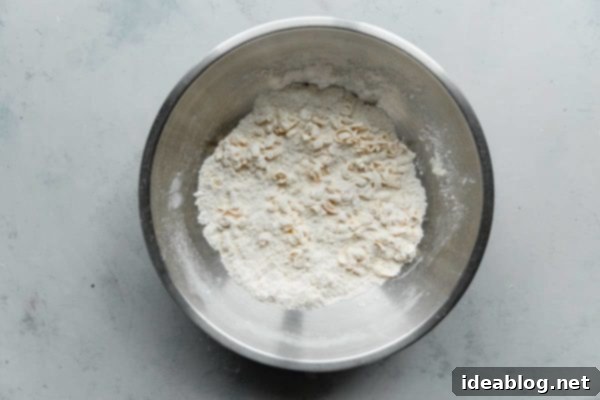
- Incorporate the Cold Butter: This step is critical for flaky scones! Take your very cold butter and, using a coarse box grater, grate it directly into the dry ingredients. This innovative technique creates tiny, cold butter flakes that are easy to work into the flour, vastly simplifying the process of “cutting in the fat.” In my extensive experience, this method works exceptionally well for achieving the perfect scone texture. Gently toss the grated butter pieces in the flour mixture, ensuring each piece is lightly coated.
- Chill the Mixture: Transfer the bowl containing your dry ingredients and butter into the freezer for a minimum of 15 minutes. This step is extremely important! It ensures the butter remains perfectly firm and very cold throughout the subsequent mixing and shaping processes. If the butter softens or warms too much, it will melt prematurely in the oven, causing your scones to spread excessively and not achieve that desirable, lofty rise.
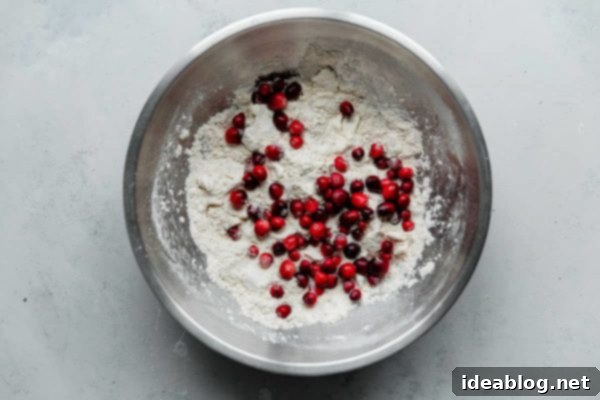
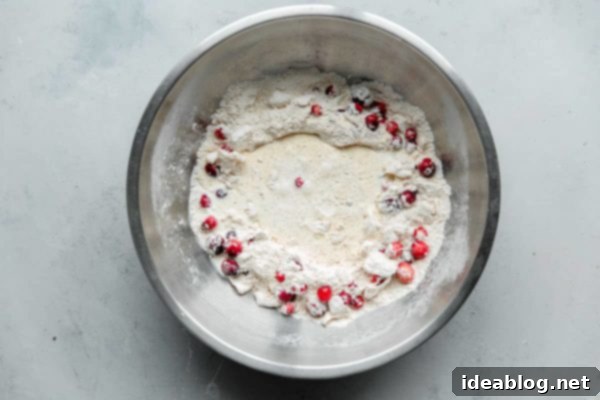
- Add Cranberries and Cream: Once chilled, remove the bowl from the freezer. Add the fresh cranberries and gently toss them to distribute evenly. Create a shallow well in the center of the ingredients, then pour in the chilled heavy cream.
- Form the Dough (Gently!): Using a sturdy spoon or a rubber spatula, carefully stir the cream into the dry ingredients. Continue mixing just until the dough barely begins to come together. At this stage, it will appear quite shaggy, and you’ll likely see some dry bits still lingering at the bottom of the bowl. Do not worry – this is precisely the texture you’re aiming for! Over-mixing at this stage can lead to tough scones.
- Bring the Dough Together: Gently press the dough (including any dry crumbs) together in the bowl to form a loose mass. Then, transfer this mass onto a lightly floured countertop.
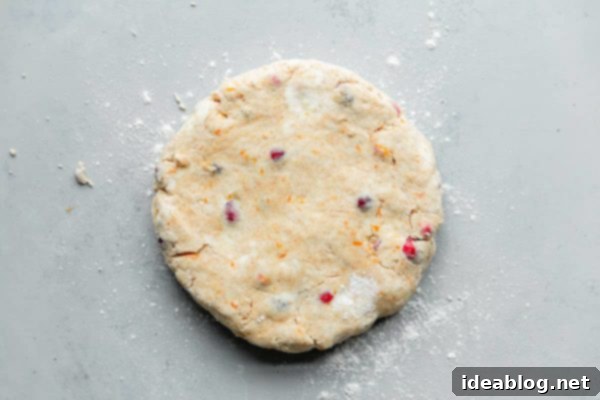
- Minimal Kneading & Shaping: Lightly press and fold the dough together for a mere 5 to 10 seconds. The goal here is just to bring it into a cohesive mass, not to knead it smooth. Avoid over-working the dough at all costs, as this will activate the gluten and result in tough scones. The dough won’t be perfectly smooth, but it should hold together in one solid piece.
- Form a Disc: Using the palms of your hands, gently pat and shape the dough into a uniform 7-inch diameter disc, aiming for a thickness of approximately 1.5 inches. Take care to smooth the edges. If at any point the dough becomes too warm or sticky, wrap it tightly in plastic wrap and chill it in the refrigerator for 10 to 15 minutes before proceeding.

- Cut and Prepare for Baking: Using a sharp, large knife (a bench scraper can also work well), carefully cut the dough disc into six equal-sized wedges. Transfer these scone wedges onto your prepared, parchment-lined sheet pan, ensuring they are spaced apart evenly to allow for proper air circulation and browning.
- Brush and Sugar for the Perfect Crust: With a pastry brush, lightly brush the tops of each scone with a little extra heavy cream. This helps create a beautiful golden-brown color during baking. Finish by generously sprinkling them with coarse sugar (such as demerara or turbinado). This simple step is key to achieving that absolutely delicious, slightly shiny, and wonderfully sugary-crunchy exterior that makes these scones so irresistible!
- Bake to Golden Perfection: Bake the scones in your preheated 425 degrees Fahrenheit (220°C) oven until they are beautifully golden brown on top and firm to the touch, typically between 18 to 22 minutes. Once baked, carefully transfer them to a wire rack to cool completely before even thinking about glazing them.

Make-Ahead & Storage Tips: How to Freeze Scones and Enjoy Them Later
One of the many wonderful qualities of scones is how incredibly well they freeze and reheat, making them perfect for preparing ahead of time for future enjoyment or for busy mornings.
- Freezing Unbaked Scone Dough:
After you’ve cut your dough into triangles, arrange them on a baking sheet lined with parchment paper. Flash freeze them for about an hour, or until solid. Once frozen, transfer the individual dough triangles to an airtight freezer bag or container. They can be stored in the freezer for up to 3 months. When you’re ready to bake, there’s no need to thaw! Simply remove the frozen scones, place them on a parchment-lined baking sheet while your oven preheats, brush with cream, sprinkle with coarse sugar, and bake as directed (you might need to add a few extra minutes to the baking time). - Reheating Baked Scones:
If you have leftover baked scones (unglazed, for best results), you can easily revive them to their fresh-baked glory. Place them on a lined baking sheet and pop them into a 350°F (175°C) oven for about 10 to 15 minutes. This is a fantastic trick for re-crisping scones that were baked a day or two prior, bringing back that delightful exterior crunch and warming the tender interior. - Storing Baked Scones: For optimal freshness and texture, store unglazed baked scones at room temperature. I prefer to leave them on a large plate and lightly cover them with a clean kitchen towel. This allows for some air circulation, helping to keep the exterior crispier than if they were stored in a fully sealed container. Glazed scones should be consumed within a day or two, as the glaze can soften the scone over time.

Cranberry Orange Scones
Pin Recipe
Leave a Review
Save RecipeRecipe Saved!
Equipment
-
Half Sheet Pan
-
Microplane Grater
-
Large Mixing Bowl
-
Parchment Paper or Silicone Baking Mat
-
Pastry Brush
-
Sharp Knife or Bench Scraper
Ingredients
For the Cranberry Orange Scones:
- 1 cup (120 g) unbleached all-purpose flour
- 1 cup (120 g) whole wheat pastry flour (see notes for substitution)
- ¼ cup (50 g) granulated sugar
- 1 tablespoon baking powder
- ½ teaspoon Diamond Kosher kosher salt
- ¼ teaspoon ground cinnamon
- 1 tablespoon freshly grated orange zest (from about 1 large orange)
- 6 tablespoons (90 g) very cold unsalted butter (cut into 6 pieces, then grated)
- 1 cup (100 g) fresh cranberries (rinsed and dried)
- 1 cup (240 mL) chilled heavy cream plus additional cream for brushing
- demerara or turbinado sugar for sprinkling
For the Orange Glaze:
- 1 cup (120 g) powdered sugar sifted for smoothness
- roughly 2 tablespoons freshly squeezed orange juice
- grated orange zest (optional) for garnishing
Instructions
-
1. Prepare Cranberry Orange Scones: Begin by preheating your oven to 425°F (220°C) and positioning an oven rack in the center. Line a half sheet pan with parchment paper or a silicone baking mat to prevent sticking and ensure easy cleanup. Set this aside.
-
2. Combine Dry Ingredients: In a large mixing bowl, whisk together the unbleached all-purpose flour, whole wheat pastry flour, granulated sugar, baking powder, salt, ground cinnamon, and the vibrant fresh orange zest until well combined.
-
3. Incorporate Butter and Chill: Using a coarse box grater, grate the very cold unsalted butter directly into the dry ingredients. Gently toss the butter pieces with your hands to coat them evenly in the flour mixture. This prevents them from clumping. Place the entire bowl of dry ingredients and butter into the freezer for 15 minutes. It is crucial for the butter to remain firm and very cold throughout the mixing and shaping process. If the butter warms or softens too much, the scones will spread rather than rise beautifully during baking.
-
4. Add Cranberries and Cream: Remove the chilled bowl from the freezer. Add the fresh cranberries and toss gently to ensure they are evenly distributed. Create a well in the center of the ingredients and pour in the chilled heavy cream. Using a sturdy spoon or a rubber spatula, gently stir the cream into the dry ingredients until the dough just begins to come together. The dough will look shaggy and slightly crumbly, with some dry bits at the bottom of the bowl—this is perfectly normal and desired!
-
5. Form the Dough: Press the shaggy dough (and any dry bits) together in the bowl to form a rough mass. Transfer the dough to a lightly floured countertop. Gently press and fold the dough together for only 5 to 10 seconds. The goal is to bring it into a single mass without over-working it. It will not be completely smooth, but it should hold together. Pat the dough into a 7-inch diameter disc, about 1½ inches thick, using the palms of your hands to shape the edges. If the dough becomes too warm or sticky, wrap it tightly in plastic wrap and chill in the refrigerator for 10 to 15 minutes before proceeding.
-
6. Cut and Prepare for Baking: Using a sharp, large knife or a bench scraper, cut the dough disc into six equal-sized wedges. Carefully transfer these scone wedges onto the lined sheet pan, ensuring they are spaced apart evenly. Using a pastry brush, lightly brush the tops of the scones with additional heavy cream. Sprinkle generously with demerara or turbinado sugar. This creates a beautiful golden-brown color and a delicious, shiny, crunchy exterior!
-
7. Bake: Bake the scones in the preheated oven for approximately 18 to 22 minutes, or until they are golden brown and cooked through. Carefully transfer the baked scones to a wire cooling rack to cool completely before applying the glaze.
-
8. Prepare Orange Glaze: Once the scones have cooled completely, prepare the glaze. In a small bowl, whisk together the sifted confectioner’s sugar and 1 tablespoon of freshly squeezed orange juice. Add an additional teaspoon of orange juice at a time, mixing well after each addition, until the glaze reaches a thick yet drizzly consistency. If the glaze becomes too thin, add powdered sugar by the tablespoon until the desired thickness is achieved.
-
9. Glaze and Garnish: Place the cooling rack with the cooled scones over a parchment-lined baking sheet. This makes cleanup easy by catching any glaze drips. Drizzle the orange glaze generously across the top of each scone. For an extra touch of aroma and visual appeal, garnish with a sprinkle of fresh grated orange zest (optional). Allow the glaze to set at room temperature for about 15-20 minutes before serving.
-
10. Serving & Storage: Scones are truly at their best when served fresh, warm from the oven, and shortly after baking. However, they will still taste wonderful a day or two after baking. For storing unglazed scones, I recommend leaving them on a large plate and lightly covering them with a clean kitchen towel; this helps maintain a crisper texture compared to storing them in an airtight container.
-
MAKE-AHEAD TIP: If you are preparing the scones in advance, do not glaze them until serving. For the best results, reheat previously baked (unglazed) scones on a sheet pan in a 350°F (175°C) oven for 10 to 15 minutes. Allow them to cool slightly, then glaze just before serving for that perfect fresh finish.
Pro Tips for Scone Success & Troubleshooting:
- I absolutely adore the addition of whole wheat pastry flour in this recipe. Its lower protein percentage is key to creating those incredibly flaky, tender scones, and it adds a fantastic depth of flavor. If you don’t have it on hand, you can confidently substitute the whole wheat pastry flour with the same amount of unbleached all-purpose flour. The scones will still be delicious!
- The importance of cold ingredients cannot be overstated. Ensure your butter and heavy cream are straight from the refrigerator (or even the freezer for the butter, as per the grating method). This prevents the butter from melting into the dough before baking, which is essential for steam creation and that signature flaky texture.
- Do not overmix the dough. Overworking the dough develops gluten, leading to tough, dense scones. Mix just until the ingredients barely come together and the dough is shaggy. A little floury patch is better than a smooth, overworked dough.
- Scones freeze and reheat incredibly well. This makes them a fantastic make-ahead option!
- To freeze unbaked dough: Cut the dough triangles and place them on a parchment-lined baking sheet. Flash freeze until solid, then transfer to an airtight container or freezer bag. They can be baked straight from the freezer! Just remove them and allow to thaw slightly on the baking sheet while your oven preheats. Brush with cream and sprinkle with sugar as directed, adding a few extra minutes to the baking time.
- To reheat baked scones: (Unglazed) baked scones can be reheated on a lined baking sheet in a 350°F (175°C) oven for 10 to 15 minutes. This is a brilliant trick for re-crisping scones that were baked a few days earlier – it makes the texture almost identical to the day of baking, giving them a renewed crisp exterior and warm, soft interior!
- Common Scone Problems & Solutions:
- Scones spread too much: The butter was too warm, or the dough was overworked. Ensure all ingredients are very cold and handle the dough minimally.
- Scones are dry or crumbly: Too much flour was added, or the dough was under-mixed (not enough liquid incorporated). Follow measurements precisely and ensure the dough just comes together.
- Scones are tough: Overmixing is the culprit here. Again, handle the dough as little as possible.
