Mastering Spun Sugar: Your Ultimate Guide to Creating Elegant Dessert Garnishes at Home
Unlock the secrets to crafting beautiful spun sugar right in your own kitchen! This comprehensive guide will teach you how to make delicate sugar strands to transform your desserts and pastries into culinary masterpieces. Perfect for adding a touch of elegance to any special occasion.

Have you ever marveled at those stunning, ethereal sugar decorations perched atop gourmet desserts? That delicate, airy confection is known as spun sugar, and it’s a surprisingly achievable culinary art form that can elevate your homemade treats to professional standards. While it might seem intimidating at first, requiring a bit of finesse and patience, mastering spun sugar is incredibly rewarding. Today, we’re diving deep into a user-friendly method to create these exquisite sugar strands in your very own kitchen.
I understand the apprehension that often comes with intricate kitchen techniques, especially those involving hot sugar. The thought of dealing with extremely hot caramel and delicate strands can be daunting. However, I’m here to guide you through a technique that minimizes the stress and maximizes your chances of success. Forget the complex setups you might have seen in culinary schools; this approach is designed for the home cook, focusing on simplicity and safety without compromising on stunning results.
One challenge often encountered when documenting such a process is photography. Capturing the dynamic act of spinning sugar while simultaneously ensuring safety with burning hot caramel is incredibly tricky, if not outright dangerous. Due to the high temperatures and the fast-paced nature of sugar work, detailed step-by-step photos of the actual spinning process are difficult to obtain. My focus, and yours, should remain on the technique and safety. Rest assured, I’ll provide clear, written instructions to walk you through every critical moment, ensuring you understand each step without needing a camera crew by your side.
What Exactly is Spun Sugar?
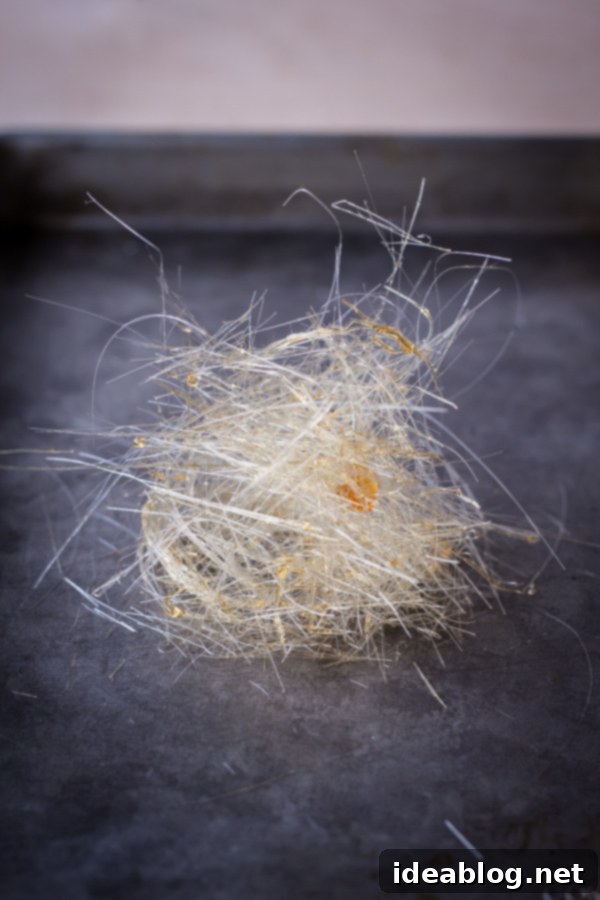
At its core, spun sugar is a delicate, hair-like confectionery made from caramelized sugar. While it shares some visual similarities with cotton candy, spun sugar is typically thicker, more brittle, and made without the specialized machinery required for cotton candy. Its primary purpose is decorative, offering an immediate visual upgrade to pastries, cakes, tarts, and plated desserts.
There are several traditional methods for spinning sugar, some of which are quite advanced and carry higher risks. For example, a classic culinary school technique involves slowly drizzling caramelized sugar from a fork, repeatedly pulling the fine strands towards yourself. While effective, this method requires significant practice, excellent heat control, and can be quite terrifying for beginners due to the proximity of your hands to very hot sugar. It’s often associated with a higher risk of burns and a steeper learning curve, making it less ideal for home experimentation.
Instead, we will focus on a more accessible and safer method that yields equally impressive results. This technique allows for better control and less direct contact with the hottest sugar, making your spun sugar journey much more enjoyable and less intimidating. Prepare to impress your friends and family with this elegant addition to your dessert repertoire!
How to Make Spun Sugar: The Home Kitchen Method
This guide will teach you a straightforward and much more user-friendly method for making spun sugar. It’s not only less daunting but also genuinely fun once you get the hang of it. The key involves quickly drizzling thin streams of caramelized sugar back and forth over a rolling pin, allowing gravity and centrifugal force to create those beautiful, airy strands. While the goal is to create the thinnest possible strands, don’t fret if you encounter an occasional droplet or slightly thicker piece; these imperfections often add to the rustic charm and do not detract from the overall effect.
Safety First: Important Precautions
Before we dive into the steps, it is absolutely crucial to emphasize safety. Working with hot caramel requires extreme caution. Molten sugar can reach very high temperatures (over 300°F or 150°C) and can cause severe burns if it comes into contact with your skin. Always keep these points in mind:
- Wear protective gear: Long sleeves, an apron, and closed-toe shoes are recommended. If you have heat-resistant gloves, consider wearing them, especially during the spinning process.
- Keep children and pets away: Ensure your workspace is free from distractions and potential hazards.
- Have a bowl of ice water nearby: In case of a minor burn, immediately submerge the affected area in ice water for several minutes. Seek medical attention for serious burns.
- Never taste hot caramel: It cools slowly and can cause severe mouth burns.
- Work in a well-ventilated area: The sugar steam can be intense.

Setting Up Your Workspace
Proper setup is essential for a smooth and successful spun sugar creation. This method requires a specific arrangement:
- Position your rolling pin: Place a clean rolling pin on your kitchen counter so that approximately half of it extends over the edge. This provides ample space for the sugar strands to hang and accumulate without hitting the counter.
- Secure the rolling pin: The side of the rolling pin that remains on the counter needs to be firmly held down or weighted. Get creative here! I’ve successfully used a bunch of upside-down bananas as a counterweight – it sounds unconventional, but it worked brilliantly. Other effective options include heavy pot handles, stacks of cookbooks, or even taping down wooden spoons across the top of the rolling pin to prevent it from moving during the spinning process. Stability is key to consistent sugar strands.
- Protect your surroundings: Since you’ll be drizzling sugar, some caramel inevitably falls. This sugar hardens quickly and can be difficult to remove from surfaces. To avoid a sticky mess on your kitchen floor and surrounding counter space, cover the immediate area below and around your rolling pin with old newspaper or paper towels. This will catch any rogue caramel drips and make cleanup significantly easier. Trust me, you don’t want permanent caramel fixtures on your kitchen floor!
Mastering the Caramel: The Foundation of Spun Sugar
The trickiest yet most critical part of making homemade spun sugar is achieving the perfect caramel temperature and consistency. This is where most aspiring sugar artists either succeed or struggle. Too hot, and the caramel will be too thin, refusing to form delicate strands and instead creating large, clumpy droplets. Too cold, and it will be too thick to drizzle at all, solidifying on your fork before it even leaves the saucepan.
Steps for Perfect Caramel:
- Combine Ingredients: In a small, heavy-bottomed saucepan, combine the granulated sugar and water. A heavy-bottomed pan ensures even heat distribution and prevents scorching.
- Dissolve Sugar on Low Heat: Stir the sugar and water gently over very low heat until all the sugar crystals have completely dissolved. It’s crucial not to rush this step. If sugar crystals remain, they can lead to crystallization later, ruining your caramel.
- Increase Heat and Cook: Once dissolved, increase the heat to medium. From this point onward, avoid stirring the mixture. Stirring can cause the sugar to crystallize.
- Prevent Crystallization: As the sugar syrup cooks, occasionally use a pastry brush dipped in water to brush down the sides of the saucepan. This washes any sugar crystals that might splash up back into the syrup, preventing them from seeding further crystallization.
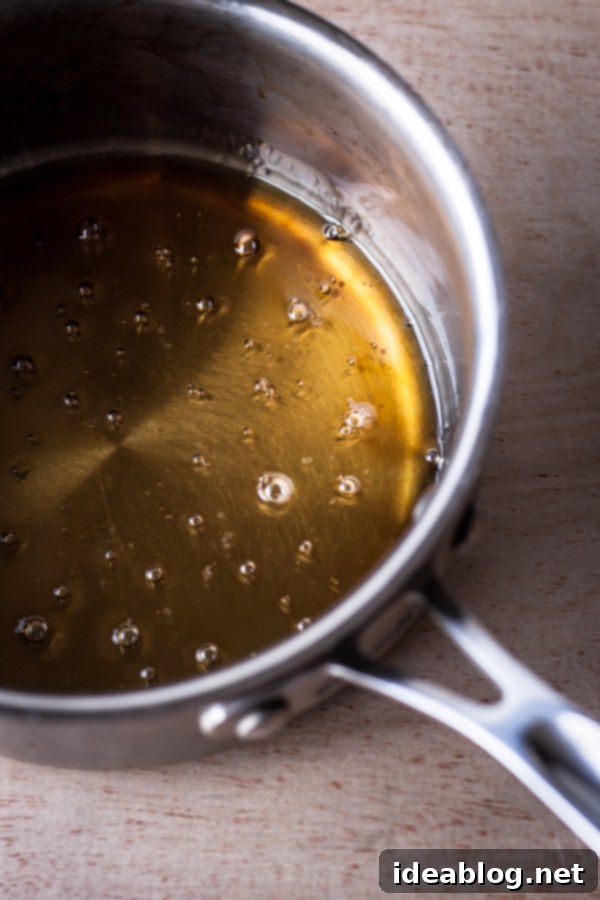
- Monitor Color Carefully: Continue cooking until the caramel reaches a very light amber color. This stage happens quickly, so watch it like a hawk. The moment it turns a pale golden brown, remove it immediately from the heat. Caramel can go from perfect to burnt in a matter of seconds.
- Cool and Test for Consistency: This is the crucial stage for spun sugar. Remove the saucepan from the heat and allow the caramel to cool slightly. It needs to cool just enough to reach the right viscosity for spinning. To test, dip a clean fork into the caramel and lift it. If very, very thin, wispy strands form and drizzle continuously from the fork, it’s ready. If it’s too runny, let it cool for another 10-15 seconds. If it’s too thick and doesn’t drizzle, gently place it back on very low heat for a few seconds to slightly warm it up until it reaches the correct consistency. This practice of cooling and rewarming is common and will become intuitive with experience. Sugar is truly amazing in its versatility!
The Art of Spinning: Creating the Delicate Strands
Once your caramel is at the perfect temperature, the fun begins. Take your fork, loaded with the perfectly tempered caramel, and start whipping it back and forth quickly across the suspended rolling pin. The motion should be swift and continuous, allowing gravity to stretch the caramel into long, fine strands as it falls. Aim for as thin strands as possible. Don’t worry if some small droplets form or if the strands aren’t uniformly perfect initially. This is a learning process, and even slightly imperfect strands contribute to a beautiful, organic look.
- Keep Moving: The continuous back-and-forth motion is vital to create individual strands rather than clumps.
- Control the Drizzle: Dip your fork repeatedly into the caramel to ensure a fresh, consistent flow. If the caramel in the pot starts to thicken, return it to very low heat for a few seconds to loosen it up again.
- Accumulate Strands: Continue this process until you’ve built up a desired amount of sugar strands on the rolling pin. The volume you need will depend on the size and shape of the decoration you plan to create.
Forming Your Spun Sugar Masterpiece
Once you’ve accumulated a good amount of spun sugar on the rolling pin, it’s time to shape it. This step needs to be done relatively quickly while the sugar is still pliable. Do not wait too long, as the sugar will harden and become brittle, making it difficult to shape without breaking.
- Gather the Strands: Gently bring the ends of the spun sugar strands together with your hands.
- Shape and Form: Carefully and loosely form the sugar into your desired shape. A common and popular choice is a fluffy, free-form nest or ball. You can also drape it over a greased object (like the back of a ladle or a balloon) to create specific domes or abstract designs. The shape and style are entirely up to your creative vision!
- Reheat if Necessary: If at any point the caramel in your saucepan hardens too much to continue spinning, simply place it back onto the stove over very low heat for a quick second. Warm it just enough to loosen its consistency, then continue spinning.
Creative Uses for Spun Sugar
Spun sugar is a versatile decorative element that can transform any dessert into a showstopper. Here are some ideas:
- Nests for Fruits or Creams: Create small nests and fill them with fresh berries, a dollop of whipped cream, or a delicate custard.
- Elegant Toppers: Place a spun sugar dome over individual cakes, tarts, or puddings for a dramatic flair.
- Artistic Shapes: Experiment with forming abstract shapes or curls to adorn plated desserts.
- Beyond Desserts: While traditionally sweet, spun sugar can even be infused with savory flavors for unique garnishes on savory dishes (though less common).
How Do You Store Spun Sugar?
Spun sugar is notoriously delicate and highly susceptible to humidity and heat. Its beautiful, airy texture can quickly degrade in moist environments, becoming sticky, losing its height, and eventually collapsing. Therefore, I highly recommend making spun sugar at the absolute last minute, right before serving your dessert.
- Immediate Use is Best: For the lightest and best texture, use spun sugar immediately after it is made.
- Short-Term Storage: If you must store it, place the spun sugar gently into an airtight container. The drier the environment, the better.
- Using Desiccant Packs: For optimal short-term storage, place desiccant packets (those small silica gel packets found in shoe boxes or vitamin bottles) into the airtight container with the spun sugar. These packets will help absorb any excess humidity and keep your sugar strands crisp for a bit longer. Just be absolutely certain not to ingest them; they are not food-safe.
Remember, spun sugar naturally gets heavier, stickier, and loses its delicate structure over time, even with careful storage. Freshly made is always superior.
Ultimately, the most important advice for working with spun sugar is to have fun with it and not take yourself too seriously. It’s an art form that improves with practice, and even your “failed” attempts will likely still taste delicious. Don’t be discouraged by initial challenges; you can always make another batch!
Spun Sugar Motto: If at first you don’t succeed, try, try again!

Classic Spun Sugar Recipe
Pin
Review
SaveSaved!
Ingredients
- ½ cup (100 g) granulated sugar
- 2 tablespoons (30 mL) water
Instructions for Spun Sugar
-
Prepare Your Workspace: Position a clean rolling pin on your kitchen counter so that it hangs approximately half-way over the edge. Secure the other half of the rolling pin with a heavy object like pot handles, weighted items, or by taping down wooden spoons to prevent movement. Line the kitchen floor directly below the hanging section with newspaper or paper towels to protect against drips.
-
Make the Caramel: Combine the granulated sugar and water in a small, heavy saucepan. Stir gently over low heat until the sugar is completely dissolved. Increase the heat to medium and cook the syrup without stirring. As it cooks, occasionally brush down the sides of the pan with a pastry brush dipped in water to prevent crystallization. Watch carefully; once the caramel reaches a very light amber color, immediately remove it from the heat to prevent burning.
-
Temper the Caramel: Allow the caramel to cool slightly off the heat. Test its consistency by dipping a fork into the mixture and lifting it. It should form very thin, wispy, continuous strands when drizzled. If it’s too thin, let it cool a bit longer. If it’s too thick, gently warm it over very low heat for a few seconds until the desired drizzling consistency is achieved.
-
Spin the Sugar: Dip your fork repeatedly into the tempered caramel mixture. Using quick, decisive motions, whip the strands of sugar back and forth across the hanging portion of the rolling pin to create long, delicate sugar threads. Continue this process, building up layers of spun sugar.
-
Shape the Spun Sugar: Once you have accumulated enough sugar to form your desired decoration, gently pick up the spun sugar from the rolling pin with your hands. While it is still pliable, carefully bring the ends together to form a fluffy, free-form shape such as a nest or ball. Work quickly before the sugar hardens. If your caramel cools too much in the pot, briefly return it to low heat to soften.
-
Serve or Store: Use your spun sugar immediately for the best texture and appearance. For short-term storage, place it in an airtight container. For added protection against humidity, you can include desiccant packets (ensure they are not ingested).
-
Clean Up: To easily remove any hardened caramel from your saucepan or utensils, fill the pot with water, place the utensils inside, and bring it to a low boil. The caramel will dissolve effortlessly.
Tips for Success & Safety:
- Extreme Caution: Always be extremely careful when working with hot sugar. Molten sugar causes severe burns, so never touch it directly and always have a bowl of ice water ready for emergencies.
- Ventilation: Work in a well-ventilated area to avoid inhaling strong sugar fumes.
- Practice Makes Perfect: Don’t be discouraged if your first attempt isn’t perfect. Spun sugar takes practice, and each batch teaches you more about caramel consistency.
- Cleanliness is Key: Ensure all your equipment is clean and free of sugar crystals to prevent premature crystallization of your caramel.
